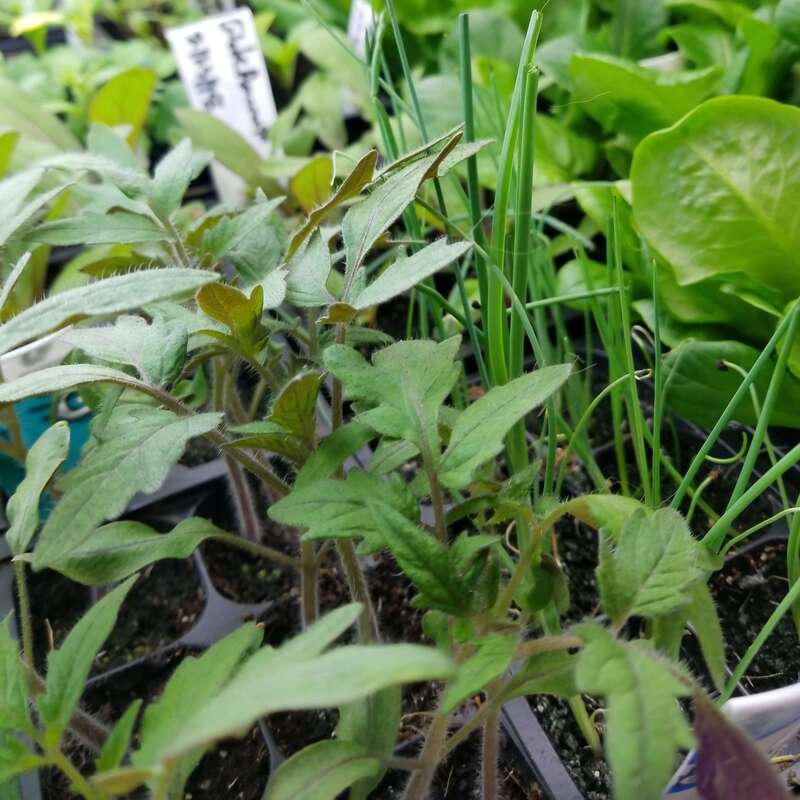
 Growing Artichokes in Northern ClimatesArtichokes (Cynara cardunculus variety scolymus or Cynara Scolymus) are mostly grown in California, but anyone with approximately 100 frost-free days can grow them. On the central coast of California, artichokes grow as perennials, usually the Green Globe variety. But in other parts of the country, artichokes are grown as an annual plant. Here in central Wisconsin, zone 4b I grow the Imperial Star variety, which was specifically bred to produce artichokes the first year from seed, and most years I can get a great crop before our first frost hits. Starting Artichokes from SeedArtichokes are one of the first plants I start, about 10 weeks before my average last frost date, although anytime between 8-12 weeks should work. The seeds are relatively large and tough and can take 3 weeks to germinate. They germinate best with a heat mat but if you have a warm room (70-80°F) a heat mat is not necessary. Artichokes have a taproot so if you start them in a small 6-cell tray you want to transplant them into a larger pot when they are still small. To get good flower bud production (the part you eat) they need 10 days of colder temperatures in the 40s while they are still seedlings. I move mine outdoors as soon as possible to achieve these temperatures but bring them in at night if it is going to dip below 40 and I have never had a problem with them forming buds. 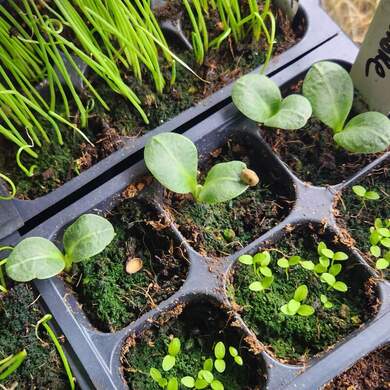 Artichoke seedlings (large leaves) just about to get their first true leaves. Growing ArtichokesTransplant your seedlings after the danger of frost has passed or protect them from frost with a frost cover. They get very large, roughly 3 feet across, so plan on lots of room for them to grow. They also like very fertile soil, especially high levels of nitrogen. You can use compost, blood meal, composted manure, or fish emulsion. I try to fertilize monthly but if your soil is poor an application every 2 weeks may be better. Artichokes need plenty of water once they start producing flower buds. I keep my plants mulched with either leaves, cardboard, straw, or wood chips. This keeps moisture in the soil and reduces weed pressure. We also use drip tape throughout our garden to keep the soil moist without overwatering. Wood chips can reduce nitrogen levels at the soil surface or throughout the soil if you till them in at the end of the season. We have healthy soil and add compost and composted manure every year, so we see no decline in growth. However, we do not use wood chips around young seedlings with shallower root growth. HarvestingWhen the flower buds are large, but the bracts are not fully open cut the artichokes off the plant at their base to harvest them. The main bud matures first, then several side buds mature later. You can allow some buds to fully flower; they turn into a beautiful purple flower that that bees love. The flower looks like a thistle flower which makes sense since the genus Cynara contains thistle-type plants. 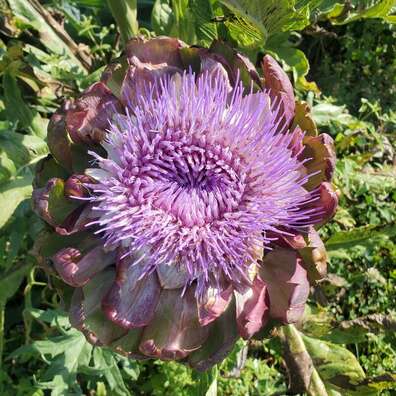 Imperial Star artichoke flower. Eating ArtichokesMy favorite way to eat artichokes is to steam them for approximately 45 minutes. The smaller side shoot ones can be cooked for less time. Then remove the leaves individually and eat the fleshy base until you get to the center, the heart of the artichoke. The inedible, woody, spiny choke on top of the heart is removed and then the heart can be eaten. I like to eat the fleshy part of the leaves and the heart with garlic-herb goat cheese but there are lots of other ways to eat artichokes. 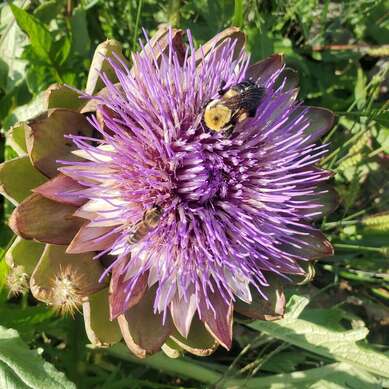 Bees also seem to love artichoke flowers. ConclusionI was very intimidated to grow artichokes for the first time as I, like many people, thought artichokes could not be grown in northern climates. However, artichokes are one of the easiest vegetables to grow in the garden. Once planted, they are low maintenance, and due to their spiky, thistle-like growth are deer and rabbit-resistant. I have also never had any insect damage, making them one of the easiest plants to grow. 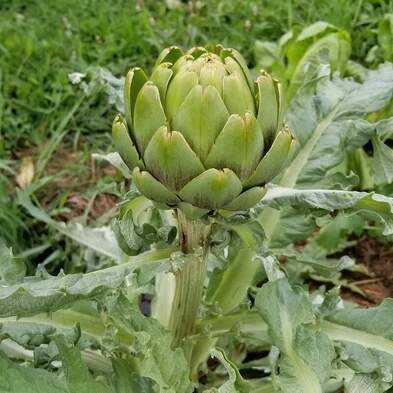 Imperial Star artichoke. References
0 Comments
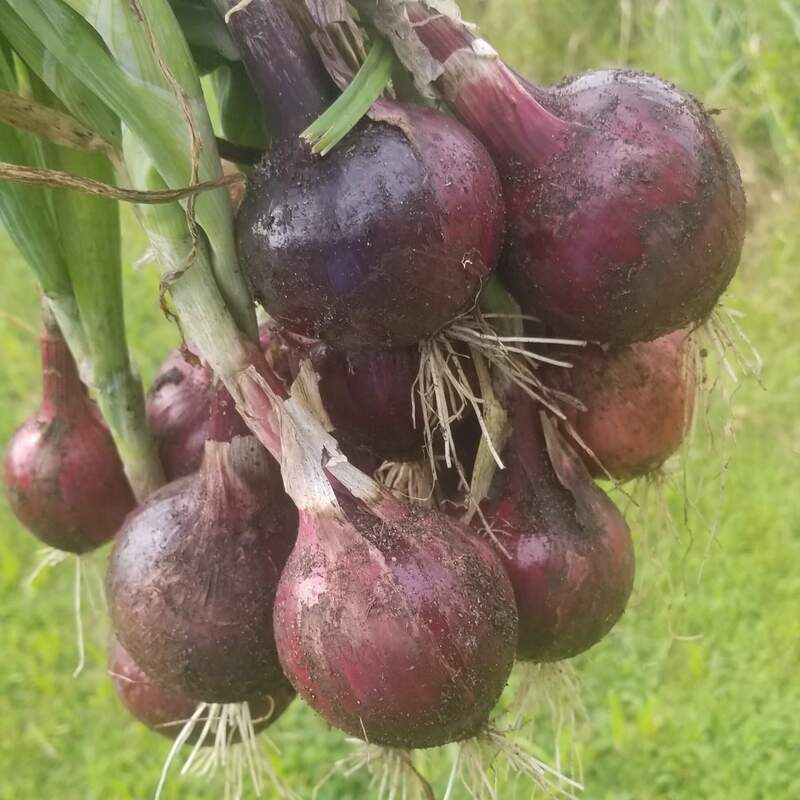
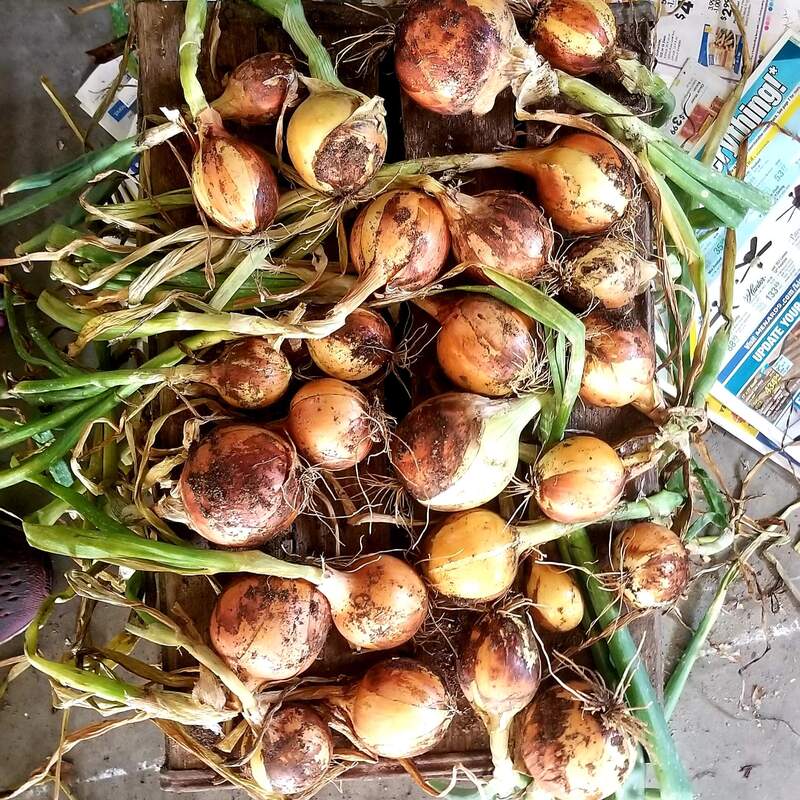
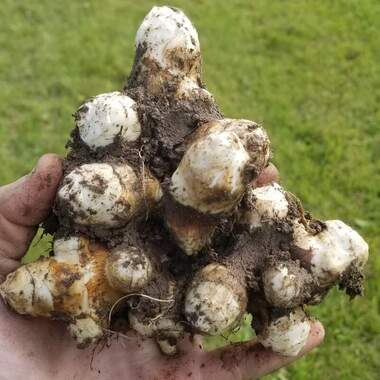 Jerusalem ArtichokesIntroductionJerusalem artichokes (Helianthus tuberosus) are related to sunflowers (Helianthus annuus) giving them their alternative name, sunchoke. They produce tubers that can be dug up and eaten. Jerusalem artichokes are neither from Jerusalem nor are they closely related to artichokes (both are part of the Asteraceae family but do not share a genus). Instead, sunchokes are a native North American plant that the Native Americans ate. Jerusalem artichokes are very easy to grow, plant the tubers one time and they will grow as a perennial year after year. Many people claim Jerusalem artichokes are invasive, which is not accurate since they are native, although they can become invasive in regions where they were not originally native. Jerusalem artichokes, however, can be very aggressive. Therefore, do not plant sunchokes where you do not want them to spread or expect to devote a significant amount of time to digging up tubers to keep the plants contained. I planted my Jerusalem artichokes outside my garden with plenty of space to mow around them. We have had them for approximately 6 years and while they have spread slightly, they have mostly remained contained to one area. The tubers of Jerusalem artichokes grow underground and can be eaten raw or cooked. Before eating large amounts of sunchokes for the first time, you should be aware that they store their carbohydrates as inulin. Inulin is considered a prebiotic because is not digested in the intestines but instead feeds beneficial bacteria. This is thought to help maintain digestive health and may be beneficial for diabetics as the inulin is not broken down to sugar like many other starches. However, the major side effect of inulin is the production of gas by bacteria in the gut as they break down the starch. Therefore, a common, and well-deserved nickname for Jerusalem artichokes is “fartichokes” and only small amounts should be ingested first to see how your body reacts. Overconsumption can lead to painful bloating, gas, and diarrhea. Other foods that contain large amounts of inulin include onions, artichokes, asparagus, and chicory. However, these foods are rarely consumed in quantities large enough to cause gastric distress. How to Grow Jerusalem ArtichokesYou can buy Jerusalem Artichoke tubers from many seed suppliers, I purchased them from Jung Seed but Fedco Bulbs also sells them. They can be planted in most soil types, but if your soil is especially poor amend with compost or composted manure first. You can plant the tubers in early spring as soon as the soil can be worked or in warmer climates they can be planted in the fall. They are very cold hardy, and grow well for me in central Wisconsin, zone 4b, but will grow from zones 3-9. Plant the tubers about 6 inches deep, roughly 12 inches to 2 feet apart. We planted six tubers and eventually ended up with a patch roughly 4x6 feet which is more than enough for our small family of three. The plants grow very tall, 10-12 feet high, so do not plant them where they will shade other plants that need full sun. I try to keep my bed mulched to reduce weeds but since sunchokes are vigorous plants they grow well even with high weed pressure. To increase tuber size, you can cut off the tops of the plants when they begin to flower. In my zone, we only sometimes see full flowering since sunchokes flower late in the season. If you do let them flower, however, they are beautiful sunflower-like flowers. The flowers are smaller than most sunflowers and multi-stemmed. 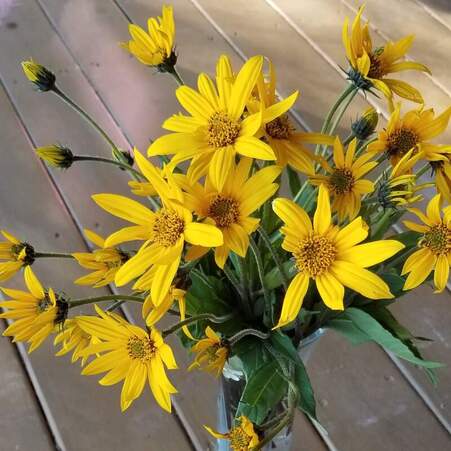 The flowers of the Jerusalem artichoke are similar to sunflowers. Harvesting Jerusalem ArtichokesUsually, Jerusalem artichokes are harvested in late fall after frost and the foliage has died back. You can dig them up sooner, but the cold is supposed to improve the flavor of the tubers. We usually dig the tubers with a shovel, but you can also use a garden fork to loosen the soil and pull out the tubers by the stem. Harvesting all the tubers is almost impossible; any remaining behind will grow into next year's crop. Unfortunately, Jerusalem artichokes do not store well so it is recommended that you only pick as many as you can eat in a couple of weeks. I have also sliced, blanched, and frozen or dehydrated them to use later. I have also tried fermenting them (you can find recipes online) but I had mold grow the first time and was not a huge fan of their taste the second time when they fermented successfully. 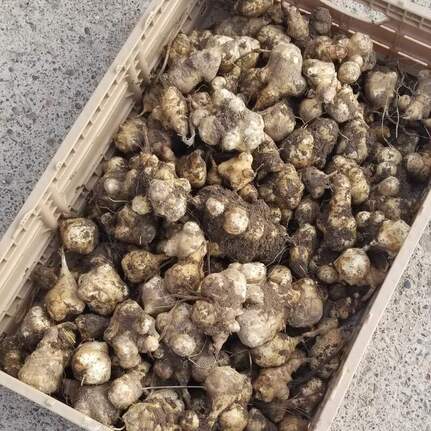 Jerusalem artichoke harvest from approximately a 4x6 foot plot. How to Eat Jerusalem ArtichokesJerusalem artichokes are knobby and should be peeled or scrubbed well to remove the dirt. They can be eaten raw, for example, sliced onto a salad, but my preferred method of eating them is cooked. I like to slice and boil them slightly to soften them and then sauté them in cast iron with shallot or onion. I find Jerusalem artichokes to have a strong flavor, somewhat nutty, and unique. For our family, sunchokes are a good supplement to our food supply, especially since after planting, they are very low maintenance. 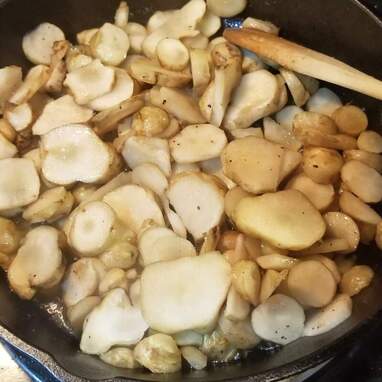 My favorite way to eat Jerusalem artichokes is pan-fried in cast iron. ReferencesCox, Jeff. 1988. How to Grow Vegetables Organically. Rodale’s Organic Gardening Magazine, Rodale Press, Emmaus, Pennsylvania. Growing Great OnionsIntroductionOnions (Allium cepa) were one of the first plants to be domesticated, likely over 4000 years ago, for both culinary and medicinal purposes (1). Various onion species are native to much of the northern hemisphere and parts of the southern hemisphere as well (1). Onions belong to the Allium genus along with many other familiar species including garlic (A. sativum), shallots (A. cepa, previously A. ascalonicum), leeks (A. ampeloprasum), chives (A. schoenoprasum), garlic chives (A. tubersosum) and scallions or green, bunching, or spring onions, consisting of several different species including A. cepa (1). Selecting the Correct Day Length Onion To grow great onions, you must know what type grows best in your location. Although growing conditions are important, onions form their bulbs in response to day length. Onions sense the number of hours of daylight and use that as a signal to switch their energy from leaf growth to bulb growth. Daylight hours are based on your latitude and the number of daylight hours needed for onions varies by the variety of onion. There are three types of onions, long-day, intermediate-day, and short-day. Johnny’s Selected Seeds has a map available online to help you determine which types of onions will grow best at your latitude. You can also look up your exact latitude on this website. I am located at 44.7° latitude, so I only grow long-day onions. Long-Day Onions Long-day onions are grown in the northern United States, roughly from Pennsylvania to Oregon (37°-47° latitude) and northwards. They start forming bulbs when days reach roughly 14-16 hours long. Many long-day onions make good storage onions although some sweet varieties that traditionally do not store well can also be grown. These onions are usually planted in early spring and mature in late summer to early fall. Intermediate-Day Onions Intermediate-day onions grow best from 32°-42° latitude, approximately from northern California to Virginia and south to northern Texas and South Carolina, however, they will bulb in almost any growing area. They start producing bulbs when the days reach approximately 12-14 hours long. These onions tend to be sweet onions, which generally do not store as well. If you are further north you want to plant these in the spring but if you live further south with mild winters you can plant in the fall and harvest in the spring or early summer. Short-Day Onions Short-day onions are grown from approximately 25°-35° latitude and start forming bulbs when days are roughly 10-12 hours long. These onions grow best in Florida to southern California and are usually planted in the fall to overwinter and mature in the late spring or early summer. Types of OnionsOnce you know your day length you can decide what type of onion you want to grow. There are many varieties, but they can be lumped into several groups including red onions, yellow onions, white onions, bunching onions (AKA scallions, green, or spring onions), and sweet onions. I live in Wisconsin so I only grow long-day onions and I mostly grow onions for storage because I also have walking onions which I can use throughout the growing season since they overwinter. I also grow some scallions for use throughout the growing season (eventually the walking onions get woody when they set their bulbs on top). Traditionally yellow onions are used for cooking and make the best storage onions but there are quite a few varieties of red onions that also store well. I prefer red onions for pickling and grilling but frequently use them for cooking as well since I grow a lot of them. Red onions are also traditionally used raw on salads. White onions tend to be milder than red or yellow onions and are often eaten both raw and cooked. I have never grown sweet onions because they tend not to store well although for many people this is their favorite variety and I have plans to try them at some point in the future. Sweet onions are the mildest onions and therefore are often eaten raw (I grew up occasionally eating an onion, cheese, and mustard sandwich!) but can be cooked as well. My Favorite OnionsYellow OnionsI always grow Patterson (F1) onions as they traditionally store well for 6 months or more. I have also started growing New York Early (open-pollinated) onions and they are earlier than other varieties I have grown, and they also grow very large for me. They do not store as long, approximately 3 months, but since they finish earlier, I just use these first while I am waiting for the better storage onions to finish growing. I am also trying a new variety this year, Talon (F1), and can update you on their growth later this fall (2024). Another open-pollinated variety that has grown well for me is Yellow of Parma and they also store well. Stuttgarter (open-pollinated) is a yellow onion variety that I have grown in the past, it stores well, and you can often find this variety as sets, although I have more difficulty finding seeds which is why I switched to growing Patterson. White OnionsThe only white onion I have tried growing is Southport White Globe (open-pollinated). These only form small bulbs but I like them when I only need a little onion for a recipe. They can also be picked young as spring onions but are some of the best white storage onions available. Red OnionsI have grown several varieties of red onions, and these always seem to do better for me than yellow onions. Redwing (F1), Red Bull (F1), and Red Wethersfield (open-pollinated) are all good storage onions that grow well for me. This year I am also trying Red Geneva (open-pollinated), Red Mountain (F1) as a Red Wing replacement (I could not find Red Wing seed this year), and Ruby Red (open-pollinated).  Red onions always seem to grow the best for me. Scallions (AKA Bunching, Green, or Spring Onions)Bunching onions are very easy to grow because they grow quickly, and you do not need to worry about bulb formation. I have had good luck with Evergreen, Tokyo Long White, and Red Beard bunching onions, all open-pollinated varieties. The Evergreen bunching onions are also hardy enough that they can overwinter in some areas (for me in Central Wisconsin, zone 4b I have had mixed results overwintering). Sweet OnionsI have yet to try growing sweet onions, but I have heard Ailsa Craig, Yellow Sweet Spanish, and Walla Walla, are all good long-day open-pollinated varieties and on my list to try growing someday. Growing Onions from Sets, Seedlings, or SeedsOnion SetsGrowing onions from sets (dry, pre-started bulbs) is the easiest way to grow onions and the easiest to find at most greenhouses and home improvement-type stores. The disadvantage of sets is that they are more likely to bolt, especially the larger sets, making the bulbs woody and prone to rotting (2). I have also found onions grown from sets are less likely to get to a large size. Sets are made by starting onions from seed and then disrupting their growth when they are just starting to form bulbs. When you plant the small bulbs, they wake up from dormancy and resume growing. Sets are also more expensive to buy than seed. Onion SeedlingsA second option is buying onion seedlings or transplants. These can sometimes be found in local greenhouses but are generally harder to source. I have not bought onion transplants from Dixondale Farms because I start all my onions from seed, but I have heard great reviews from other gardeners about them. One advantage of suppliers like Dixondale is that you can have the seedlings shipped if you cannot find transplants locally and they have a bigger selection of varieties than most greenhouses. The advantage of transplants in general is that you do not have interrupted growth after bulb formation like you do with sets, so your onions are less likely to bolt and you are more likely to get large bulbs. However, like sets, transplants are more expensive than seeds. 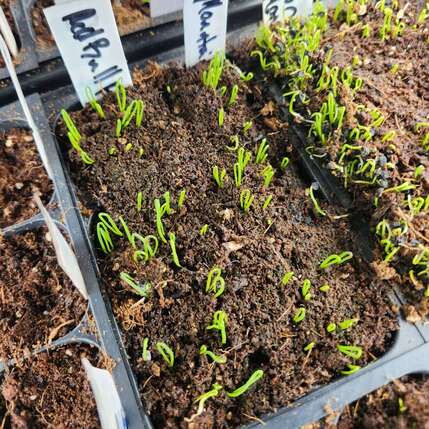 Onion seedlings that are just starting to emerge. Onion SeedsThe last option for those who like to start their plants is to use seeds. These have the same advantages as buying seedlings, but you generally have many more options for varieties of onions if you are willing to buy seeds online. One disadvantage of seeds is that onion seeds lose viability very quickly and it is the one seed type I always try to buy new each year. Although if you buy sets or transplants you also need to buy new ones each year. I have successfully used one and even two-year-old seeds, but germination is generally 50-75% lower after even one year. If you do save onion seeds, it is best to store them in the refrigerator or freezer in an airtight container with a little silica gel to absorb moisture.  These onion seedlings are large enough that they can be trimmed back to 4 inches to keep them from flopping over and make them fit better under the lights. Starting Onions from SeedIf you start onions from seed, they are generally started early as they are cold hardy, and so can be planted out early. I start my onions at the end of February, which is eight weeks before my average last frost date in mid-May (2). Onion seeds are very easy to start assuming the seeds are fresh. As stated above onion seeds lose viability very quickly so you generally want to buy new seeds each year. You can also plant onion seeds close together as they are easy to separate when transplanting. I sprinkle quite a few in a 6-cell or 3-inch pot. Cover with about a 1/2" inch of moistened light potting soil (like Pro-Mix) or seed starting mix. Bottom water as needed to keep the soil moist but not sopping wet. You can also use a humidity dome to help keep them moist. My seeds usually germinate in a week or two with a heat mat, but it can take up to 3 weeks to see germination. Onion seeds will germinate in colder temperatures so a heat mat is not necessary, but it will speed germination. Start fertilizing when the seedlings have fully emerged and are about an inch high with half or quarter-strength liquid fertilizer (nitrogen-based fertilizer is best but an all-purpose one will work fine as well) and continue to fertilize weekly with a dilute solution. Once the seedlings are over about four or five inches, I trim the tops to keep them a more manageable size. Start hardening them off about a month before your last frost date and transplant them as soon as the weather cooperates. I try to get mine transplanted by mid to late April, but we sometimes still have snow at this time which delays planting. For more information on seed starting in general you can refer back to my earlier blog post on the basics of seed starting. 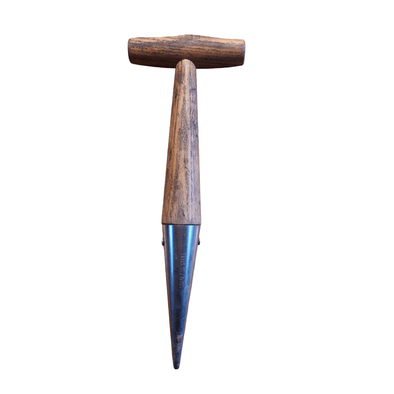 A dibble tool that is used to plant onion transplants, bulbs like tulips or daffodils, and garlic. Planting OnionsTo plant onions, sets are the easiest. Simply dig a shallow trench, pop the onion sets down about 4-6 inches apart, and cover with soil so they are just below the surface. Rows should be about 12 inches apart, but I plant so many onions I often plant them closer to approximately 6-inch rows. If you have fertile soil amended with compost or composted manure, close spacing should not be a problem. I like to mulch between the rows with something like shredded leaves. I find onions are a pain to weed so getting some mulch in early to reduce weed pressure is helpful. To plant seedlings, either ones you grew or purchased, I find using a dibble (AKA dibber) is helpful. A dibble is simply a sharpened stake attached to a handle that is also useful when planting bulbs, garlic, etc. Once my onion bed is prepared (rake out, mix in compost, fertilizer, etc.), I lay down the mulch. I used to mulch after I planted the onions, but it is a pain to get the mulch around the tiny transplants without covering them up. Last year I mulched first before making my holes and it was much easier. I use the dibble to push a hole through the mulch and soil. Pop in the seedlings and tamp around to firm the soil around the transplants. Onions like full sun, and if you have heavy soil a raised bed will help with soil drainage and improve your bulb size. I like to use nitrogen-rich fertilizer monthly throughout the growing season such as fish emulsion or blood meal. Stop fertilizing when the necks of the onions start softening before they fall over. Once they fall over, they are done growing and bulb size will no longer increase. 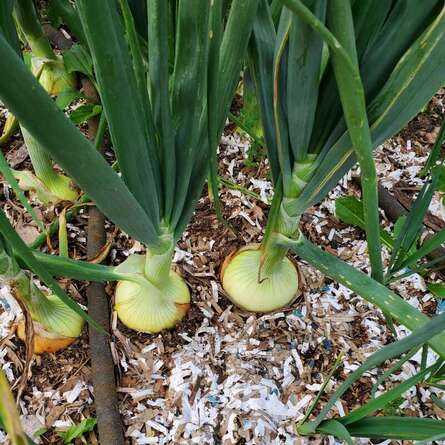 Yellow onions growing in my raised beds with a soaker hose for watering and shredded paper as a mulch to keep down weed pressure. Harvesting OnionsOnions are ready to be harvested when the necks soften and about half the tops fall over (3). You can knock the rest of the tops over, wait a few days, and then harvest all of them (2) or I just wait until they fall over naturally and harvest every few days. Harvest the onions and shake excess dirt off but do not clean them. After harvesting, storage onions need to be cured for about 2 weeks or until they are completely dried. I like to hang them upside down on a rack or lay them down on newspaper or cardboard in my garage. Do not allow them to be in direct sunlight for too long or they will turn green and make sure they are well-ventilated, or they may rot (3). After they are completely dried, I cut off the tops and store the bulbs in cardboard produce boxes (holes for ventilation) or mesh bags. I store my onions in my garage which is heated in the winter to about 45° F and many last until spring. Check your onions every few weeks to throw out any that have gotten soft or started rotting. 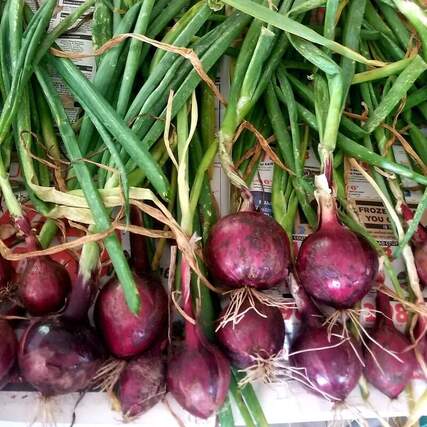 Red onions laid out on newspaper in my garage to cure. Saving Onion SeedI like to save onion seeds, particularly from my heirloom Zebrune shallots since they are open-pollinated but I also collected a mix of red onion seeds last year (2023). Onions will cross-pollinate so if you are saving seed and want to keep it pure you want to make sure you only have a single variety flowering at the same time nearby. However, onions and leeks, for example, are different species and should not cross-pollinate. Onions are biennial so if you want to save seed you have to save bulbs from the previous year and plant them out in the spring. Because they already went through one growing season they should quickly flower and go to seed. The red onions I planted last year were from bulbs I grew in 2022 but I did not keep them separate so I likely had a mix of varieties plus many were also hybrid so they may not be like their parents. However, I like to experiment, so I planted the seeds this year and so far, the seeds look like they have a high level of germination and are very vigorous. ConclusionOnions are one of my favorite vegetables to grow, I think because they store well over winter without any extra work. You do not need to blanch and freeze them like many other vegetables, just keep them cool and dry. I do like to dehydrate some to grind up for onion powder and I have not needed to buy garlic or onion powder in years. I also like to pickle some to use on hamburgers and salads. I grow as many onions as I can handle, because honestly as much as I love harvesting the onions at the end of the season, the planting and weeding can be back-breaking work, but well worth it. References
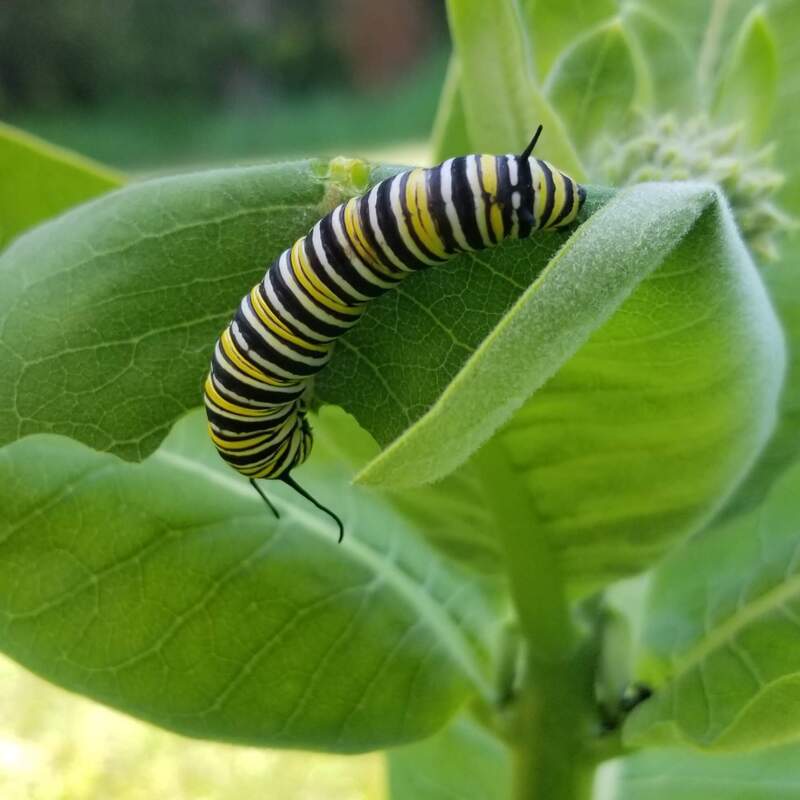
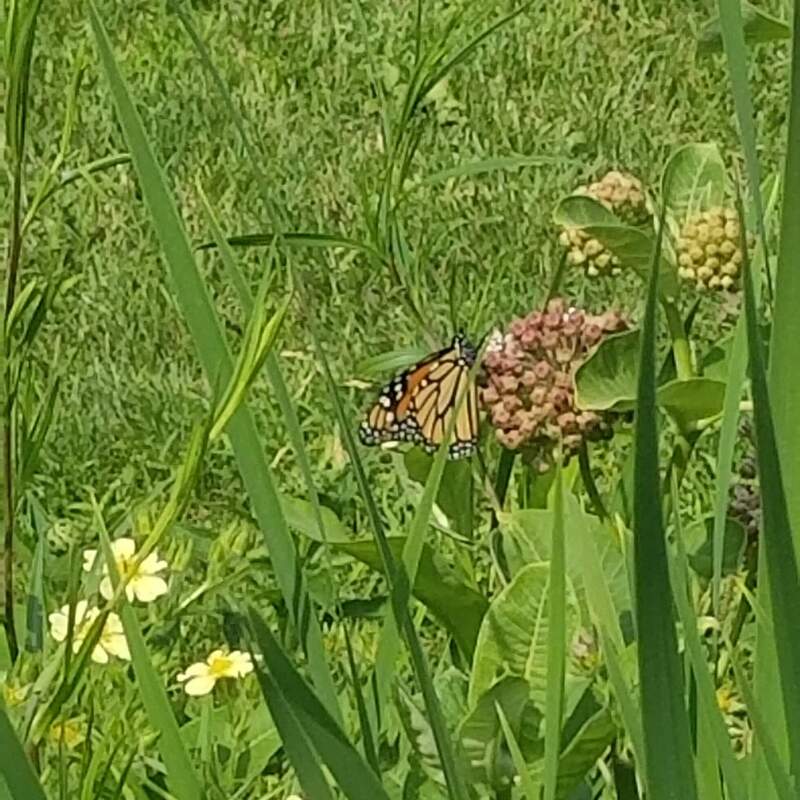
Milkweeds and MonarchsThe monarch butterfly (Danaus plexippus) is one of the most well-known butterflies but unfortunately, populations have been declining for years (1) though they are not yet at a critical level. Although other butterflies, such as the Karner blue, are at risk of becoming extinct and deserve more attention than they currently receive, the monarch is what I consider a “gateway” insect. Just like many people consider chickens the “gateway” animal on hobby farms (once you get chickens it often leads to acquiring other farm animals), the monarch is a butterfly that receives a lot of attention and leads people to understand the importance of saving other butterflies and insects that may not be as showy or pretty but still serve an important ecological niche. I will try to focus on other important insects in future blog posts but for this post, I will focus on monarchs. One of the reasons monarch butterflies may be harder to conserve than other species of insects is that they are migratory. Therefore, you need to focus on habitat conservation not just where they lay eggs and live as caterpillars but also where they overwinter as adults. Monarchs that live east of the Rocky Mountains migrate to Mexico (and sometimes the southern US) in the fall (2). Monarchs that live in the Pacific states often overwinter in California, but some also migrate to Mexico (2). The overwintered butterflies lay eggs in early spring where they spent the winter, those eggs hatch, and turn into adults, who then migrate back north into the United States and Canada (2). Most people are aware that the larvae (caterpillars) of monarch butterflies only eat milkweed. However, many people (myself included before a few years ago) may not realize that multiple milkweed species exist that can support monarch butterflies. Milkweeds belong to the Apocynaceae family, mostly the Asclepias genus, which contains over 200 species of milkweed plants, 73 of which are native to the United States (3). The Cynanchum, Sarcostemma, and Calotropis genera also contain some milkweed species. Milkweeds are named for their milky sap, which contains glycosides, which are toxic to humans and other species but not to monarchs. The toxins accumulate in the monarch making them unpalatable to predators. 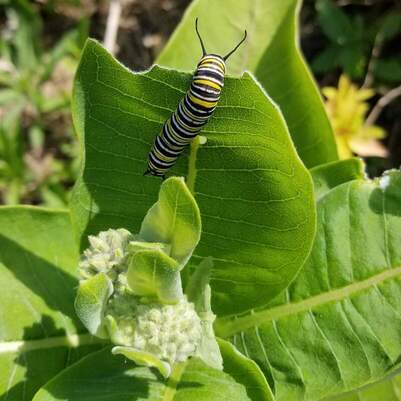 Monarch caterpillar on common milkweed in my backyard. I grew up with common milkweed (Asclepias syriaca) in Pennsylvania and it is also what primarily grows around my house in Wisconsin. I started butterfly weed (Asclepias tuberosa) from seed two years ago and planted it in my front flower beds. Also, just FYI, a great place to buy native plants and seeds, either online or in person, is Prarie Moon Nursery. I also discovered last year we have swamp milkweed (Asclepias incarnata) growing around our pond. Even though multiple milkweed species can support monarch caterpillars, is there one or more species that are the preferred food source? This is important for homeowners who want to help increase monarch butterfly populations but may not have the space to plant multiple species in their flower gardens. 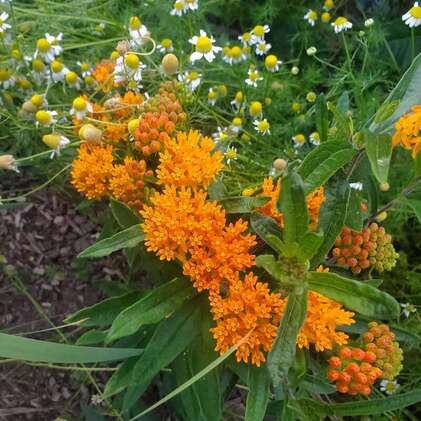 Butterfly weed I grew from seed and planted in my front flower bed. A research study of nine different milkweed species in midwestern Iowa by Pocius et al. discovered that the greatest number of monarch eggs were found on common milkweed and swamp milkweed (4). These milkweeds also had a high level of caterpillar survival. They also discovered that monarch caterpillars that hatched from eggs laid on honeyvine milkweed (Cynanchum laeve) and tall green milkweed (Asclepias hirtella) had the lowest survival rate (4) so these species would not be recommended to be planted. Another consideration for homeowners is how easily the milkweeds can be grown and transplanted. You can access the complete chart here, but other considerations include habitat, for example, swamp milkweed requires a wet location and common milkweed tends to spread aggressively via runners and therefore may not be the best choice for homeowners who want their milkweed to stay contained in a flower bed. 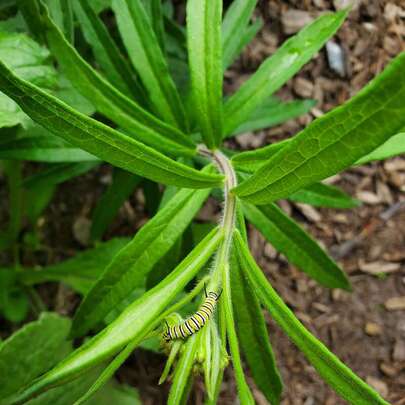 Butterfly weed that hasn't yet flowered hosting a monarch caterpillar. A last consideration when planting milkweed is what species is native to your area. Ideally, you want to plant native species whenever possible as they will be the most beneficial to the insects in your area and the species that will grow the best in your area. To determine this, I suggest visiting The Biota of North America Program (BONAP) website (5) where you can find plant species based on a variety of criteria including genus. Here is the link to the Asclepias (milkweed) genus maps to help you determine which milkweed species are native to your area. As you can see common milkweed is native (dark green) to much of the eastern and midwestern United States extending into some southern states as well. If you do not already have native milkweeds growing in your gardens, I hope you will consider planting some to help the monarch butterfly recover in population. Many people also enjoy raising monarchs indoors and releasing them. Although this is a noble idea, this practice can cause the spread of a monarch parasite, Ophyrocystis elekrtoscirrha (OE) (5, 6). According to Morris et al., wild monarchs in Arizona had a 4% infection rate overall while farm-raised monarchs had a 29% rate (7). Although this protozoan (single-celled eukaryote) parasite occurs naturally outdoors, it can contaminate the equipment you use to raise the caterpillars and prevent them from developing properly into adults. Just like many diseases spread more easily among animals in captivity, the same can occur with monarchs raised indoors in close quarters. Additionally, data from Morris et al. in which monarch butterflies, both wild and farm-raised, were tagged and then recovered following migration suggests that farm-raised monarchs are less likely to successfully migrate (7). Farm-raised monarchs may be less fit, perhaps due to a loss of genetic diversity, than wild monarchs and thereby less likely to survive (6). Therefore, if you wish to make a difference for monarchs and other native insects, plant native vegetation and refrain from using pesticides as much as possible. References
My Favorite Seed CompaniesI buy from multiple seed companies because the various seeds all serve different purposes in my garden. I love open-pollinated/heirloom and hybrid seeds for different reasons. I love trying different varieties of seeds to see which grow best in my garden. I love different colors and tastes of different varieties of the same vegetables. Therefore, I buy from many seed companies. The following seed companies are the ones I buy from most frequently but are not listed in order of preference, I purchase from them depending on my needs at that time. I also try to order from companies that are based further north in the United States (my one exception is Baker Creek). I do this because the colder climate companies tend to have a greater seed selection that will perform well in my shorter growing season in central Wisconsin. If you are a Southern gardener, I would still recommend checking out the companies I like (most companies try to get a selection of seeds that perform well in different climates) but also look for some great seed companies that are further south and maybe even local to you. Lastly, I have generally had great germination with all of these seed companies, so I highly recommend them. Baker Creek Heirloom Seed CompanyI like Baker Creek because they only sell heirloom and open-pollinated varieties. These types of varieties are essential for anyone who wants to save seeds as they will always grow true if they do not cross-pollinate in your garden. I love saving tomato and pepper seeds, so Baker Creek is one of the main companies I buy them from. I also love trying different varieties of tomatoes and peppers and Baker Creek always has new and unusual varieties available. Baker Creek is also the last seed company I purchase from that still sends one or more free seed packets out with orders over a specific amount (3 free packets on a $65 order, 2 free packets on a $35 order, and 1 free pack on a $10 order) and they have free shipping on all seed orders. Also, their free catalog is pretty great but the larger one you can purchase is amazing! Fedco SeedsFedco is based out of Maine and so fits my criteria for a Northern climate seed company. They always have a large selection of shorter-season seed varieties which are perfect for my gardening zone. They also have a tree division from which I have purchased many bare-root fruit trees and bushes. Although Fedco offers heirloom and open-pollinated varieties they also offer hybrid seeds which I prefer when I am looking for disease resistance, bolt resistance, or another trait that can be harder to find in heirloom seeds. Although hybrid seeds can be expensive Fedco’s prices are reasonable, and they do have free shipping on orders over $50. Fedco also offers organic versions of many seeds if that is important. One last note about Fedco is that they are very open about where their seeds come from. They utilize a numbering system to show where their seeds are coming from such as small seed farmers (which includes Fedco staff), family-owned companies, companies not part of a larger conglomerate, and multinational companies that are or are not engaged in genetic engineering. This allows you to purchase seeds openly based on personal ethics. Fecdo has also recently decided to drop all Syngenta-owned seeds, even though many of them are popular hybrids, because Syngenta manufactures neonicotinoid insecticides which are known to negatively affect bees and other beneficial insect populations. In 2006 they also dropped all seeds from Seminis/Monsanto for similar ethical reasons relating to sustainability. This open-business practice is rare among seed companies, and probably most non-seed companies as well. Rohrer SeedsI like Rohrer Seeds for a variety of reasons, one of which is that they are based out of my home state of Pennsylvania and my family purchased their seeds when I was growing up. They have very reasonably priced seeds, you do have to pay for shipping, but their shipping is also very reasonably priced. Rohrer used to have a good selection of their branded seeds for 99 cents a packet. Those seeds have mostly increased to $1.99 a packet but that is still the cheapest per pack of all my favorite seed companies. Another reason I like Rohrer is that they sell seeds from other companies as well. So, I can get seeds from Lake Valley, Rene’s Garden, Livingston, Seed Savers Exchange, Baker Creek, and more, all in one location. The last reason I like Rohrer Seeds is that they have great customer service. I used to put in two separate orders, one for my vegetable seeds for my family garden and one for flower seeds that I would grow to sell on Etsy (back when I sold online). The workers at Rohrer would realize that the two orders were being shipped to the same place and ship them together and either refund me the shipping cost for one order or send free seed packets as an apology if they could not refund the shipping. I never expected to be refunded or given free seeds since I had to order separately due to my orders being personal versus business purchases. Although I no longer buy from them for business use, I still get many of my staple vegetable seeds from Rohrer. Johnny's Selected SeedsJohnny’s is another Maine-based company and probably the most expensive seed company I order from for both the cost of the seed packs as well as for shipping costs. So why do I still list Johnny’s as one of my favorite seed companies? Their seeds are of great quality and although they have some heirloom seeds available their hybrid selection is fantastic. If I have a problem with a disease in my garden (for example, one year I lost all my cucumber plants to downy mildew), Johhny’s is the first place I will look to see if disease-resistant varieties are available. Johnny’s also has a great selection of other gardening supplies including plant stakes, frost and shade covers, gardening tools, soil blockers, and more. They also occasionally hold informational webinars about gardening, usually about their specific varieties, which is a great opportunity to learn more about the growing conditions and properties of their seeds. MIgardenerMIgardener is based out of Michigan, another northern climate state. They are very similar to Baker Creek in that they only sell heirloom and open-pollinated seeds, but they are a smaller company with (maybe?) less selection although they have been growing steadily. Their seeds are very reasonably priced, and the company seems dedicated to keeping costs down for customers. All their seed packs are $2, and they have free shipping on orders $20 and more. They do not have a paper seed catalog which is one of the ways they can keep costs down and provide great prices for their companies. I buy many of my tomato and pepper seeds from MIgardener since I know they are open-pollinated, and I can easily save seeds from their varieties. ConclusionIf you have a seed company you love, please let me know in the comments below or send me an email. I always love trying out new seed companies!  My Favorite Gardening Tools
 Hori Hori soil knife from A. M. Leonard (left), sheath (center), and Barebones Hori Hori (right).
 Fiskars long-handled loppers and pruners.
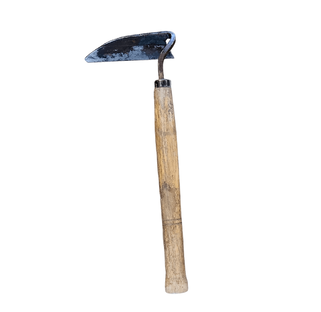 Japanese weeding sickle.
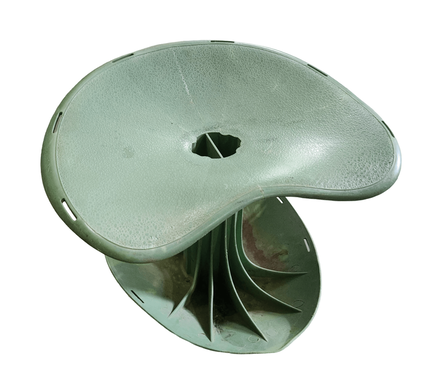 Rocking garden seat.
 Atlas 370 gardening gloves.
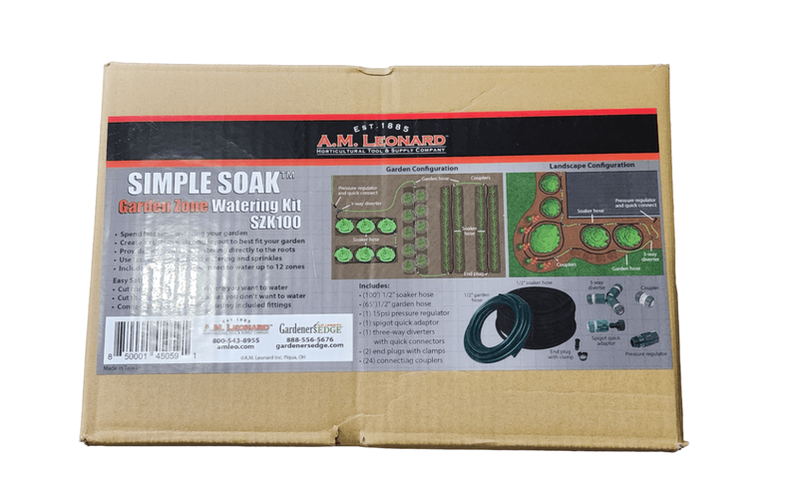 Soaker hose kit from A. M. Leonard.
 B-Hyve Orbit hose timers. Bluetooth capable (left) and manual (right).
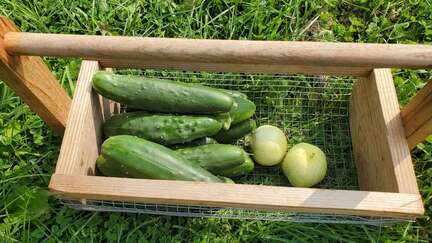 Homemade garden hod.
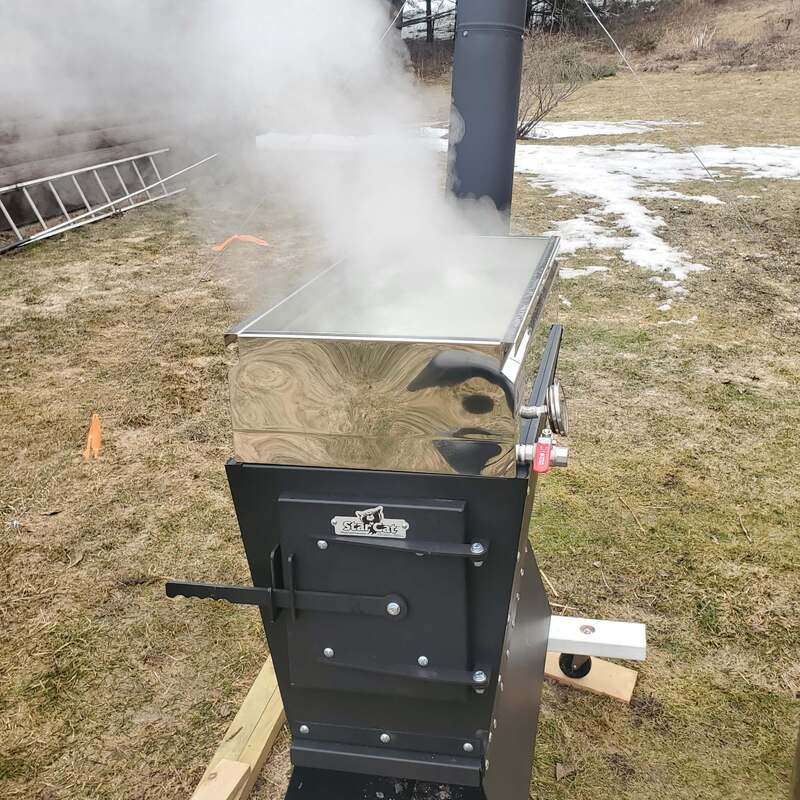
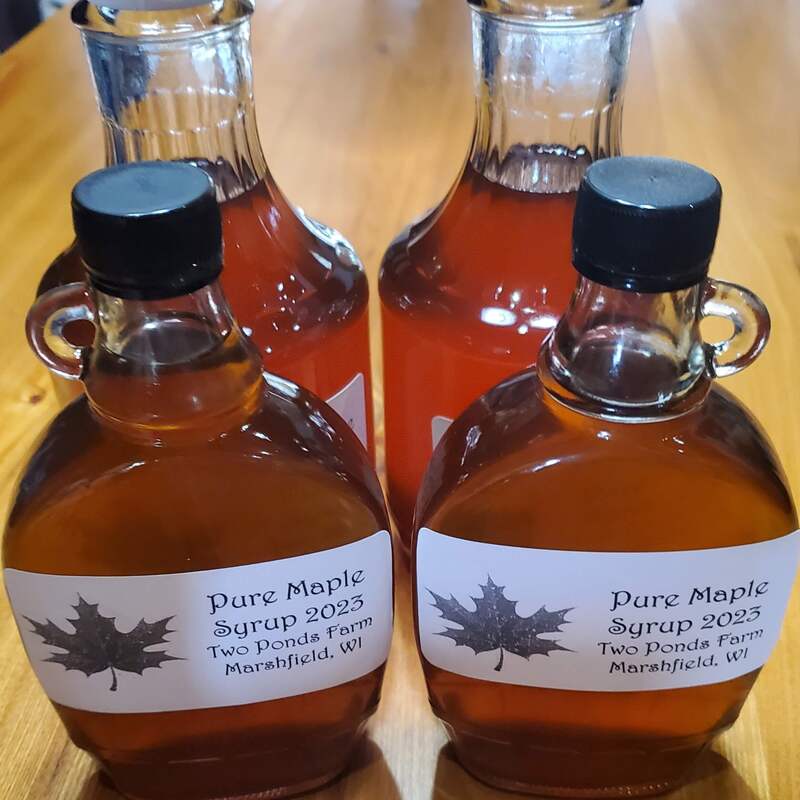
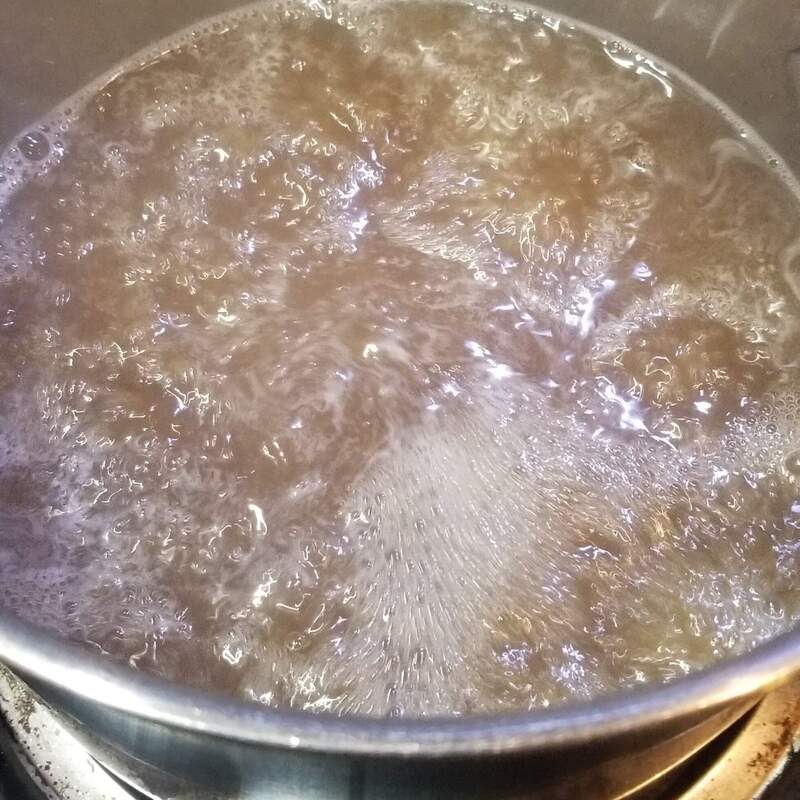
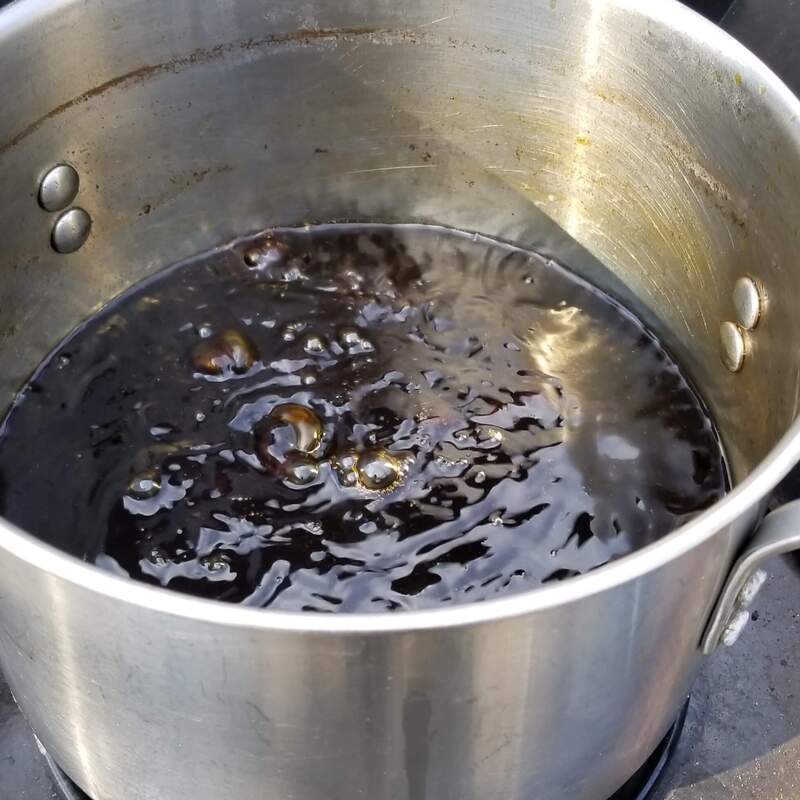
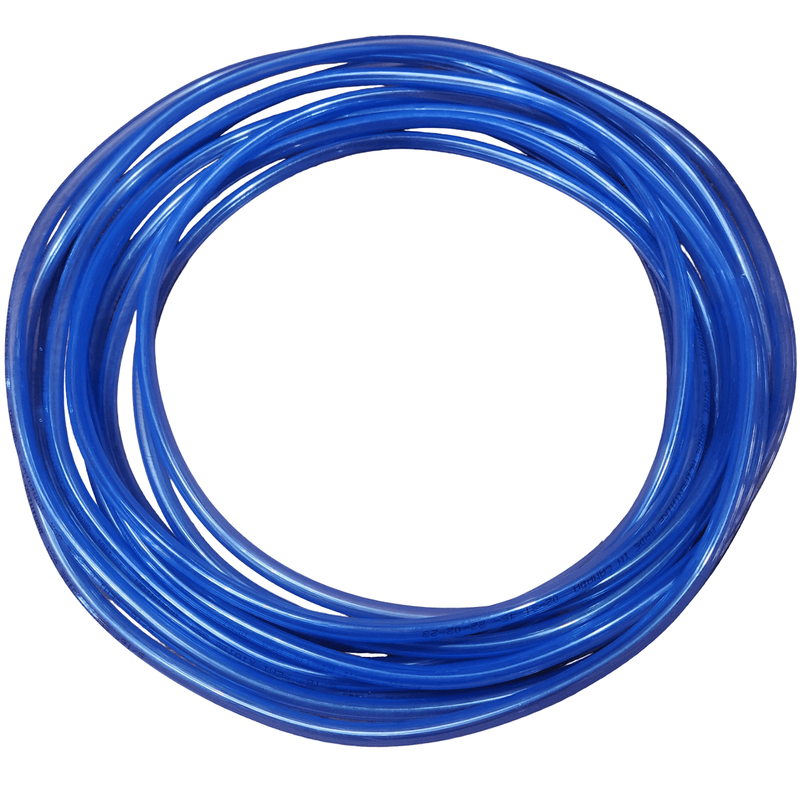
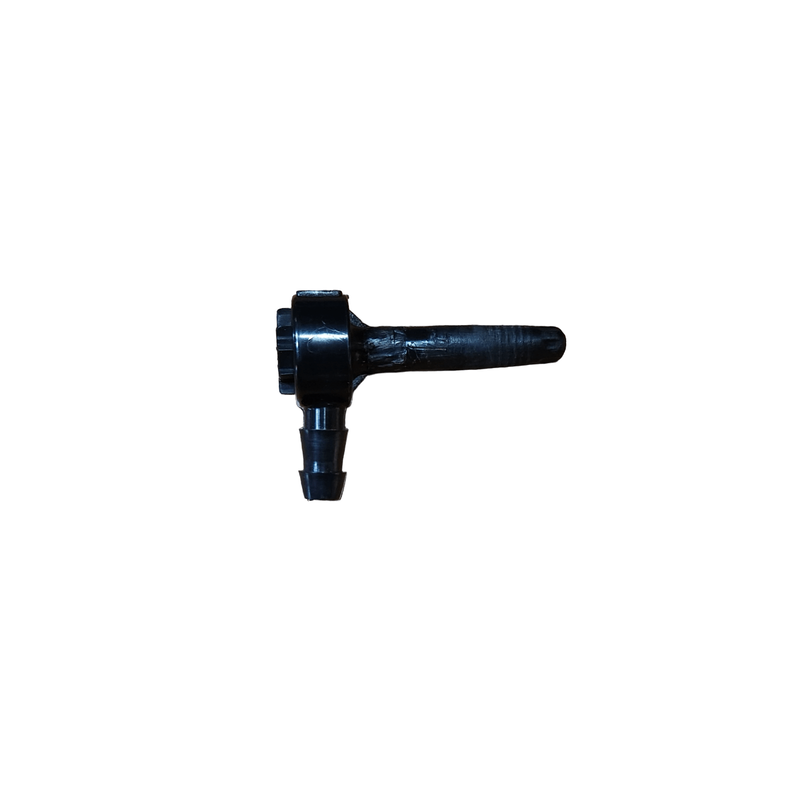
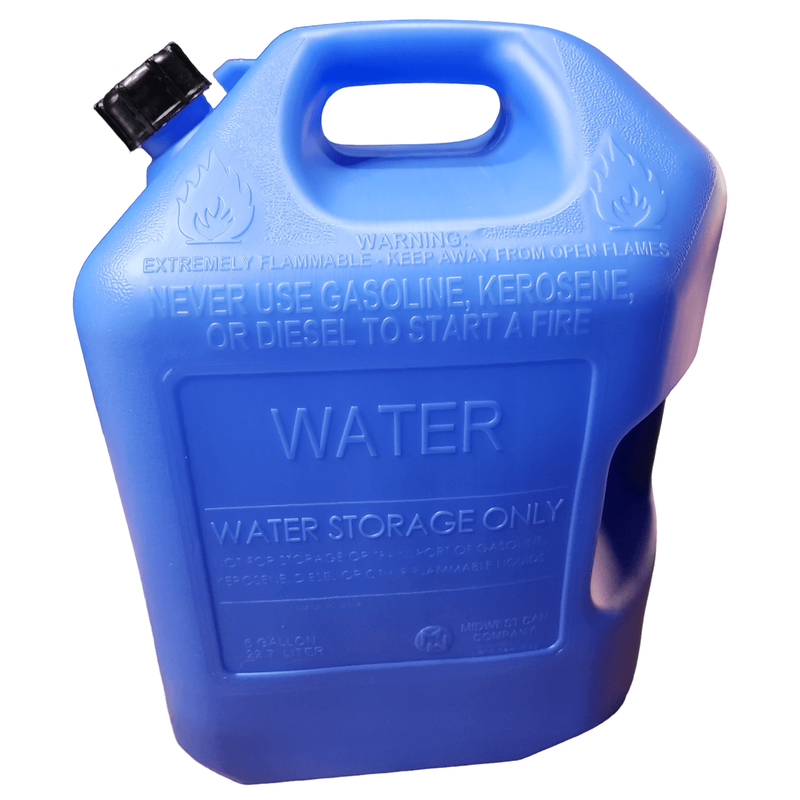
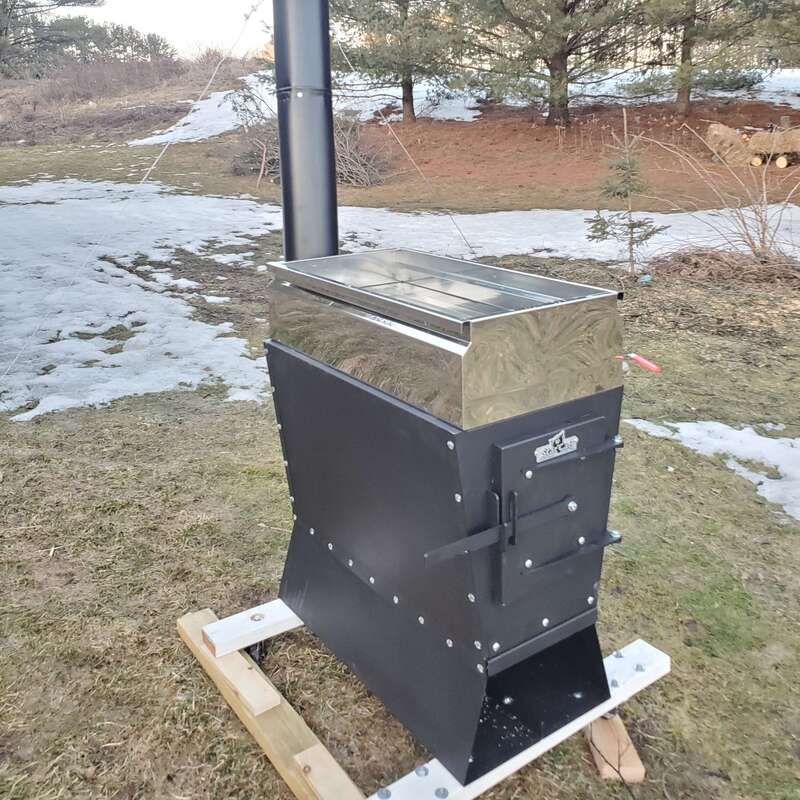
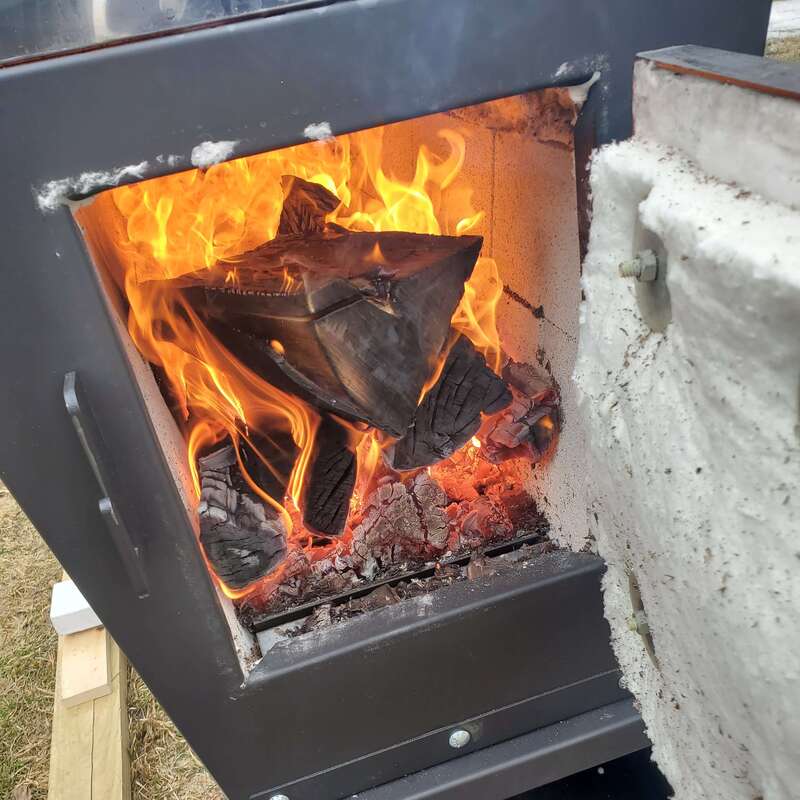
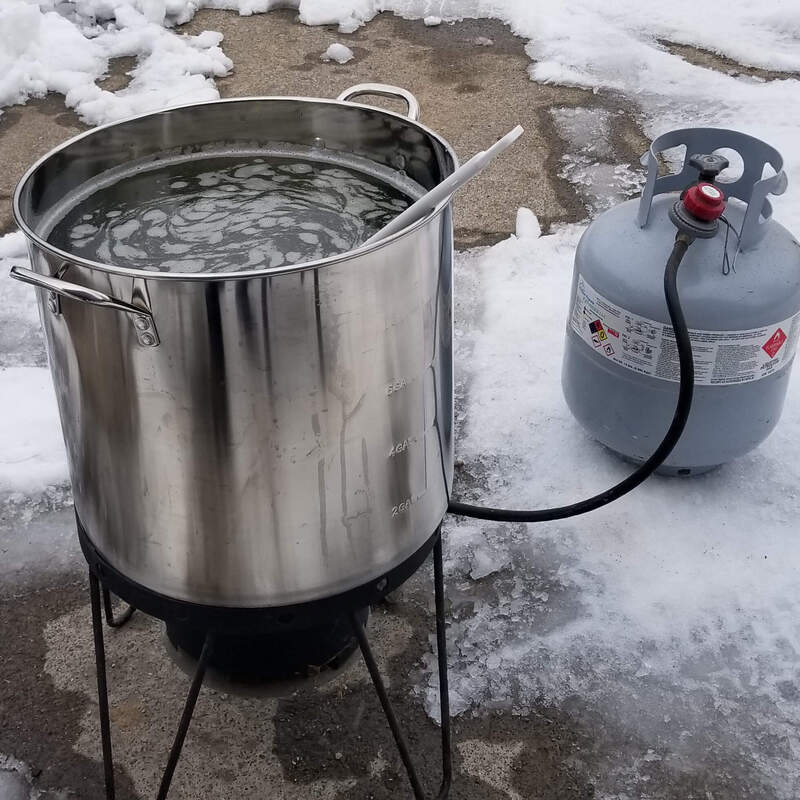
Maple SyrupingWe have been collecting maple (and occasionally birch) sap for about five years and boiling it to make syrup. This article is targeted to small, backyard syrup producers, collecting from ~2-12 taps. However, I will also discuss different methods to collect sap and make maple syrup if you wish to increase production. Why Make Maple Syrup?The truth is I do not eat maple syrup except for a taste once a year when we make it (I have difficulty regulating blood sugar). So why do I love to make syrup, even when I cannot enjoy the final product? The simple truth is that it is a fun, unique experience that occurs at a time of year when not too much else is going on. Maple syrup production occurs in early spring, and this is a time on our property when we have fewer tasks to do compared to late spring through fall. Collecting sap and boiling it down while you relax outside by a fire is a unique, almost magical experience that I highly recommend to anyone who has the chance. It is easy to buy real maple syrup, especially where I live because so many people make their own and sell extra. But real maple syrup is expensive and for good reasons. It is a time-consuming process to collect and boil down the sap, which generally has a 2-3% sugar content, into syrup which is 66-68% sugar. So, making maple syrup yourself may save money (if you do not count your time) depending on your setup and how you boil it down. If you have access to wood on your property you can boil it down for free (again, not counting your labor) but otherwise expect to pay for wood or propane to use as fuel. You can also make an evaporator relatively cheaply, if you are handy, or buy a large pot or flat evaporator pan to use over a wood or propane fire, to minimize expenses. However, unless you invest in a reverse osmosis system (more on that later) the one thing you cannot minimize is time. How Much Sap Do You Need?The general rule of thumb is that a 40:1 ratio of sap to syrup is needed if collected from sugar maples (other maples are closer to 50:1 and other trees can be tapped like birch and walnut but have even higher ratios). This means if you want to make a gallon of syrup each year you need to collect at least 40 gallons of sap. Larger producers now mostly use reverse osmosis systems first to eliminate as much water as possible and therefore increase sugar content before boiling the remaining sap with an evaporator to the final required sugar concentration for syrup. You can also collect sap from other trees to make syrup, including birch trees but the ratio is approximately 110:1, so you need over 100 gallons of birch sap to make a gallon of birch syrup. The syrup is also darker and more savory tasting than maple syrup, even with similar ending sugar content, and is often used as a glaze to cook salmon or pork. One advantage of birch trees though is that the sap tends to run after maple so by the time you are done collecting maple sap you can remove your taps and re-use them on any appropriately sized birch trees you may have. Walnut trees (Juglans), including black walnut, butternut, English walnut, and others can also be used. We have made birch syrup for a couple of years but prefer maple. We also have some black walnut trees on our property but have not tapped them as they are still too small. The color of almost done maple syrup (left) is much lighter than birch syrup (right). Timing MattersMaple syrup is always made in spring because that is when the sap starts running in trees. During the summer, trees conduct photosynthesis in their leaves. Photosynthesis is the process whereby trees and other plants take light energy and convert it to sugar. They use the energy from the sun plus carbon dioxide from the atmosphere and convert the carbon dioxide to organic sugars. In the process, they also release oxygen, which is very lucky for us! The tree uses the sugar to grow but extra sugar is pumped down from the leaves into the roots for storage over winter. The following spring when the days warm up, the sap starts running. The roots take up water from the ground and move it up the tree, taking all that stored sugar with it. Sugar is the energy source that the trees use to bud out and grow leaves that spring. Once temperatures start warming up to ~40°F during the day but still dipping below freezing at night, the sap will start running. In central Wisconsin, this is usually March into early April. This year (2024), however, we had a huge warm-up in the first couple weeks of February and again later in February, and many people decided to tap early (this is the earliest we have ever collected sap and made syrup). The season can be as short as a couple of weeks or as long as a month or more, but when the days and nights start getting too warm, the sap can go bad in the heat, and it also gets bitter. Usually, when the maple tree buds start swelling, this is a sign you should pull your taps. 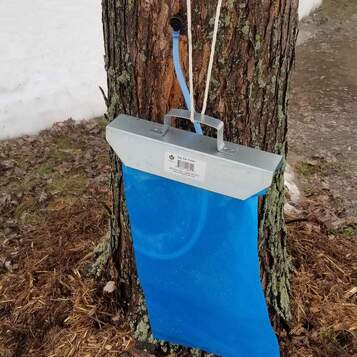 A typical tubing and bag setup for sap collection. We have since swichted to longer tubing with 5-gallon food-grade buckets for collection, which are reusable long-term. Supplies and EquipmentTrees – If you want to make maple syrup you need maple trees. Any larger maple tree works but sugar maples have the highest starting concentration of sugar in their sap. We have mostly red maples and silver maples on our property and measurements with a refractometer show a concentration of about 2% sugar in the sap. This can vary from tree to tree, even within the same species, and the beginning versus the end of the sap season. Generally, you want your trees to be at least 10 inches in diameter at 4-5 feet above the ground. You can put in 2 taps if your tree is over 20 inches in diameter. (1) I see many people putting in multiple taps in trees that probably should not have more than one, I prefer to put the health of the tree first. There are other trees that you can tap for syrup, but maple, birch, and walnut species appear to be the top three most tapped trees. Drill – You will need a drill, preferably battery-powered unless you are only tapping trees close to an electrical source. Some people even use hand drills, but I would not recommend this unless you are only tapping a few trees or have younger people to help drill. We use a 5/16th drill bit because our spiles are 5/16th in size. They also come in 7/16th and 3/16th inch sizes. Spiles/Spouts/Taps, Tubing, and Bags/Buckets – You will need tubing that fits your spile size. This year we switched from collecting sap in bags to using longer tubing into 5-gallon buckets. We have yet to tap more than a dozen trees so we can easily collect our sap by hand but if we ever expand, we will try using gravity flow to funnel the sap from multiple trees into one or more larger collection vessels. Most of our land is flat so this is probably only an option for a small section of our woods behind our house which only has about 8 tappable trees. Many commercial operations use a vacuum system to collect more sap and it does not require gravity to keep the sap flowing into a large collection bucket. If you are collecting sap in the bags or buckets that hang on the tree you only need a short, 1–2-foot, piece of tubing for each tap, or if you can hang your bag/bucket on the spile you do not need tubing at all. This year we started collecting sap in food-grade five-gallon buckets with a lid that we drilled a hole into to insert the tubing. Because we place the buckets on the ground, and you usually drill tap holes a few feet up this method requires longer-length tubing, but it is easier to collect and keeps more debris out of the sap. Although more expensive, the buckets also reduce plastic waste because they are more reusable than plastic bags and easier to clean out between collections. We use plastic spiles, but you can also find more durable metal ones. We now buy tubing in bulk from a local maple syrup supply company (The Maple Dude) and have found that the tubing comes in rigid or semi-rigid types. We much prefer the semi-rigid as it is easier to get over the end of the spiles. Tubing (5/16") can be bought in bulk (left), spiles, also known as spouts and taps (center) come in plastic (pictured) or metal, and water storage jugs (right) are a great way to store smaller amounts (6 gallons) of sap. Rubber Mallet – We use a rubber mallet to pound the spiles into the trees after drilling. 70% Isopropyl Alcohol – We use 70% isopropanol to sterilize the drill bit before drilling and the spiles before inserting them into the tree. Thermos of Hot Water – A thermos of hot water is helpful to warm up the end of the tubing before you place it over the spile. This is especially useful if you have rigid tubing! Even with the hot water we sometimes have difficulty fitting the rigid tubing over the spile. Rope and Bungee Cords – These can be helpful if you are using the collection bags, we have had the wind pull the bags far enough away that the tubing falls out. We usually tie the bags to a tree branch if possible, instead of hanging it off the spile for more security and then wrapping a bungee around the top of the bag and the tree to help hold it in place. Filters – You will likely want at least 2 different kinds of filters. A sap filter is used after collecting the sap to remove any sticks, insects, or bark debris from the sap. A finishing filter (often with a pre-filter inserted) is used for a final filter of the syrup at the end of the boil. 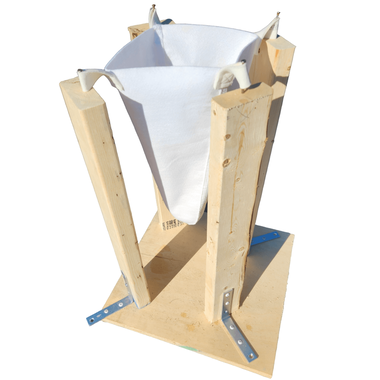 A finishing filter in a homemade filter stand. The stand is large enough to fit a 6-8 quart pot underneath. Evaporator/Pan or Large Pot - Last year we invested in a StarCat wood-fired evaporator (the smallest one they make) from Smoky Lake Maple Products that has saved us lots of time! Before the StarCat we used a 10-gallon brewing pot on a propane burner which worked well but took 12-14 hours to boil down a 10-gallon batch plus the added expense of buying propane. Fuel – We used propane for several years but as prices and our sap collection volume increased, we decided to invest in a wood-fired evaporator since we have lots of hardwood available on our property. We now use wood to boil the sap until the volume gets too low for the evaporator. We then transfer the sap to a pot over the propane burner until it is just about done, then finish boiling it on the stove in our house. Reverse Osmosis System – Another improvement to increase efficiency is to invest in a reverse osmosis system to save time boiling the sap. Small backyard syrup producers can buy reverse osmosis systems that can concentrate sap from about 2% sugar to 4%. This might not seem like a huge difference, but it doubles the sugar concentration which should decrease the boiling time by half. If you have 100 gallons of 2% sugar the RO system can get it down to 50 gallons of 4% sugar. So instead of a 24-hour boil (or more), you might be able to get it done in a more reasonable 12-hour day. The wood-fired StarCat Evaporator (left and center) is much more efficient than our old method of using a 10-gallon brew pot on a propane burner (right). How to Tap Trees and Make Maple Syrup
ConclusionIf you get the chance to collect sap and make syrup or even help with someone else’s collection and boil, I highly recommend it. If you have any questions, please feel free to contact me. References
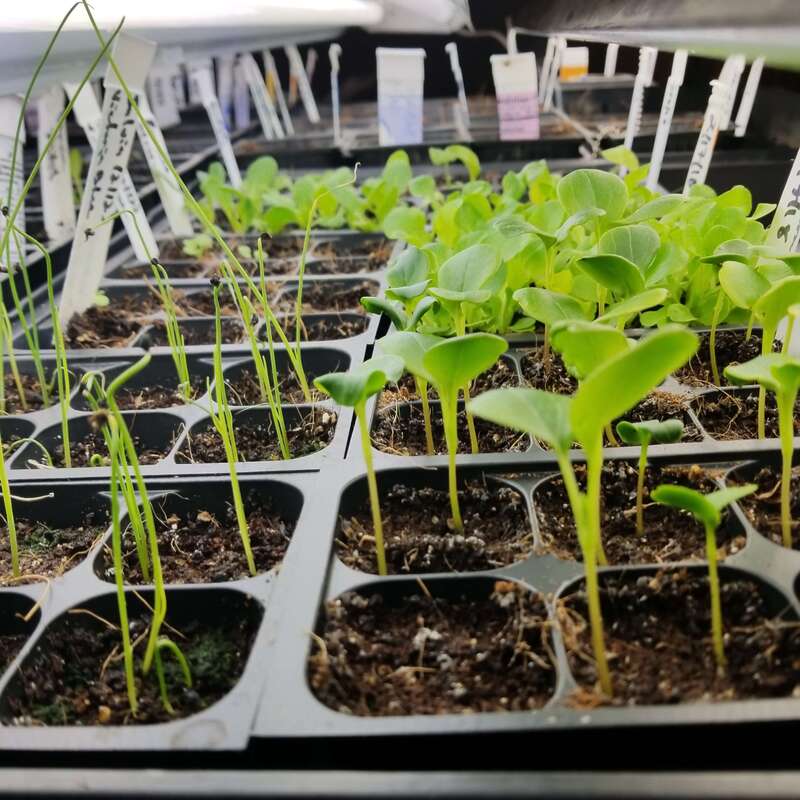
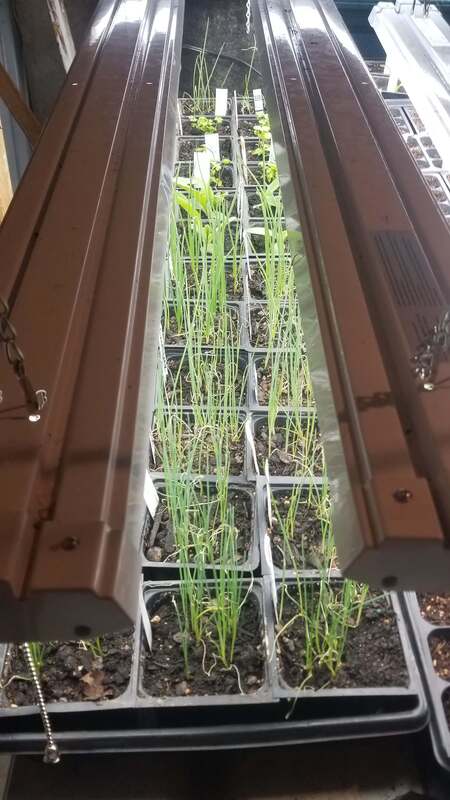
 The Basics of Seed StartingI started growing my vegetable plants from seed rather than buying seedlings from big box stores or local greenhouses for several reasons. First, I love working with soil and plants so by starting seeds I get to start gardening (albeit indoors) earlier than I would if I bought seedlings. Second, I have a very large garden, so I save money by buying seeds and starting them rather than buying plants. Lastly, one of my favorite parts of having a garden is to try many different varieties of vegetables, especially tomatoes and peppers. If I buy my seedlings from big box stores or even independent greenhouses my selection is much more limited than if I buy seeds and start my own. Before I get into the supplies you will need to start seeds let's discuss timing. I see this question asked all the time in my online gardening groups and there is not a simple answer. The easiest way to get a rough idea of when to start your seeds is to first figure out your average last frost date in spring. There are lots of different websites and I would recommend checking several, but this one has worked well for me and gives dates close to many other sites. Once you enter your zip code, look for the 50% chance of last frost at 32°F, which for me is mid-May. Remember, this is an average and in any given year the date could easily fluctuate by a week or two. Realistically, I generally do not get my warm season crops, both directly sowed seeds and transplants, planted until the soil warms up more which is usually the first week of June for me. Once you know your average last frost date count back, however many weeks is recommended (check your seed packet or do an online search), to figure out when you need to start seeds. For slow-growing and slow-germinating seeds like onions, celery, artichokes, and some herbs like parsley I start seeds 8-10 weeks before my last average frost date. For many cold crops like cabbage, kale, broccoli, and cauliflower I plant 7-8 weeks ahead. For peppers which can take weeks to germinate (especially the super hots), even with a heat mat, I start about 7-8 weeks before my average frost date, but I generally plant them out 2 weeks after my last frost date since peppers do not like the cold. Lastly, for tomatoes, which germinate and grow more quickly than peppers I start later, about 4 weeks before my last frost date. Again, I usually wait a week or 2 after my last frost date to transplant to make sure the air temperature and soil temperature are warm enough. The reason seed starting dates is not an exact science is because even knowing your average last frost date you may live in an area with a microclimate that is either warmer or cooler than average. You can start tracking your temperatures where you live, but that would take years to get good data or learn to enjoy a little trial and error. As mentioned above the actual last frost date can vary because it is based on an average. Also, the temperature in which you are growing makes a difference. I found that when I started putting my seedlings into a greenhouse for a couple of weeks before I planted them, they grew much faster than when I had them growing in my cooler basement. So, I had to adjust my dates and start my seeds later to account for faster growth. The best resources I have found to help you calculate dates are from Johnny’s Selected Seeds which has SO MANY freely available calculators and tools, some of which are downloadable. My favorite tools are their seed-starting date calculator for seedlings and their fall-harvest planting calculator. They also have a succession-planting calculator which I have never used it as I do not have much time to replant most seeds due to my short growing season. Once you have your seeds organized and dates figured out it is time to get all the supplies you need. Some of these supplies are optional so buy what you can depending on your budget. I also recommend starting just a few different types of seeds in your first year and if it goes well increase the number you grow in the years after if you want. You do not want to end up overwhelmed or with a bunch of leggy, or even worse dead seedlings because things went wrong (trust me I’ve been there). Seedlings in 6-cell pots with a fan blowing (middle) to strengthen them and help avoid damping-off. SuppliesBefore you start seeds, you need to stock up on a few supplies.
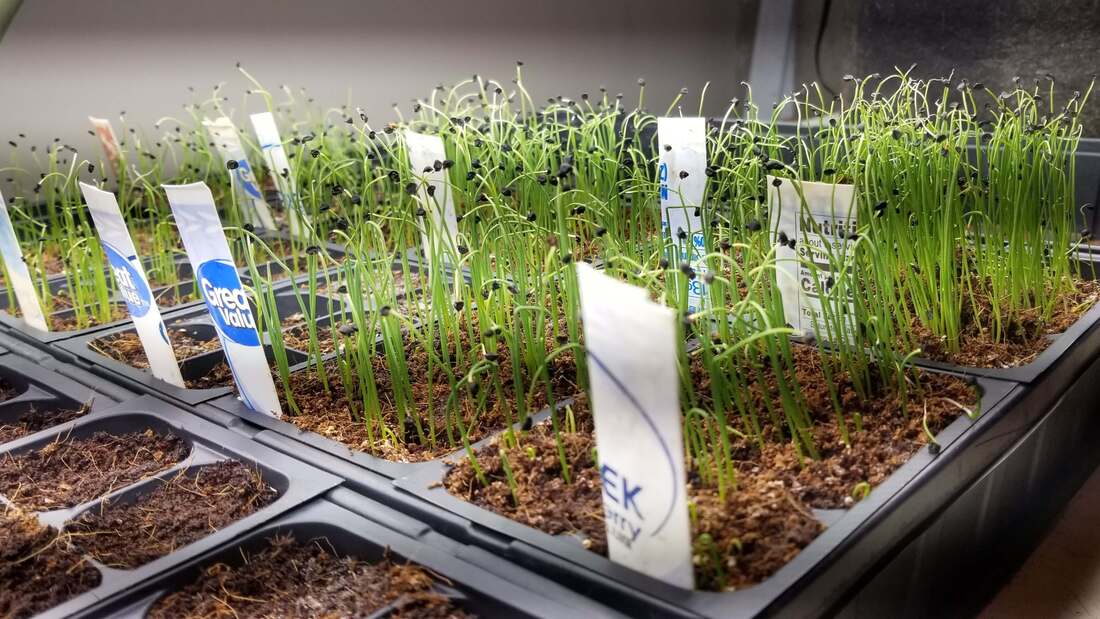
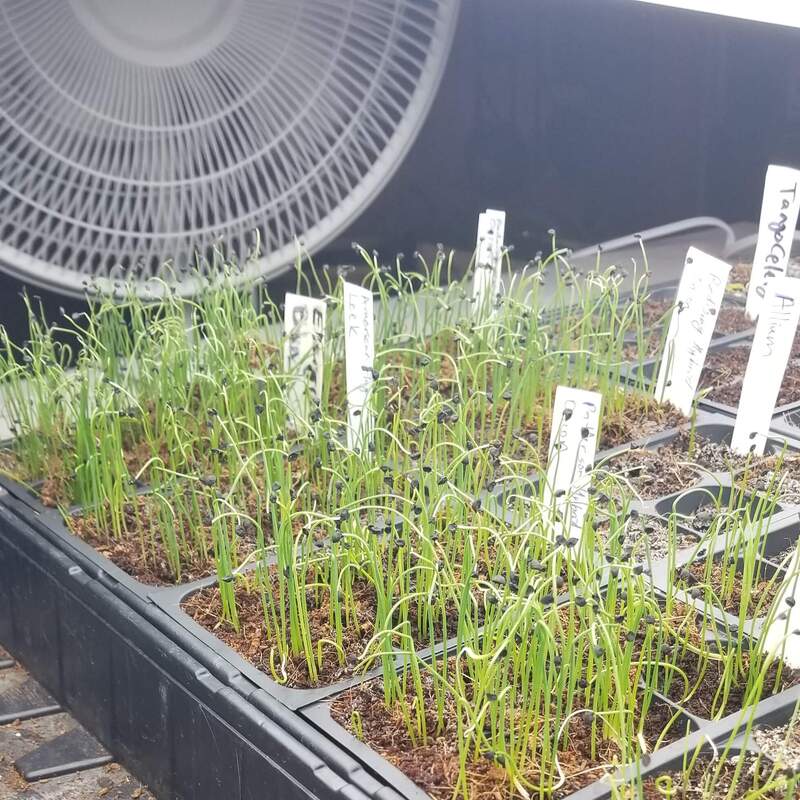
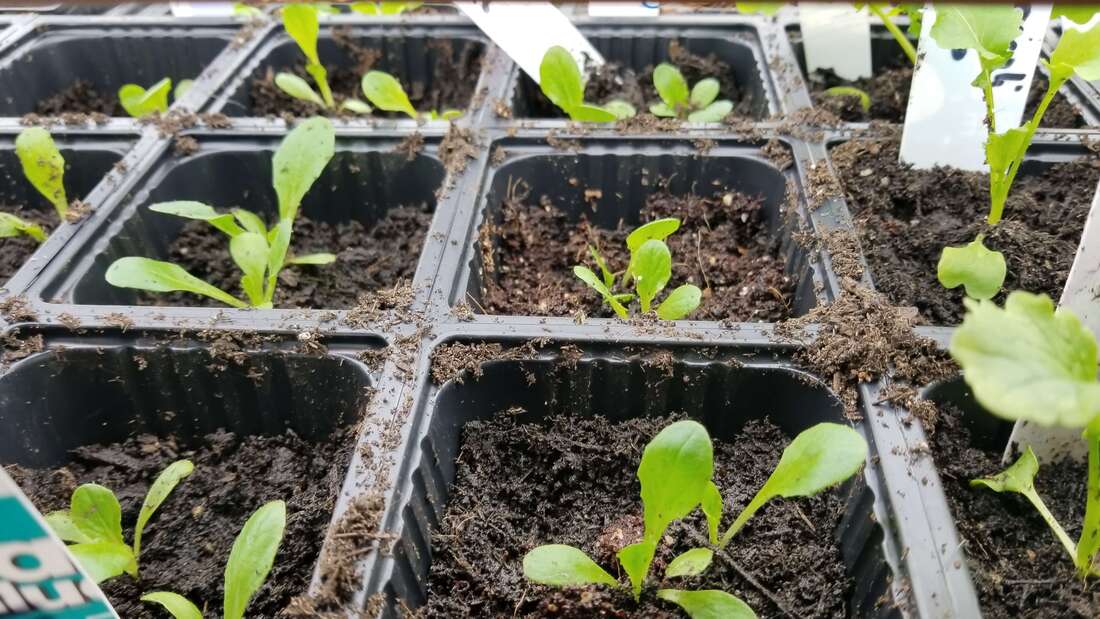
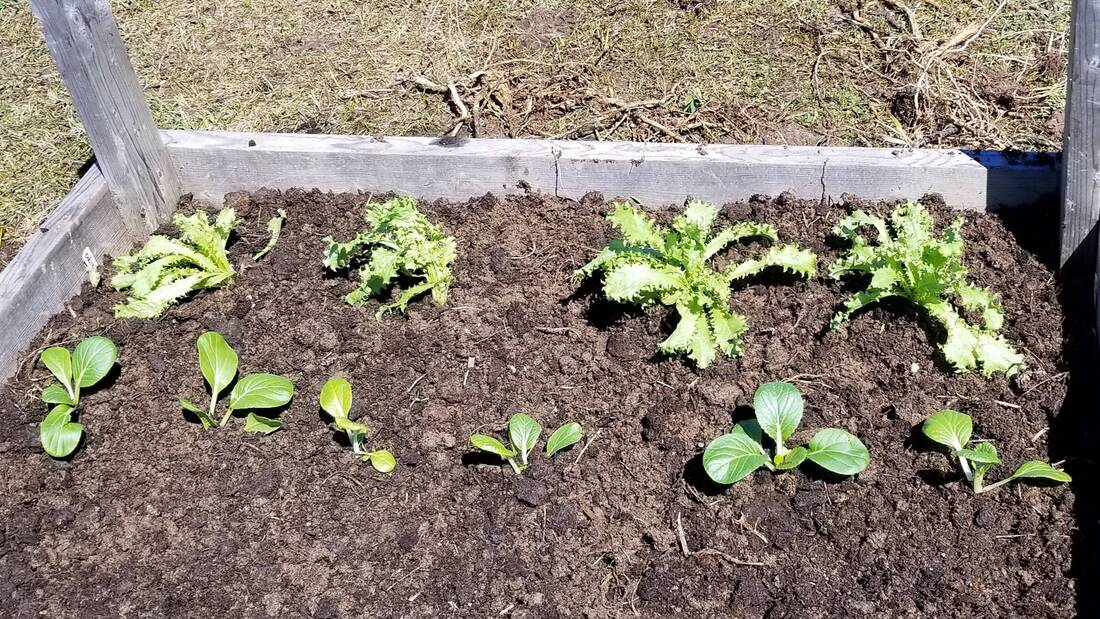
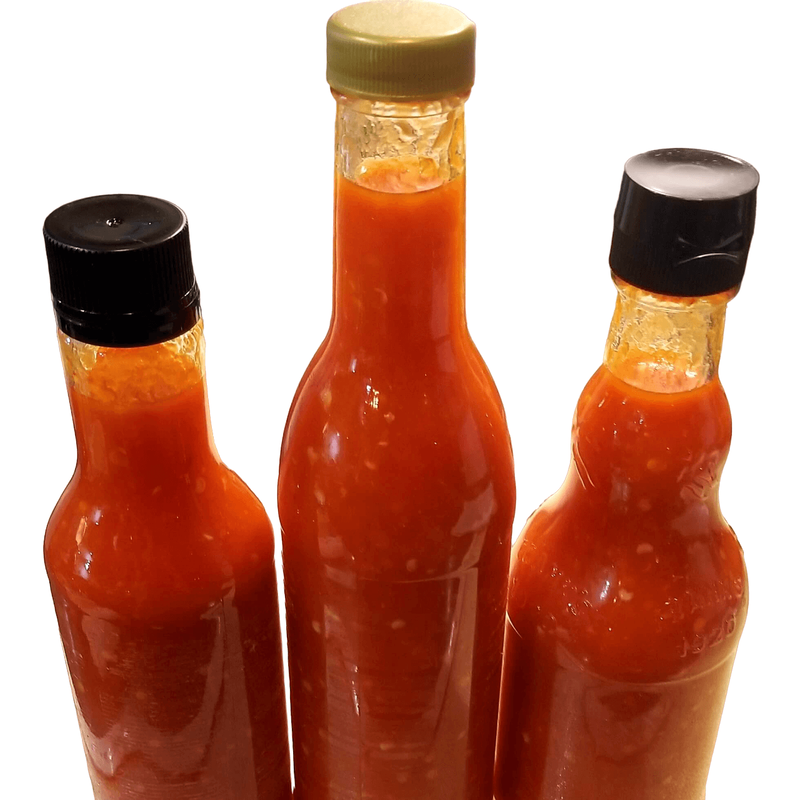
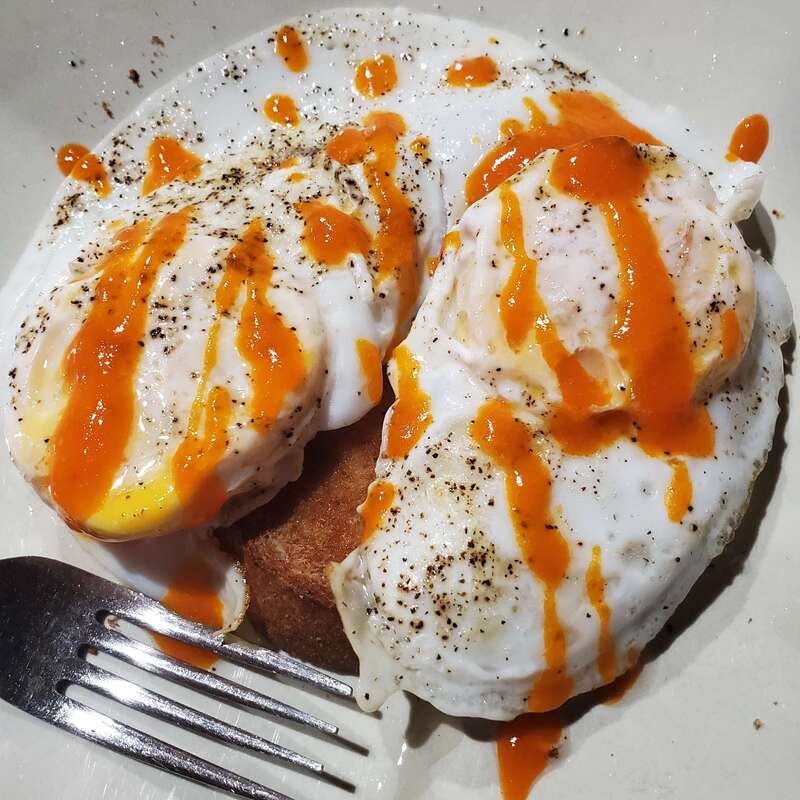
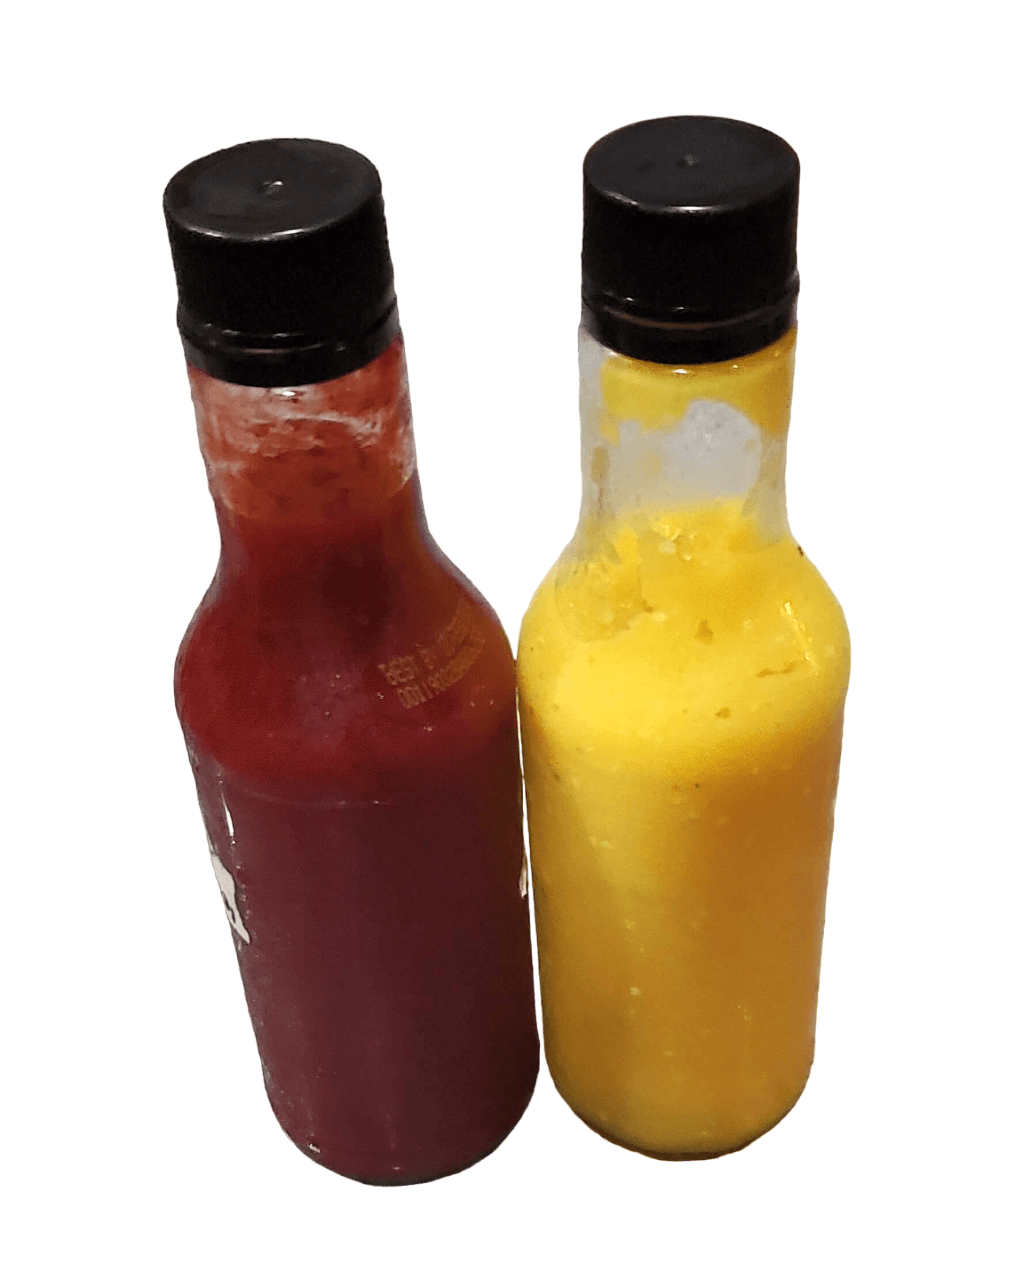
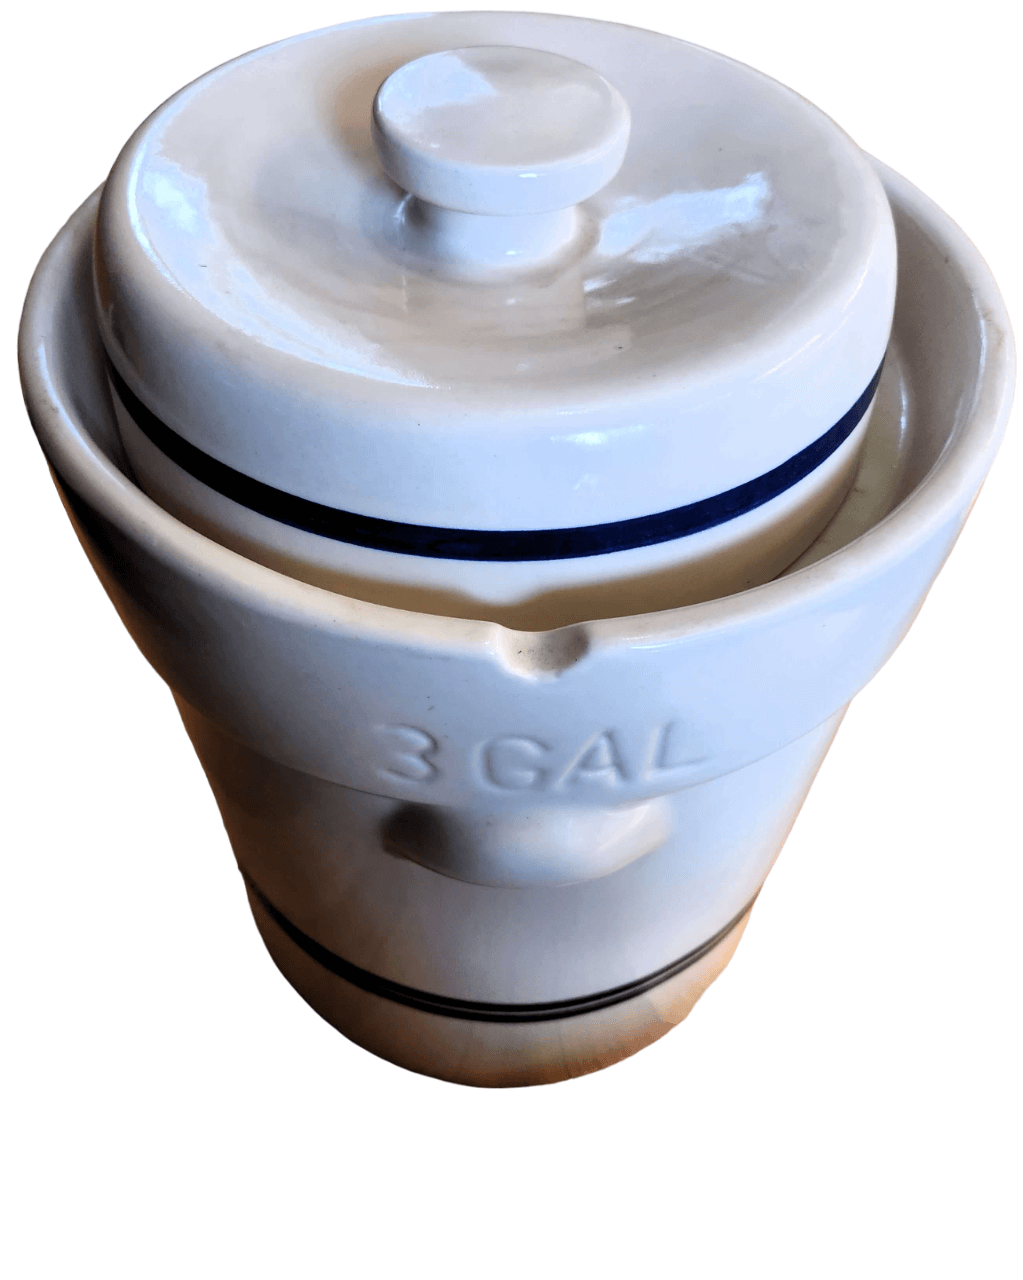
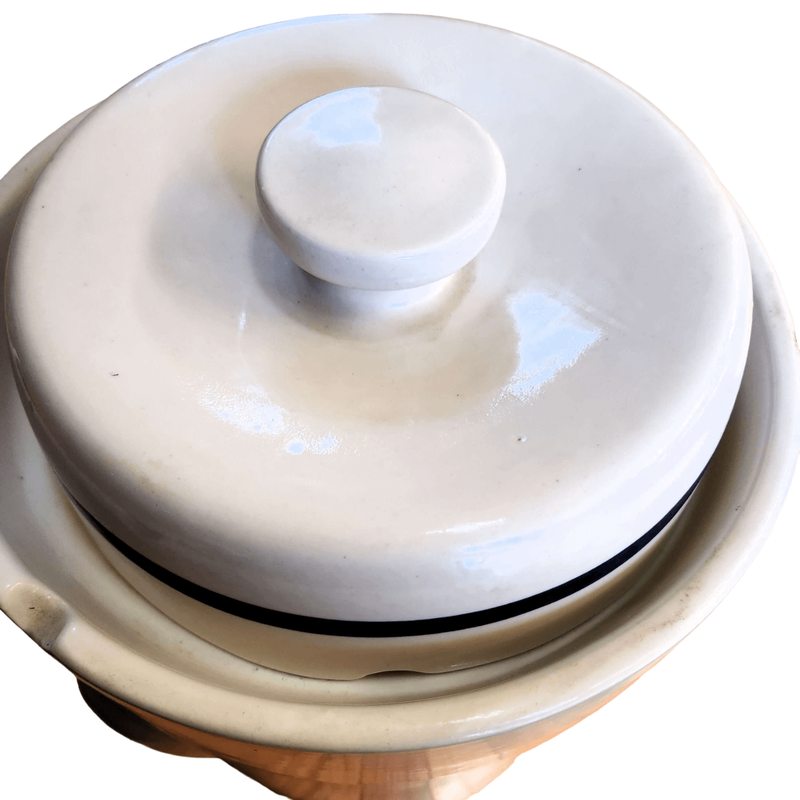
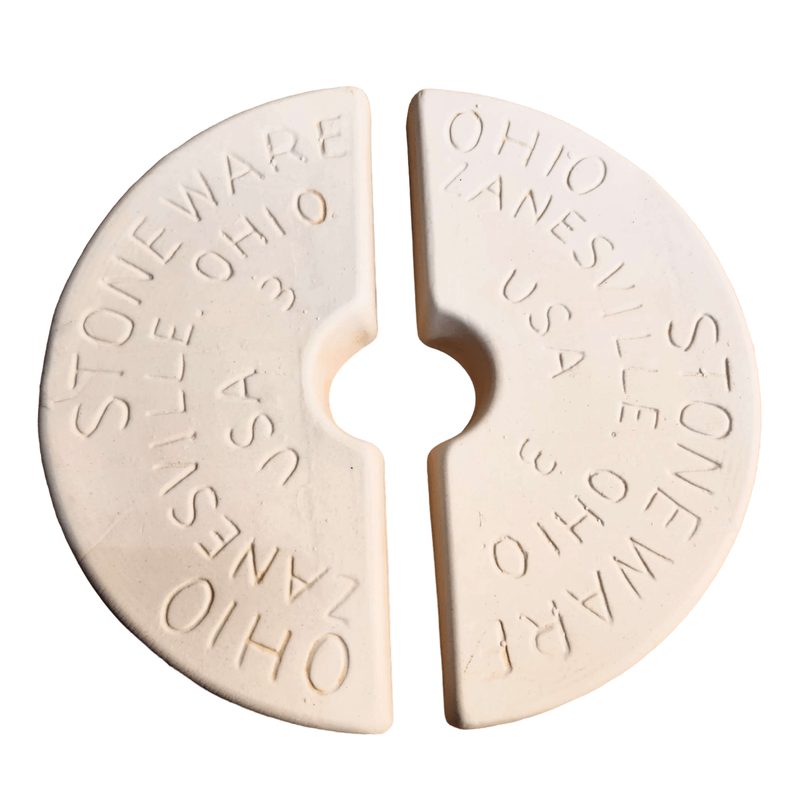
From left to right, onion seedlings under 4 foot LED 5000K lights, lettuce seedlings potted up into 3.5 inch square pots, and endive and pac choi recently transplanted into a raised bed. ConclusionI love starting my own seeds and hopefully you will too. Just remember if it does not work out great your first time, try again! My first time I started seeds I went on vacation and the person who was checking in on my seedlings overwatered them because she thought they were dying. It turns out they were dying because I had problems with damping-off (this was not her fault, some had started dying before I even left for vacataion). Unfortunately, watering even more makes damping-off worse so I lost about half or more of my seedlings that year. I have since learned that less water is usually better and I also try to time my vacations until after the majority of my plants are in the ground! Good luck and feel free to contact me with any questions! 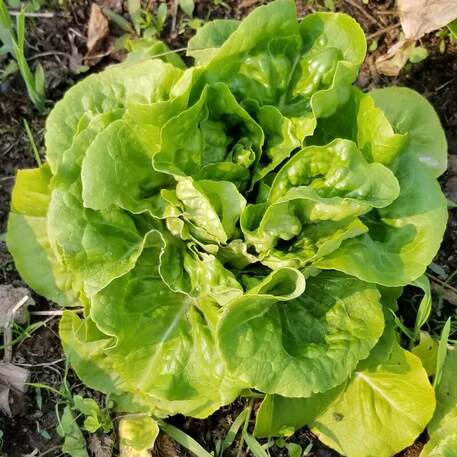 Fully grown lettuce that I started from seed in my basement and transplanted outdoors in my raised beds. Open-Pollinated, Heirloom, Hybrid, and GMO Seeds I see a lot of confusion online about the different types of seeds that are available for purchase. Here I will attempt to clarify the differences between them, allowing you to make the best-informed decision about what types of seeds are best for your garden. Open-Pollinated vs Heirloom SeedsOpen-pollinated and heirloom seeds are similar in that both types of seeds can be saved year after year as long as they are grown distanced from different varieties of the same species to prevent cross-pollination (1). These seeds are genetically stable and manifest similar phenotypes (physical characteristics) when grown (1). Open-pollinated seeds arise from cross-pollination of separate plants of the same species AND variety or self-pollination from the same flower or separate flowers on the same plant (1). Self-pollinating varieties can generally be grown closer together with less risk of cross-pollination but unless you isolate the flower and hand-pollinate there is always the risk that the wind or an insect cross-pollinated for you if another variety of the same species is growing nearby (1). Tomatoes and peppers are probably the most saved seed by home gardeners, and I found that peppers are more likely to cross than tomatoes. I do not attempt to isolate my plants because I am only saving seeds for my use, and I do not mind the uncertainty of growing a possible hybrid the following year. Heirloom seeds are an older variety of open-pollinated seeds (1). Generally, any seed older than 50 years is considered an heirloom but that is not universally agreed upon (2). Heirloom seeds must be open-pollinated but open-pollinated seeds are not necessarily heirlooms. If you are interested in saving seeds and want to make sure the seeds you collect will grow to be the same as their parents, then you must use open-pollinated or heirloom seeds. New varieties of open-pollinated plants can be made using labor-intensive traditional plant breeding methods that involve crossing 2 varieties, collecting the seeds from plants manifesting the characteristics you are looking for, growing new plants from those seeds, and repeating for many years until you have a stable seed that produces the same type of plant year after year. Although new open-pollinated plants can take years to develop, once you have stable seeds, they can be propagated easily via saving seeds (assuming no other varieties were nearby to cross-pollinate). Hybrid or F1 SeedsHybrid seeds (also known as F1, or first generation after the cross seeds) are from cross-pollination of two genetically different varieties of the same species of parent plants (1). The usual way to create these can take years and lots of testing to determine that the phenotypes you want (characteristics such as color, disease resistance, size, etc.) are present and stable in the offspring. Because of the time it takes to generate new varieties of hybrid plants and because to make seed a grower needs to perform this cross-pollination each year (1), which is labor-intensive, is why hybrid seeds cost so much more than open-pollinated or heirloom seeds. Hybrid vigor is a phenomenon that often arises when two different plants are crossed and is one of the reasons why hybrids are so popular (1). You can save seeds from hybrid plants but there is no guarantee that the plant that grows from the saved seed will be the same as the parent. I have successfully re-grown some hybrids (but not most) from seeds that looked just like the parents so if you are willing to experiment there is no reason you cannot save hybrids. If you are not interested in experimentation, simply stick to saving open-pollinated or heirloom seeds. Importantly, hybrid seeds are NOT GMO (genetically modified organism) seeds. GMO SeedsGMO seeds are developed by genetically engineering the genes from one species into another (2). This is done for a variety of reasons such as disease resistance, pesticide resistance, or increasing a desirable trait such as more nutrition. Most gardeners appear to be vehemently opposed to GMO seeds, but they may not be aware that 70% of the processed foods in the United States come from GMO ingredients (2). However, although you may be unwittingly eating GMO crops, GMO seeds are generally NOT available to the average home gardener (see update below!), they are primarily used by commercial farmers to grow corn, soybeans, canola, sugar beets, and cotton (FDA). Other non-processed foods that may be GMO in the United States include certain varieties of potatoes, apples, summer squash, papaya, and pink pineapples (FDA). Many people want to avoid every GMO crop which although extremely difficult is certainly an option. I think GMO crops and seeds need to be taken case by case. As an example, the Hawaiian papaya would likely have gone extinct due to a ringspot virus but was saved by genetically engineering a resistance gene into the plant. On the other hand, the practice of engineering pesticide-resistance genes into our commercial crops so that we can spray more herbicides on our crops without killing the crop itself is not a practice I am in favor of. UPDATE on 02/07/24: As of February 2024, the first bioengineered seeds are available to home gardeners from the Norfolk Healthy Produce company. They inserted a purple color gene from an edible snapdragon plant into a tomato genome. This makes a very purple tomato with increased anthrocyanin, an antioxidant that gives purple vegetables their color. This tomato has been vigoroursly tested and is deemed safe by both the USDA and FDA. Because these seeds are under patent the fruit, seeds, or plants cannot be sold by anyone other than the company that developed them, they are also very expensive! If you want a very purple tomato that is non-GMO Baker Creek Heirloom Seeds is trying to bring the Purple Galaxy Tomato to market. They were supposed to be available early this year but due to production issues will no longer be available to purchase (they even featured it on the cover of their 2024 seed catalog, oops!) Hopefully seeds will be available soon! In the meantime, there are lots of other heirloom and open-pollinated purple and black tomato varieties available, try them all! ConclusionI grow mostly open-pollinated and heirloom seeds (especially my tomatoes and peppers), but I will occasionally grow hybrids usually for specific reasons such as disease resistance, reduced bolting, or easier growth. I lost all my cucumber crop one year to downy mildew so ever since then I have grown at least one type of downy mildew-resistant cucumber variety along with my open-pollinated varieties. It is also possible that you can find open-pollinated disease-resistant varieties if you do not wish to grow any hybrids however in many cases disease resistance may not be as well documented, so it may take some trial and error with different varieties to find one that works. The other type of crop I generally grow from hybrid seed is broccoli and cauliflower. We tend to have large temperature fluctuations in the spring, and I grow much more consistent heads of broccoli and cauliflower with hybrid seeds than open-pollinated ones. One last note on the “organic” seed label. Organic simply means a seed was grown under organic conditions as defined by the USDA’s National Organic Program (1) This means that any fertilizer, pesticides, or any other treatment used to grow the plants must all be labeled organic, and the seeds cannot contain any genetically modified genes. There is no difference genetically between a seed of the same species and variety that was grown organically versus one that was not. You can purchase organic hybrid seeds just like you can purchase non-organic heirloom seeds. ReferencesLactic Acid Fermentation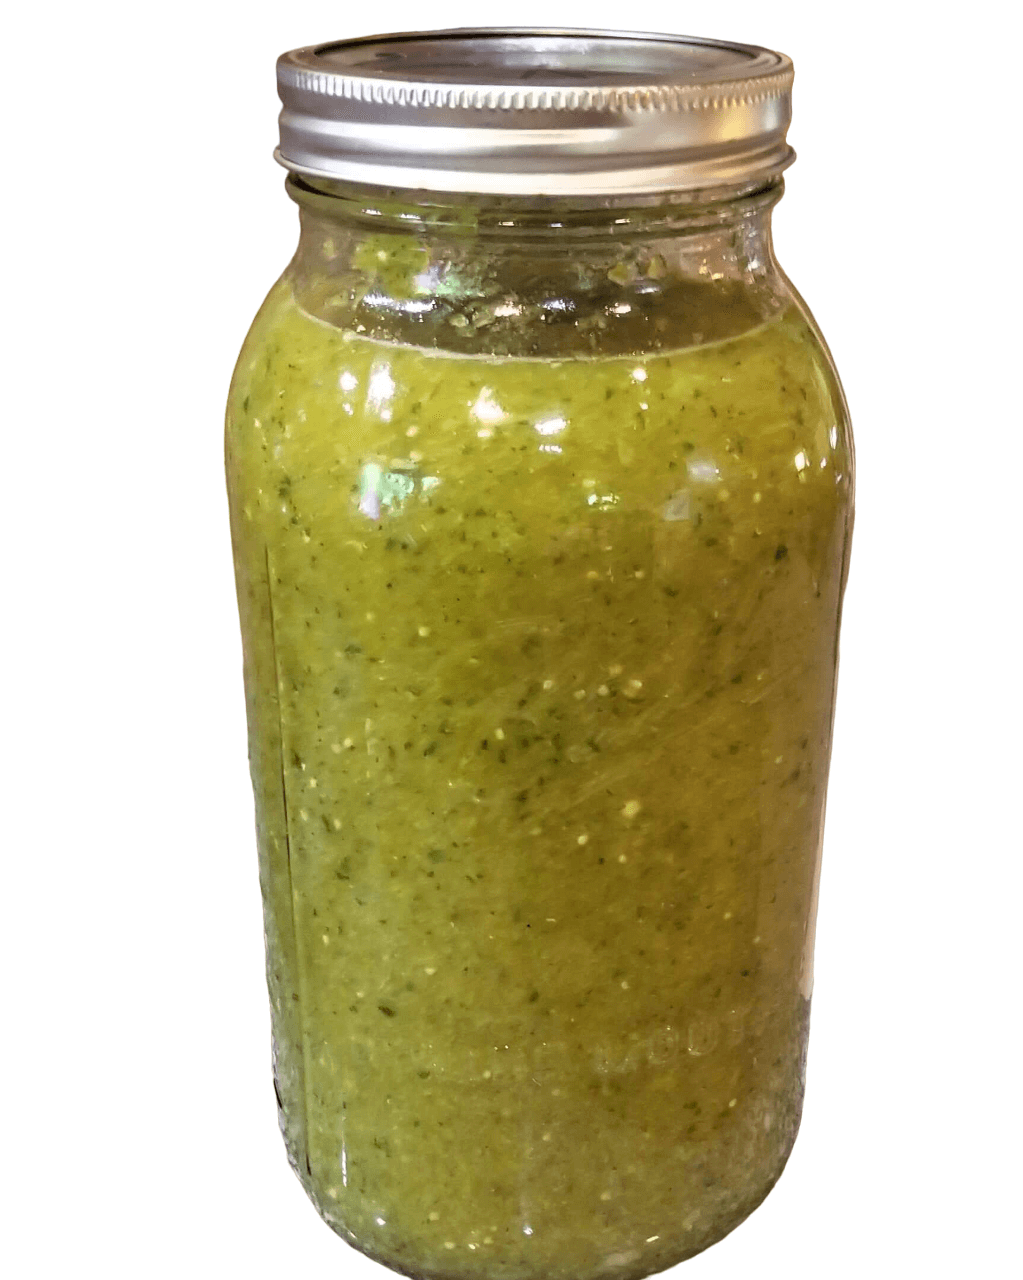 A half-gallon jar of fermented salsa verde. What is Fermentation?Fermentation is the anaerobic (without oxygen) breakdown of substances such as sugars and carbohydrates into other substances often acid or alcohol via microorganisms such as bacteria and yeast (1, 2). Microorganisms ferment to make energy, while acid, carbon dioxide, and ethanol (alcohol) are side products that we utilize (1). For food purposes, two different types of fermentation are most often used: ethanol and lactic acid fermentation (also known as lacto-fermentation). Yeast, specifically certain wine and beer strains or bread strains of Saccharomyces cerevisiae, which you can purchase, is generally used to make alcohol or bread, respectively (1). Carbon dioxide is released which is what causes bread to rise or it is off-gassed in the case of ethanol fermentation (1). In contrast, wild lactic acid bacteria, particularly certain strains of Lactobacillus, Leuconostoc, and Streptococcus, generally perform lacto-fermentation, although other bacteria may also play a role (1). Lacto-fermentation is used to make many common food products such as sauerkraut, kimchi, pickles, hot sauces, cheese, yogurt, and more (1, 2). A third type of fermentation sometimes performed at home uses acetic acid bacteria which are used to make vinegar and kombucha (2). Various fermented hot sauces and one of my favorite ways to use hot sauce, over eggs! Why Ferment?Fermentation is a form of food preservation. Before refrigeration, freezers, and safe canning equipment existed, fermentation was used to preserve the harvest and make food safer to store. Fermentation can also make food more nutritious and more digestible (2). Most cultures have food preservation techniques based on lacto-fermentation, ethanol fermentation, or both. I ferment not only to preserve the produce I grow but also because I like the taste. Fermented hot sauces and pickles taste different than a typical vinegar-based hot sauce or pickle. I am also prone to acid reflux and find that fermented foods are easier on my stomach than the typical vinegar-type pickle (although I love vinegar as well!). 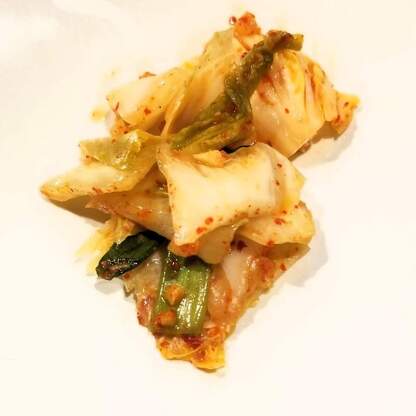 Fermented kimchi, one of my favorite ferments! How to FermentFermentation is a very safe method of food preservation assuming you start with enough salt. A good rule of thumb is to use at a minimum 2% salt, although some vegetables require more. For example, cucumbers consist of a lot of water therefore, up to 5% salt is better to prevent mold formation. For a good chart on how much salt to use and more information on how to make up the salt solution, I like this website. Because fermentation is one of the safest ways to preserve food, I am often willing to follow random internet recipes for fermentation (unlike canning where I only follow safe, tested recipes) because generally if a fermentation goes bad, you know. Just double-check how much salt to add to that vegetable for any fermentation recipe. If your fermentation turns slimy or moldy (anything fuzzy), throw it out! What is commonly called Kahm yeast (a white coating on top of the ferment that is not fuzzy) is safe to eat but can give the food an off flavor. 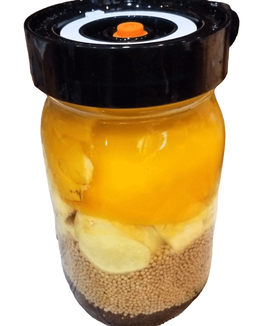 A mustard ferment with an Easy Fermenter lid. The key to successful fermentation is to keep everything below the brine and eliminate as much oxygen as possible at the top of the ferment. Anaerobic lactic acid bacteria grow without the presence of oxygen however mold contamination always occurs at the top of the ferment as it requires oxygen to grow. Once the fermentation gets started enough carbon dioxide is produced to push out excess oxygen and the risk of mold contamination is reduced. To keep oxygen from re-entering ferments I like wide-mouth mason jars (quart or half-gallon sizes are great), with glass weights to hold everything below the liquid brine and a lid to keep the air out. I often use the Easy Fermenter Lids or simple airlocks used for alcohol fermentation as they self-burp, so you do not need to keep opening the lids. If you use an actual lid you will need to release the gas produced often enough to keep the jar from exploding but you also run the risk of incorporating oxygen into the top of your ferment every time you crack the lid which can allow mold to grow. For larger ferments, you will likely want a fermentation crock. I like the water seal fermentation crocks with a lid in a moat at the top that holds water, forming an airlock. A small hole in the lid allows the gas to escape but the hole is covered by water to keep oxygen from entering the crock. A 3 gallon water sealed fermentation crock from Ohio Stoneware. The top moat is filled with water and the hole in the lid that allows gas to escape is visible in the second picture. Most fermentation crocks also come with stone weights to hold the vegetables below the brine. For a basic fermentation, you make up your salt solution (some things like sauerkraut are traditionally brined dry, meaning you add salt directly to the vegetables and the salt pulls liquid out) and pour it over your prepped vegetables. Make sure all the vegetables are covered, add your weight to keep the vegetables submerged, and attach the lid. Most ferments such as hot sauce go at least 30 days but commercially made Tabasco is generally aged 3 years, sauerkraut generally takes 6-8 weeks, and cucumbers are usually much shorter, 5-7 days although you can go longer if you want a sourer pickle. I tend to do shorter cucumber ferments to reduce the risk of mold formation and because I like crunchier pickles. In general, the longer the ferment the softer the vegetable will become. ResourcesFor sauerkraut and cucumber-fermented pickles, I follow Ball (one of the safe canning resources) recipes. Their online website only has a fermented tomato salsa recipe, but other fermentation recipes such as sauerkraut, pickles, hot sauces, and Worcestershire sauce are available in several of their books. See my Canning post for more information on the Ball books that are currently available. Pickles are more likely to mold in my experience, so I like the Ball recipe because it uses a little vinegar at the beginning of the ferment to help reduce the risk of contamination before the fermentation gets started. However, there isn’t enough vinegar added to inhibit fermentation. For fermentation resources other than Ball, I like the Insane in the Brine website, particularly for his hot sauce recipes. The author has also written a couple of books, which feature even more of his recipes than are available online. Other books I recommend include “The Noma Guide to Fermentation” by Rene Redzepi and David Zilber, “The Art of Fermentation” and “Wild Fermentation” by Sandor Ellix Katz, “Fermented Vegetables” and “Fiery Ferments” by Kirsten and Christopher Shockey, and “The Kimchi Cookbook” by Lauryn Chun. References
|
AuthorIn 2016, my family and I moved from the New York City area to small town Wisconsin. Our move, this website and blog (and our previous Etsy store) is the result of our desire over the past several years to simplify our lives, increase our quality of life, reconnect with nature, and enjoy a more self-sufficient life. I grew up as a country kid in central Pennsylvania working on my grandfather's fruit farm and as a corn "de-tassler" at a local seed farm. My background is in biology where my love of nature originated. I am a former research scientist and professor and have now transitioned to a part-time stay-at-home mom, self-employed tutor, and small business owner. Thank you for taking the time to check out my site. Archives
July 2024
Categories
All
|


 RSS Feed