|
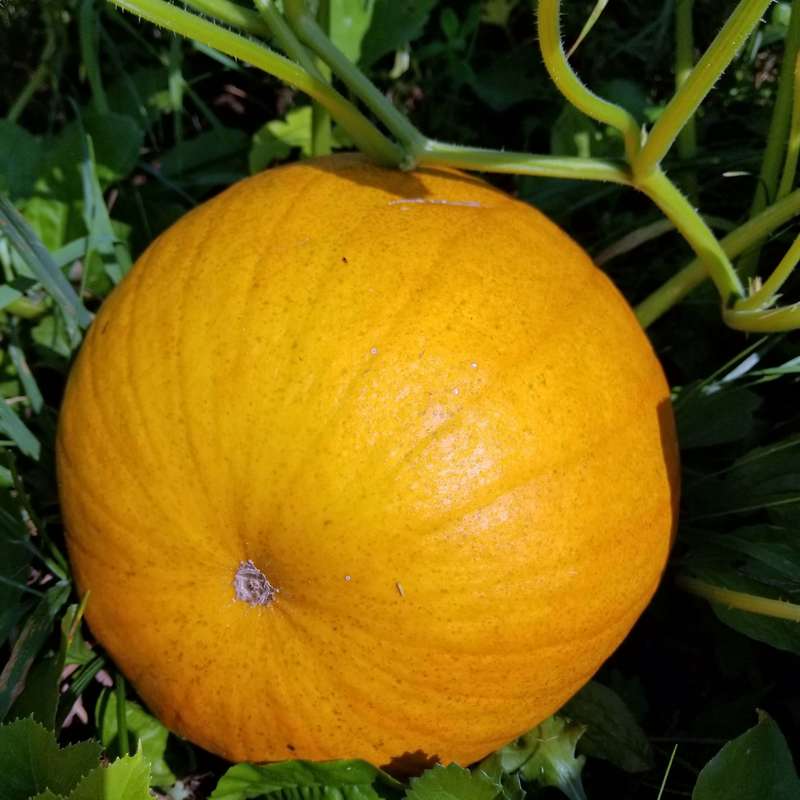
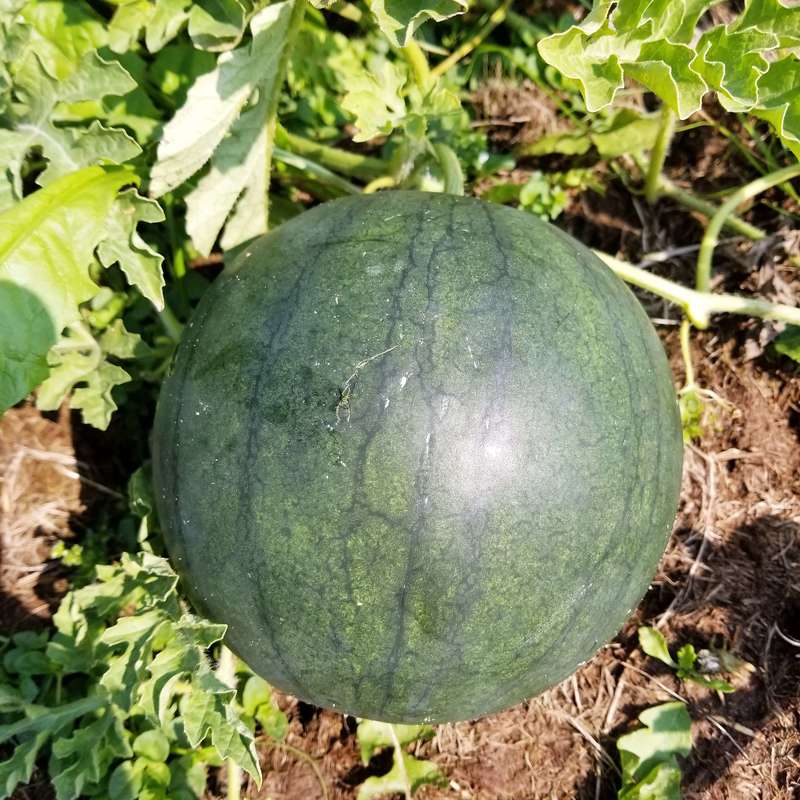
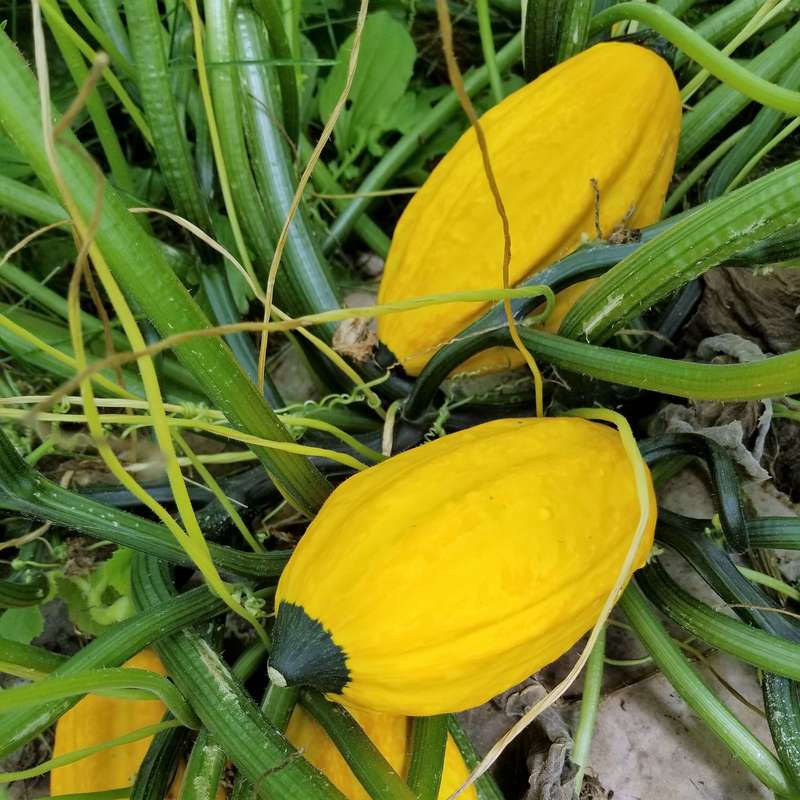
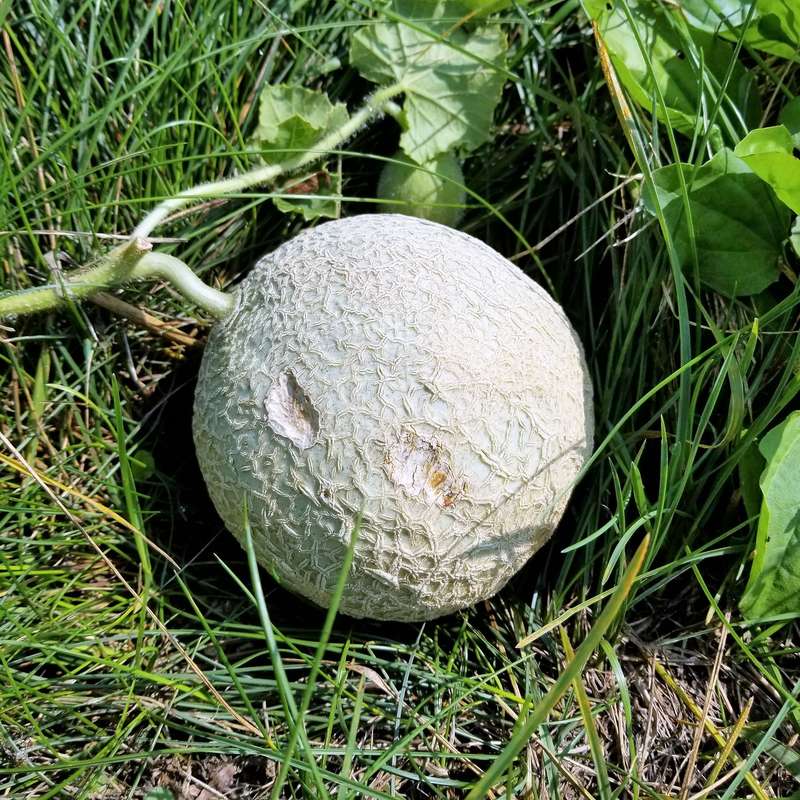
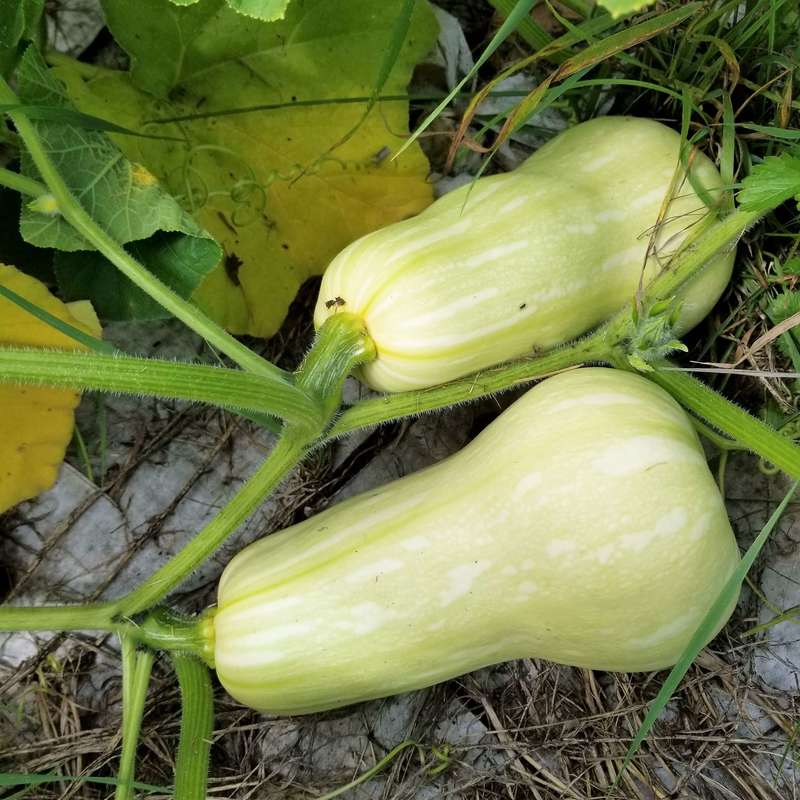
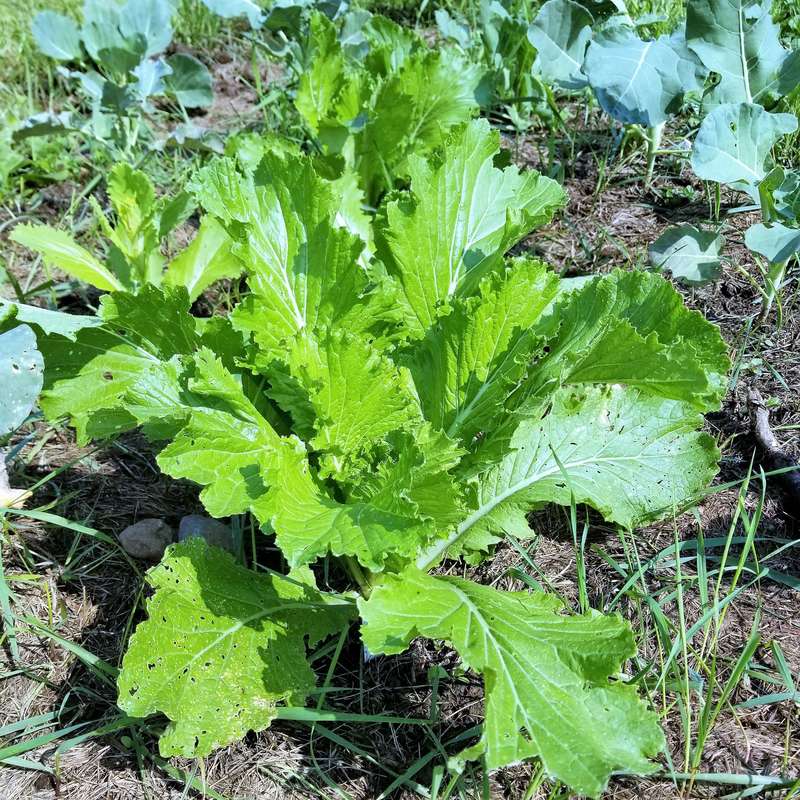
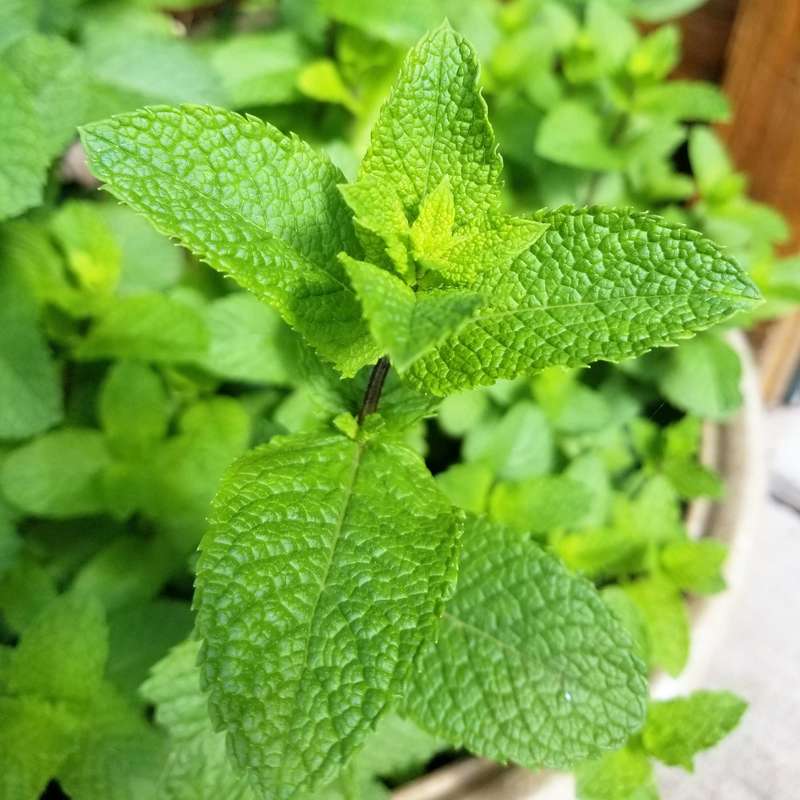
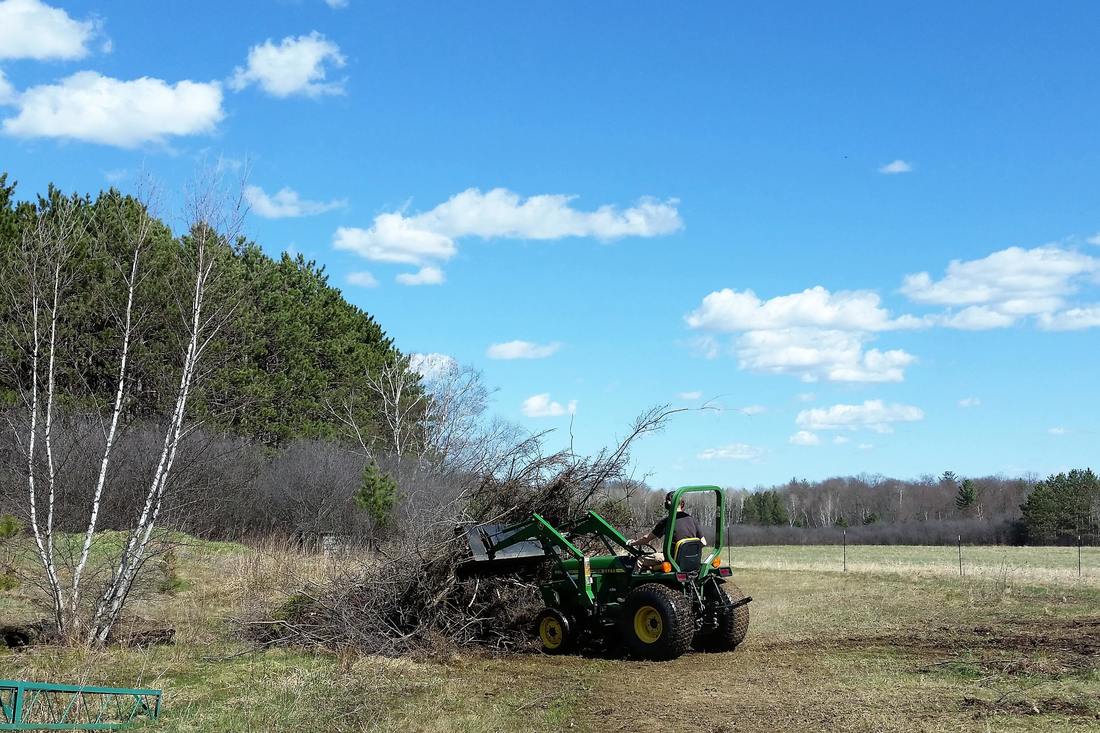
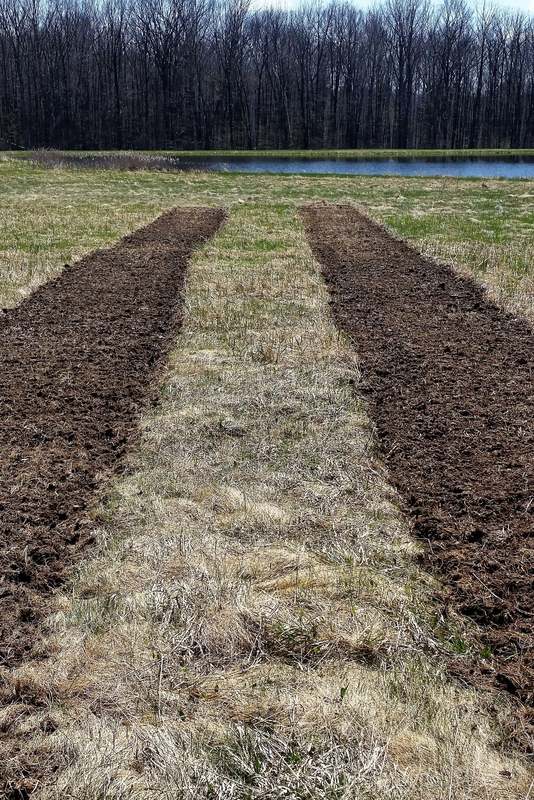
One of my favorite summer activities is gardening. My favorite types of gardening are vegetable and herb gardening. I grew up helping my parents with their garden and participated in 4H where I completed gardening activities and competed in the county fair. As a 12-year old I even had my own herb garden! One of the main reasons I enjoy gardening so much is because I love cooking and eating great-tasting food. Even if you live in an apartment there are ways you can still garden even if on a smaller scale. Container gardening or participating in a community garden are great options! In the following post, I will share some of my personal reasons for maintaining a vegetable garden and tips on how to get the most out of your garden. All the pictures that follow were taken from my garden this year. This is our first year gardening at our new house so we converted a field filled with grass and weeds into our garden. It is still a work in progress but even with a challenging rain-filled spring and early summer we have managed to produce a good number of fruits and vegetables. My Top 5 Reasons to Vegetable GardenReason 1: Taste and NutritionOne of the main reasons I love vegetable gardening is that fresh produce straight from the garden just tastes better. A sun-ripened tomato has so much more flavor and nutrition than one from the grocery store that was picked green and allowed to ripen on the truck, at the distributor, or at the store. Green tomatoes are often ripened via ethylene gas that is sprayed on them. Tomatoes naturally give off ethylene gas so there is likely nothing unsafe about this practice but it does have a huge effect on taste. Another reason I prefer fresh vegetables from the garden is that the time from plant to table is generally minutes to days whereas vegetables from the grocery store can be significantly older by time they make it to your plate. This dramatically affects the taste and nutrition of your food. 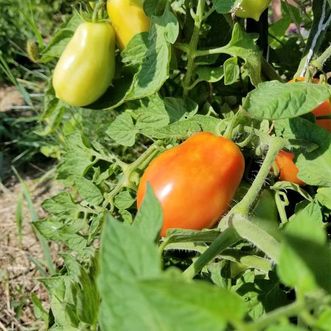 Roma tomatoes ripening in the sunReason 2: Saves MoneyThe second reason I love vegetable gardening is that it is cost effective. If you are new to gardening you will have to spend some money up front for the proper tools and supplies. However, much of the equipment can be re-used and will last for many years. You also need to buy seeds and/or plants to transplant each year but if your garden is successful you will make that money back many times over. If you have the room to start your own seeds indoors to transplant you will also save a significant amount of money. Finally, if you are trying to eat healthy or even organic it can get very expensive very quickly. Eating local is a great idea but not everyone can afford to do all their shopping at the local organic farmers market or grocery store. Growing your own vegetables, even if you do not use completely organic methods, does allow you to eat healthier even on a budget. Reason 3: Mental and Physical Well-BeingThe third reason I love gardening is because I love spending time outdoors. It is great for mental health and as a form of strength-building exercise. As an introvert, I absolutely need time outside away from crowds and people. Even a half hour working in my vegetable garden relaxes me, reduces anxiety, and keeps me grounded. I am also prone to joint and tendon issues so I need to be really careful about how much and what type of exercise and activities I participate in. Gardening allows me to stay active and increase my upper (and lower) body strength although it is very easy to overdo it! Reason 4: Passing it on to the Next GenerationThe forth reason I love gardening is because it allows me to raise my daughter in a manner that increases her activity, nutrition, and love of the outdoors. Heading out to the garden reduces screen time and keeps her moving and exploring. She absolutely LOVES picking vegetables and usually eats the tomatoes, carrots, peas, and green beans straight off the plants. It is also slowly teaching her patience. I have to remind her over an over that we need to wait to pick many of the vegetables until they fully mature and ripen. In my opinion one of the biggest problems (among many!) in America is the disconnect between the food supply and our dinner table. Most Americans do not know where their food comes from or how it is grown and produced. I love teaching my daughter that our food does not come from a grocery store! This is an even bigger problem with our meat supply but I will save that for another post! Reason 5: Self-SufficiencyMy last reason to garden is to increase self-sufficiency. It is virtually impossible these days to be completely self-sufficient. Ideally my family would be completely self-sufficient in regards to food, energy, finances, etc. However, this is generally not realistic for us or most other families. The time when you could make a living and provide for your family on your family farm is gone. However, food is one area where it is much easier to become at least partially self-sufficient. Growing your own fruit and vegetables and then learning proper preservation techniques is one of the best ways to become self-sufficient. I will focus another blog post in the future on preserving your harvest. If I have managed to convince you to maintain a vegetable garden then read on for some tips on how to garden most effectively. These tips are mostly designed for people just starting out but even if you are an experienced gardener you may find them helpful. Tips for Vegetable GardeningTip 1: Location, Location, Location!The first thing you need to think about when starting a vegetable garden is where you want to place your garden. If you are in apartment with a balcony obviously you would want to start there or in containers at a window. Whether you are gardening indoors or out, one of the biggest requirements is light. A south facing garden is best as most vegetables need a significant amount of light. If you are indoors you can always supplement natural light with fluorescent bulbs or grow bulbs. If you have a garden outdoors, the closer to the house the better. You are more likely to maintain your garden if it is easily accessible. Another consideration for location is soil quality and drainage. If you have many places to choose from you may want to get your soil tested before deciding on a location for the garden however even if the soil is not the best you can slowly amend the soil over the years to optimize growth. You also do not want to pick a very low-lying area where water tends to sit as good drainage is important for the growth of most plants. If you live in a dry arid climate you probably want to maximize drainage into your garden to decrease watering requirements. Our garden in Wisconsin is not limited by space or light unlike our raised beds when we lived in NY. We are lucky enough to have plenty of space and light but do have drainage issues in parts of the garden. 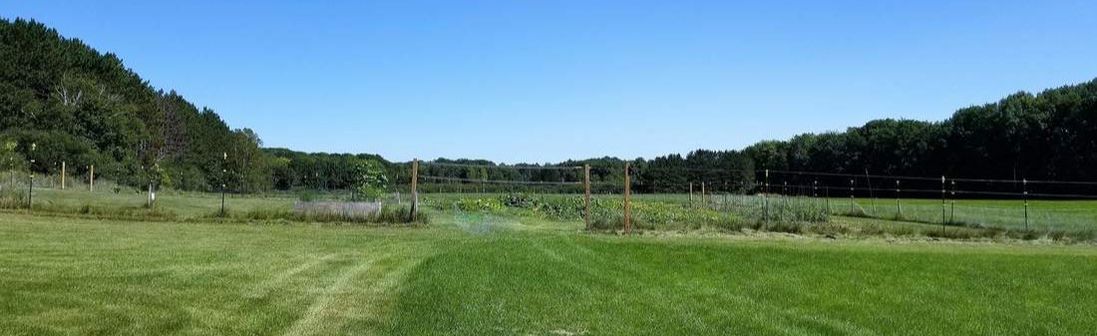 Vegetable Garden in the Middle of a FieldTip 2: Start Small!Once you have decided on location you need to pick a size for your garden. If you are new to gardening start small! It is very easy to get overwhelmed with a large garden and it is also more expensive in regards to time and money. You also need to buy less equipment with a smaller garden. You may be able to get away with just hand tools or a small hand-held rototiller. Larger gardens will likely require a walk-behind tiller or tractor with a roto-tiller. I am in the process of exploring no-till garden options but it can take many years to increase the quality of your soil to where this is a feasible option. As you can see from the above picture we did not take our own advice. We fenced in a half-acre, however probably 3/4 of the space is or will be dedicated to fruit and nut trees, grapes, and raspberries and other bush fruit. The last 1/4 is our vegetable garden which currently houses 2 raised beds but will hopefully have 4-6 in the future. Tip 3: Raised Beds!If you can afford it I would recommend at least one or two raised beds. You can fit more vegetables in a small space this way because the soil quality is usually better. If you make your own they may cost $100 or so each depending on the type of material you use, the soil you add, etc. This is an easy way to get a well-drained garden that isn’t too big and has high quality soil. I recommend adding in top soil, compost, and peat moss. If you are planning on many raised beds getting a dump truck load of soil and compost is much more economical than buying them in bags. 4’x8’ beds are optimal however I have tried 5’x10’ beds which worked but for a smaller person or child it is hard to reach to the center of a 5’ span. In addition to drainage and soil quality raised bed are great for any plant that you want to keep contained and prevent from spreading such as asparagus, horseradish, mint, etc. I currently have 3 raised beds, one for garlic, one for asparagus, and one for annual flowers. We hope to add one or two more each year. Ideally any smaller plants would go in raised beds although you can plant larger ones as well. In the future, I would love to grow onions, lettuce, spinach, peas, beans, broccoli, cauliflower, cabbage, peppers, and more in raised beds. The bigger plants like squash, pumpkins, and corn generally grow well and are easier to maintain directly in the ground. A great resource for raised bed gardening is Mel Bartholomew’s “Square Foot Gardening” book. Although he crowds his plants in a little closer than I do for many of mine it is still a great resource if you are just getting started. 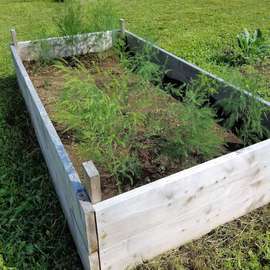 4x8 Foot Raised Asparagus BedTip 4: Don't Plant in Rows!The traditional way of planting involved straight rows of plants. However, you make better use of your space if you plant using the square foot method where you utilize all available space. Just remember to leave rows or spaces where you to need access to pick. For example, vine plants like winter squash and pumpkins easily overtake any rows you may try to maintain. However, these plants require very little maintenance throughout the growing season so I like to leave 6 or 8 feet between plants but designate an entire quadrant of my garden to them without any rows. For vegetables like leaf lettuce or spinach and beets and carrots I simply disperse my seeds into a quadrant that is small enough for me to reach into to weed if necessary. By skipping the rows I fit more vegetables into a smaller space. Although this does often require more thinning depending on how thickly the seeds are dispersed. 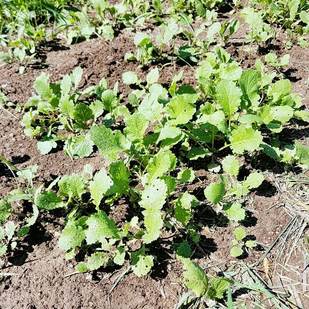 Turnips that are Dispersed, not Planted in Rows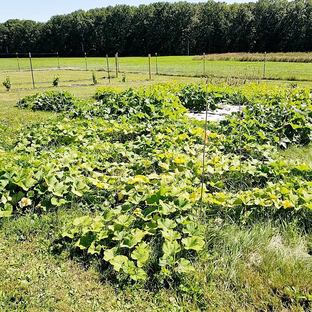 Winter Squash, Gourds, and Pumpkins without RowsTip 5: Mulch is your Friend!One of the best tips I have heard recently was to use cardboard boxes or newspaper to mulch your garden and prevent weeds. Spend the winter months collecting your newspaper and extra boxes or find free ones online. Remember to remove any plastic tape or metal staples from the boxes. The ink in newspapers is almost always soy-based so it is safe to use in gardens. Then when you plant your garden in the spring lay the boxes and newspapers out flat on the edges of your garden, in any rows, or between plantings to prevent weeds from growing. You’ll likely need to weigh your boxes and newspaper down with either mulch or rocks if mulch is in short supply. You can also use mulch directly without the boxes such as leaves from the fall, grass clippings, compost, etc. This will dramatically cut down on the amount of weeding you need to do and make gardening much more pleasant. 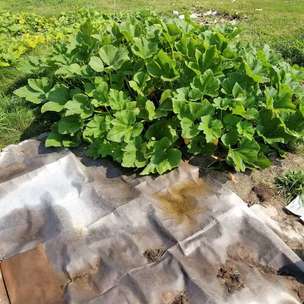 Cardboard Boxes Dramatically Decrease WeedsTip 6: Hill your Crops!My last tip involves drainage. If you cannot afford raised beds or don’t want to use all raised beds, drainage can be a huge issue depending on your location. This year we planted some of our vine crops in hills and others we just planted straight into the ground. Unfortunately, this spring and early summer we received 6 to 8 inches of rain above average for a three-month period. The squash planted in hills grew much better than the squash that was planted flat into the ground. Most of our crops that weren’t hilled such as some squash, onions, and peas rotted in the ground because the water didn’t drain well. So, if your garden is in a low-lying area, you have a high clay soil that doesn’t drain well, or you are prone to a wet spring/summer you may want to hill or mound many of your plants. It’s much easier to water your garden when needed then try to remove too much water. I’m sure there are many other tips and that I could come up with but please feel free to send any comments or questions to me, either in the comments section below or via my contact page. Also, if there is any topic that you wish me to cover in more detail please let me know. Other topics I would like to discuss in the future include fencing, composting, growing vegetables vertically, seed saving, preserving, and lots more!
5 Comments
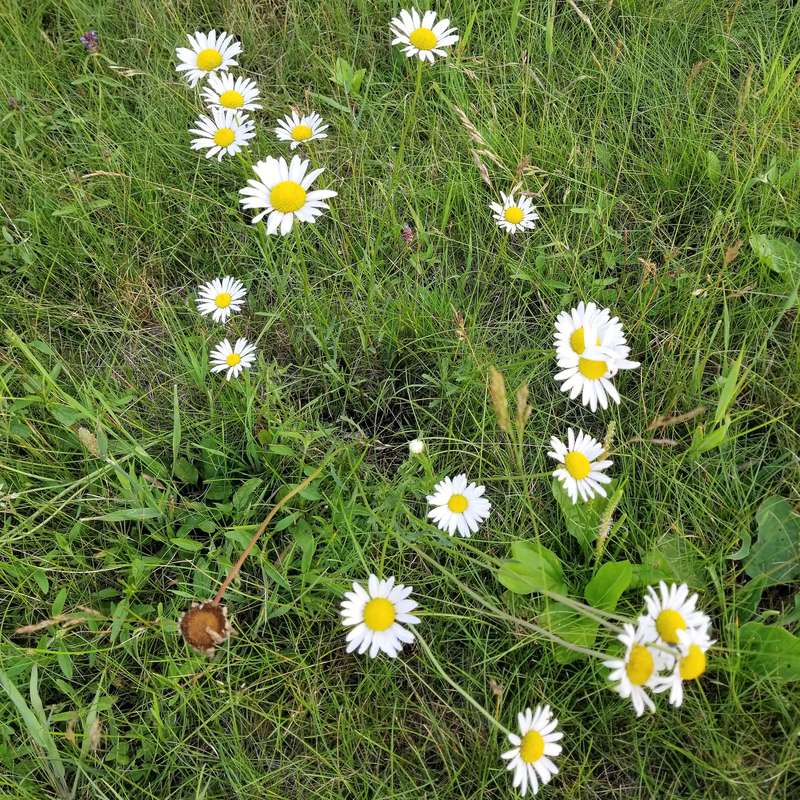
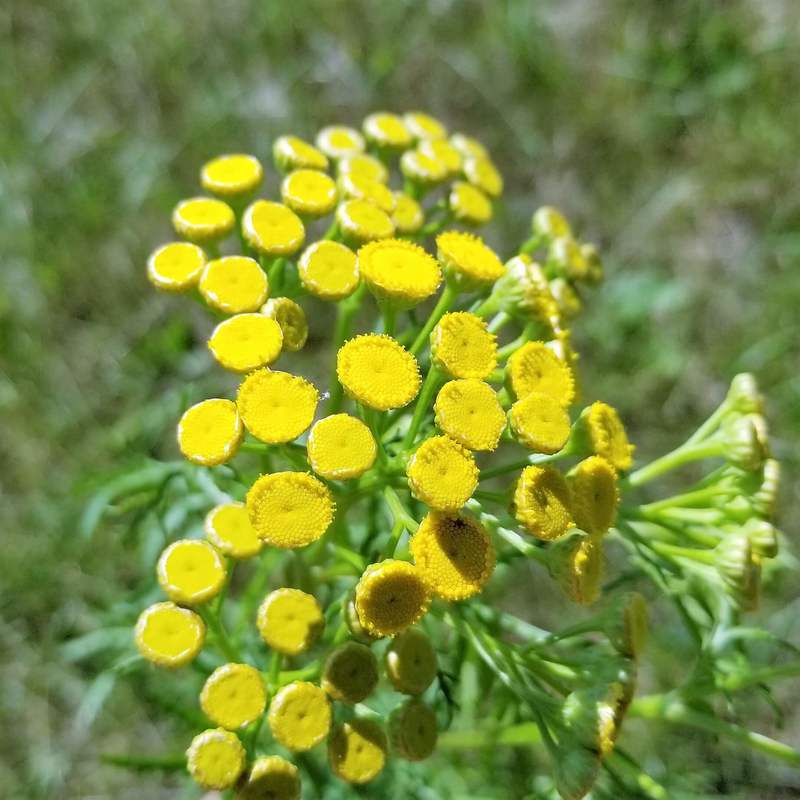
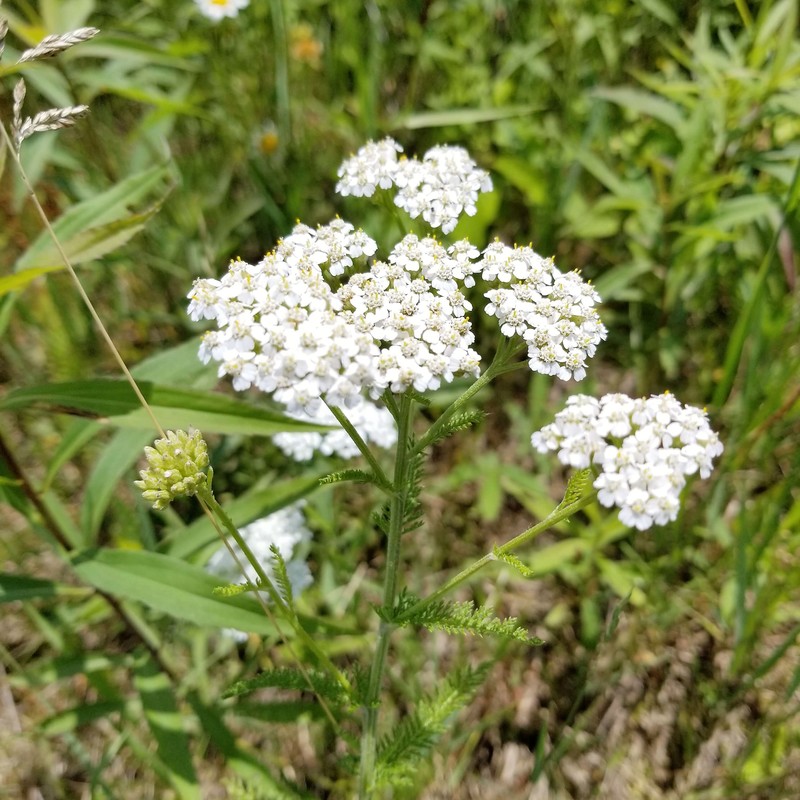
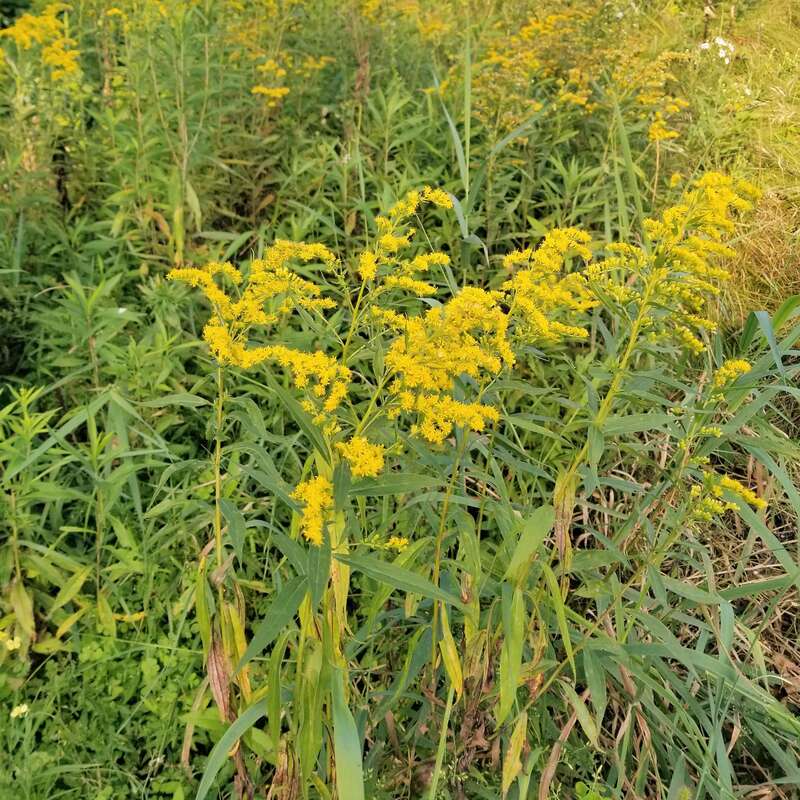
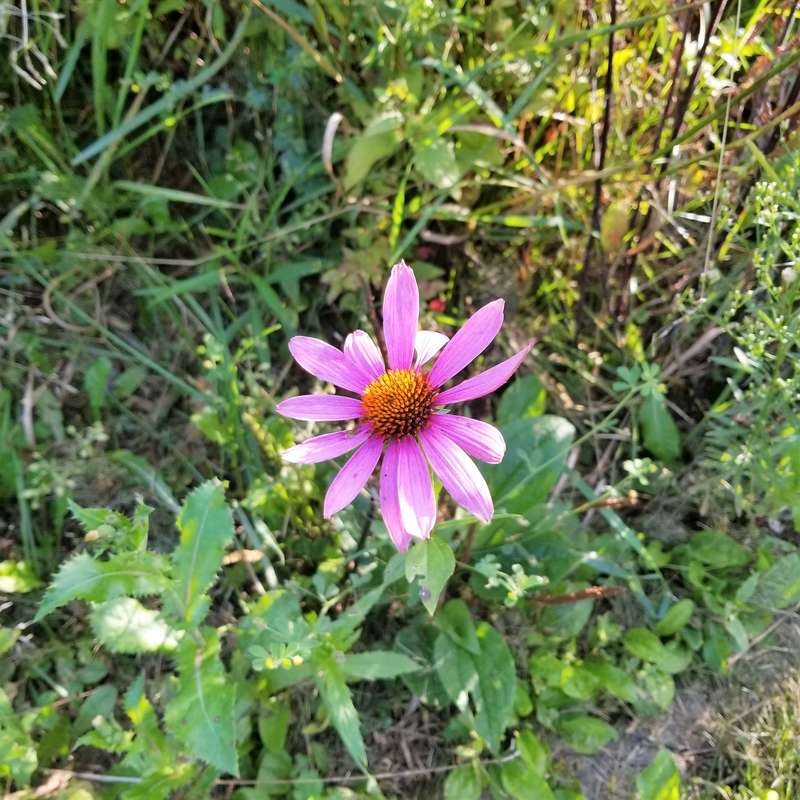
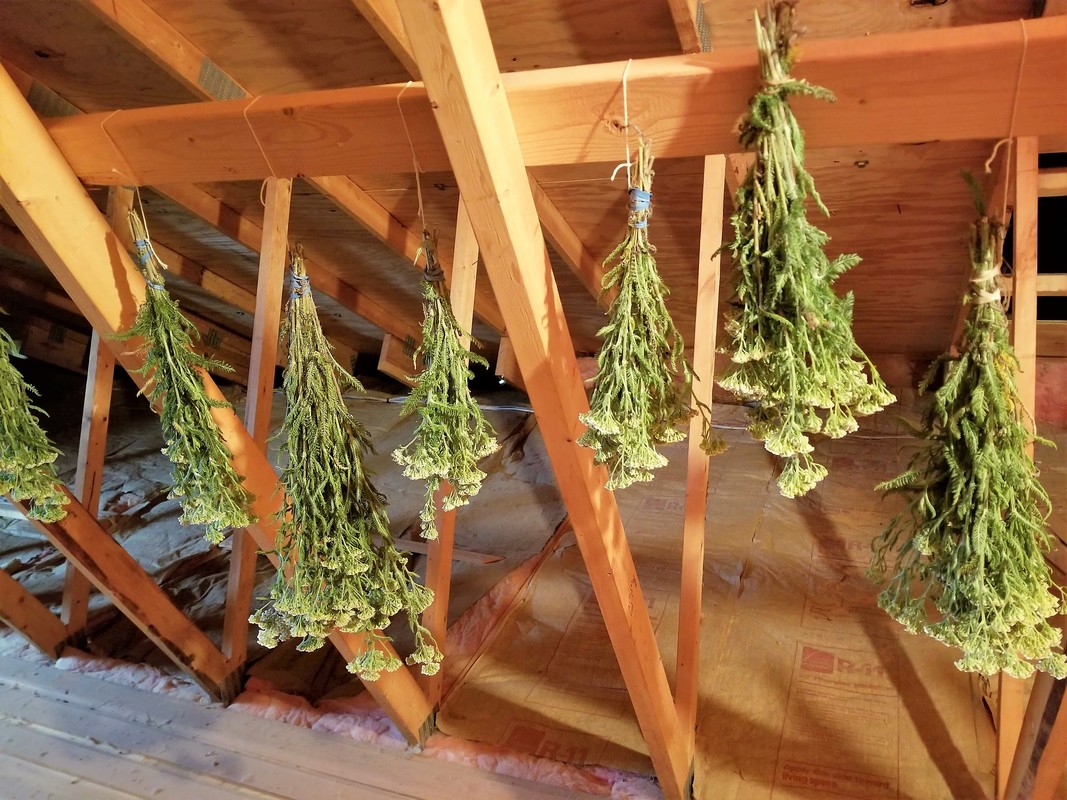
Drying Wildflowers I have recently started drying both wildflowers and cultivated flowers to sell on my Etsy and eBay sites (update, I no longer sell online). I love gardening but have minimal experience with ornamental gardening and flower gardening. I prefer vegetable and herb gardening (mostly because I like cooking and eating). When we moved into our home last summer we had so many flower beds that were only partially or not at all maintained. We did what we could last year to improve the flower beds and this Spring we bought a load of mulch to help reduce weeds and bring the beds back to life. Some flower beds have received more attention than others but hopefully, over the next few years, we will get them all back to their former glory. I have also slowly begun filling in the beds with multi-purpose herbs. Herbs are beautiful in flower beds and most can also be used in cooking or teas. I have also begun the long task of identifying all the bushes, shrubs, flowers, and ground covers in our beds. In addition, we have tons of wildflowers growing on our property some of which I am familiar with but many others are unknown to me. Pictured below are some of the wildflowers on our property which I have managed to identify. Unfortunately, many of them are invasive or not even native to my area. Wildflowers Oxeye Daisy Yellow Tansy White Yarrow |


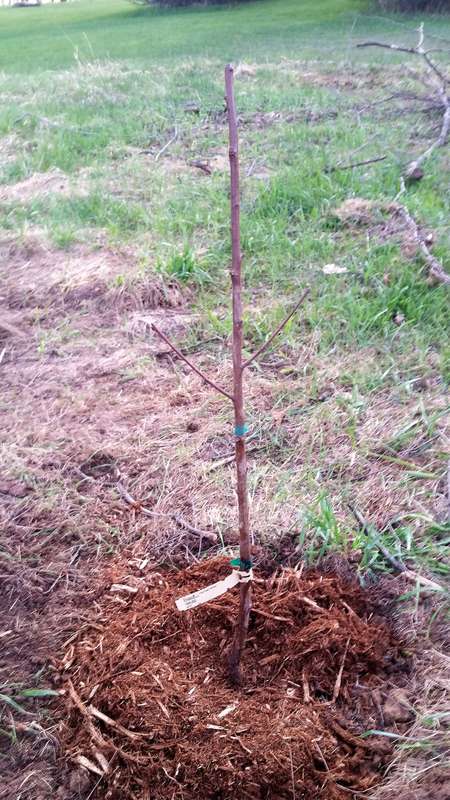
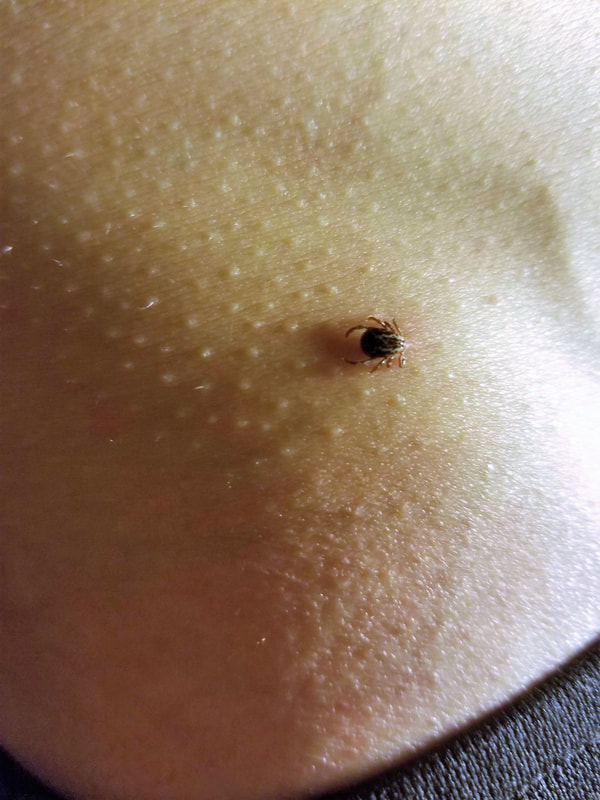
| Once our plot was tilled, we needed to put up a fence as quickly as possible. We have a large number of deer on our property and in the surrounding area (as evidenced by the fact that we hit three deer in a six-month period with our vehicles!) so a fence is absolutely necessary. We fenced in roughly a half acre, a 150’ x 150’ square. We used poultry netting for the bottom 3 feet with an extra 1 foot that we turned outward at the base to discourage digging under the fence. The top 3 feet of the fence we strung with 3 electric fencing wires. Because we do not have electricity close enough by for the fence we bought a solar powered electric fencer to power the fence which works very well. Once the fence was done and the grapes and fruit trees planted we focused on our vegetable garden. In addition to our large roto-tilled area where we planted corn, lots of vine crops, beans, tomatoes, and peppers, my husband made two raised beds for me (with hopefully many more in the future!). One we used for asparagus, the other I planted with annual flowers for cutting and drying. Other things we have done this summer include build a wooden play set for our daughter which we promised to do as we had to leave her other one in New York when we moved. We are currently in the process of sanding and re-staining our log home (a much bigger task than anticipated)! We discovered some logs were beginning to rot so this was definitely a necessary task this summer. Lastly, we have spent the entire spring and summer fighting the ticks which will likely be a separate blog post in the future. We mostly have dog or wood ticks but have also found some deer ticks which carry Lyme disease. We had a huge problem with deer ticks in NY (in fact we lived in one of the worst counties for Lyme disease in the US) so we are glad to exchange them for wood ticks. But we have so many wood ticks here that we find them everywhere including our house, clothes, yard, field, play set, fish tank, and more. Daily tick checks are a must! |

Author
In 2016, my family and I moved from the New York City area to small town Wisconsin. Our move, this website and blog (and our previous Etsy store) is the result of our desire over the past several years to simplify our lives, increase our quality of life, reconnect with nature, and enjoy a more self-sufficient life. I grew up as a country kid in central Pennsylvania working on my grandfather's fruit farm and as a corn "de-tassler" at a local seed farm. My background is in biology where my love of nature originated. I am a former research scientist and professor and have now transitioned to a part-time stay-at-home mom, self-employed tutor, and small business owner. Thank you for taking the time to check out my site.
Marisa
Archives
July 2024
June 2024
May 2024
April 2024
March 2024
February 2024
January 2024
December 2023
November 2023
March 2023
January 2023
May 2019
March 2019
November 2018
October 2017
September 2017
August 2017
February 2017
January 2017
Categories
All
3-Pronged Cultivator
Aerogarden
Antique
Apothecary Glasses
Artichokes
Atlas Gloves
ATV
Bacillus Thuringiensis
Bare Root Trees
Beer Glasses
Berries
Black-Eyed Susan
Bleached Pinecones
Bleached Pinecone Wreaths
Bt
Butterflies
Cabbage
Canning
Celery
Chard
Chemistry Glasses
Chickens
Chicken Tractor
Cold Crops
Cold Frame
Collards
Compost
Concord
Coneflowers
Cornish Cross
Daisies
Deer
Deer Fencing
Dehydrating Food
Dried Flowers
Drip Irrigation
Dual Purpose Chickens
Ducks
EBay
Echinacea
Edelweiss
Eggs
Extend The Growing Season
Fall Gardening
Farm Life
Favorite Gardening Tools
Fermentation
Flower Gardening
Food Preservation
Frost Dates
Fruit
Fruit Trees
Fruit Wine
Garden Hod
Garden Huckleberries
Gardening
Garden Pests
Garden Seat
Garlic Scape Recipes
Garlic Scapes
GMO Seeds
Goldenrod
Grapes
Greenhouse
Growing Garlic
Growing Herbs
Health
Heirloom Seeds
Herbs
Hill Crops
Home Decor
Homemade Jam
Hori Hori Soil Knife
Hot Sauce
How To Start Seeds
Hybrid Or F1 Seeds
Hydroponics
Insecticides
Itasca
Japanese Weeding Sickle
Jerusalem Artichokes
Kale
Karner Blue Butterfly
Lactic Acid Fermentation
Leatherman Multi-Tool
Lettuce
Lupine
Maple Syrup
Marquette
Meat Birds
Milkweed
Monarchs
Mulch
Mulching
Native Plants
Nightshades
Onions
Open Pollinated Seeds
Orchard
Organic Gardening
Organic Pest Control
Peas
Peppers
Pest Control
PIckles
Pinecone Wreath
Pinecone Wreaths
Pruners
Purple Coneflower
Raised Beds
Ranger Chickens
Rudbeckia Flowers
Sauerkraut
Save Money
Seed Companies
Seed Saving
Seed Tapes
Self-Sufficiency
Soaker Hoses
Square-Foot Gardening
Sun Hat
Sustainability
Tansy
Ticks
Tomatoes
Trailer
Turnips
Two Ponds Farm
Vegetable Gardening
Vintage
Wine
Wine Grapes
Wine Grapes For Northern Climates
Wood-Fired Evaporators
Wreaths
Yarrow
 RSS Feed