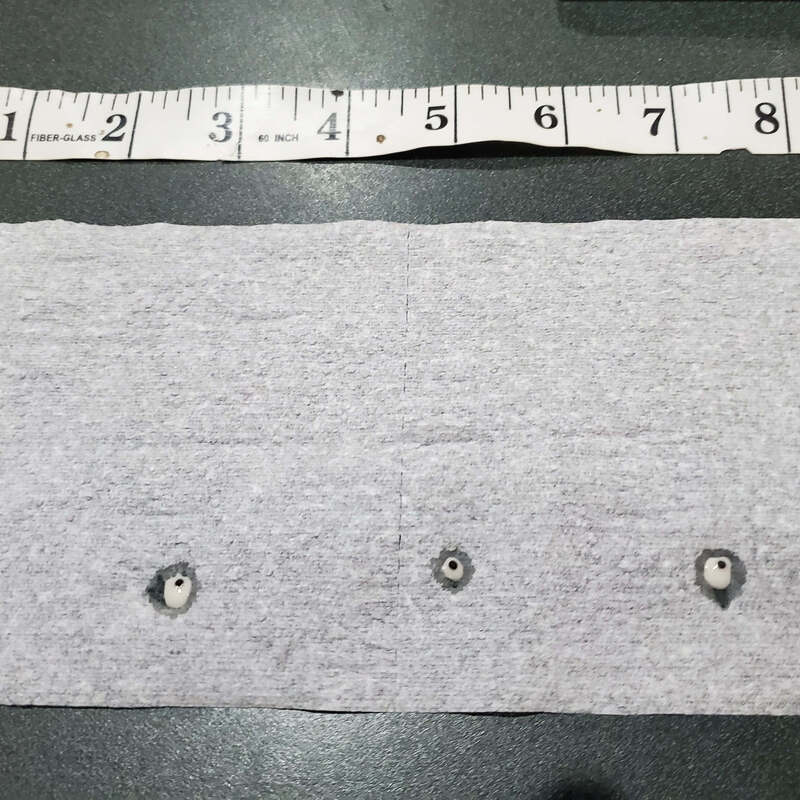
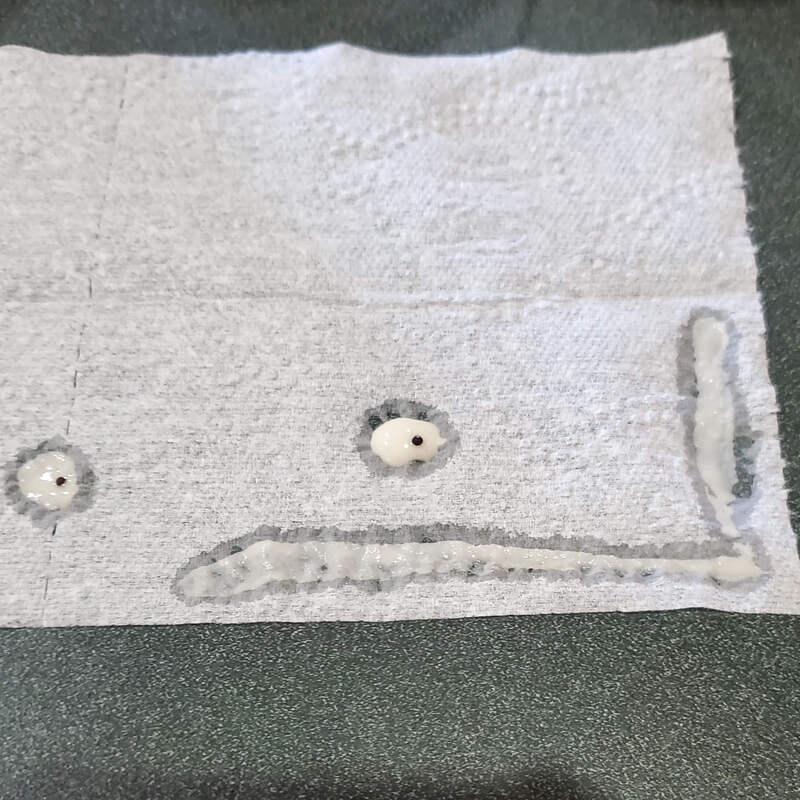
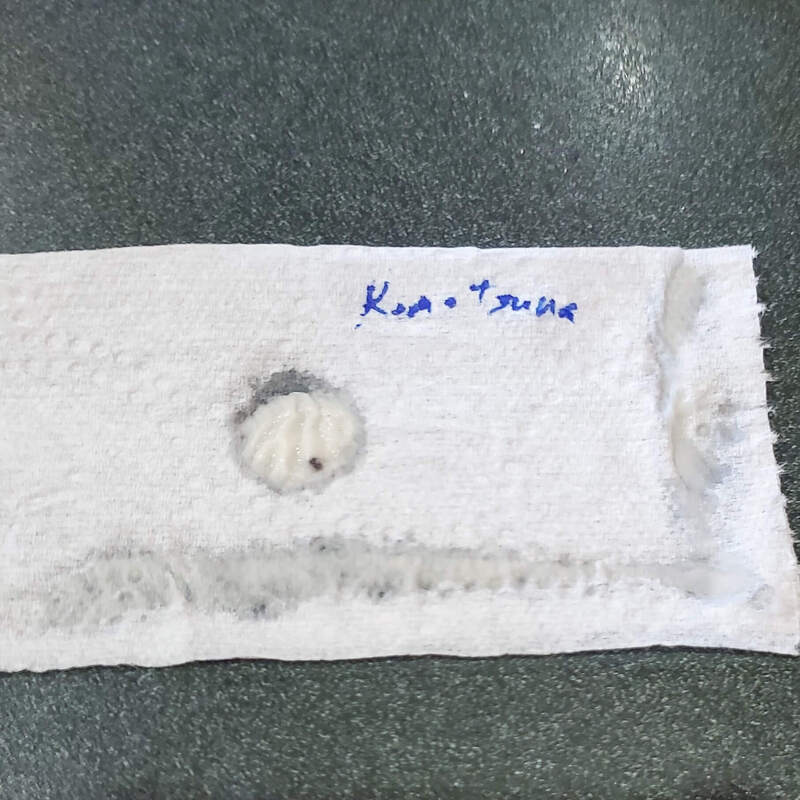
Two Ponds Farm
  • Home
  • About
  • Blog
  • Contact
  • Privacy Policy
  • Garden Pictures
  • Chicken and Duck Pictures
  • Native Plant Pictures
  • Game Camera Pictures

3/18/2023

Make Your Own Seed Tapes

0 Comments

Read Now
 

Make Your Own Seed Tapes

​I love seed tapes for lots of vegetables that are directly sown, but I particularly love them for those that have small seeds, which makes them hard to sow thinly. If I sow the seed too thick, I must then spend hours every summer thinning my plants, or I end up with skinny, stunted plants. My favorite vegetable to use seed tapes for is carrots, as I have difficulty getting these seeds thin enough when sowing. I have even tried mixing the carrot seed with sand and using a shaker to spread the seed more evenly, but I still end up with carrots too close together. The convenience and speed of planting seed tapes are also nice as you can just lay them down and top them with soil (just don’t try it on a windy day).
Picture
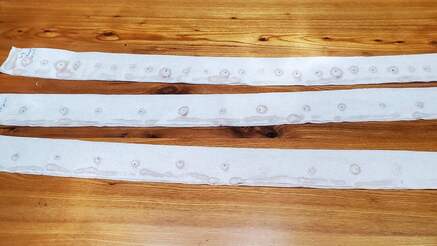
These are completed seed tapes that are laid out flat to dry.
​The big disadvantage to seed tapes is that they are much more expensive than just buying the seeds alone. Additionally, the varieties you can buy them in are limiting. My favorite part of gardening is trying lots of different varieties, but generally, you can only get very common varieties in tape form. Although making seed tapes is time-consuming, I find that I prefer to spend my time in the late winter making my seed tapes, when I am less busy rather than taking the time to thin plants in the summer, when I am much busier. Plus, most gardeners I know have a hard time thinning as they hate to kill any plant.
Picture
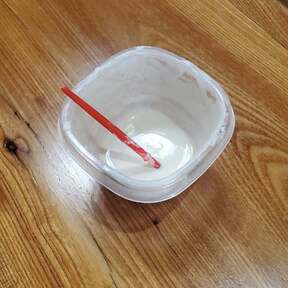
Flour-water mixture with a paintbrush that I use to make the seed tapes.
​I found two common methods online to DIY seed tapes. One method is to use school glue and the other is to use a flour-water mixture. I tried the flour-water mixture first and it worked so well that I have never bothered to try the glue method. You will need toilet paper (either one-ply or pull the two-ply apart so you use one sheet), toothpicks or a paintbrush, a small container to mix flour and water in until you get a runny paste, and a tape measure. The steps are simple:
The flour mixture is dotted out at set intervals and a seed placed in each dot (left). The flour mixture is placed along the entire bottom/side edge of seed tape to seal (center). Seed tape is folded over to seal it and labeled with the variety (right).
  1. Roll out the toilet paper to the desired size. Separate into 2 sheets if it is double ply so you only use one layer. My raised beds are 4’x8’ so I make my seed tapes 4-foot long as 8-foot tapes would be too hard to handle.
  2. I fold the paper in half the long way, so I know where the center is and then fold them back open to make the tap. You will eventually fold them in half at the end when you glue the two halves together using the flour paste.
  3. Use your paintbrush or toothpick to place dots of flour mixture at set intervals depending on the spacing the seed pack recommends. I prefer to use a paintbrush, but both options work well.
  4. Place a seed in each dot of flour paste. If your seeds are old or you often have difficulty germinating, you can place more seeds per dot but you may end up needing to thin them.
  5. Use your paintbrush or toothpick to lay a line of flour mixture along the bottom edge/sides of the toilet paper. This will be the seal along the edge of the tape.
  6. Fold your toilet paper the long way using the flour mixture to seal the edges. Press down gently to make sure you have good contact.
  7. Allow the seed tape to dry, fold it up, and store it in a dry location until it is time to plant. I use a plastic tote that is easy to carry out to the garden.
Picture
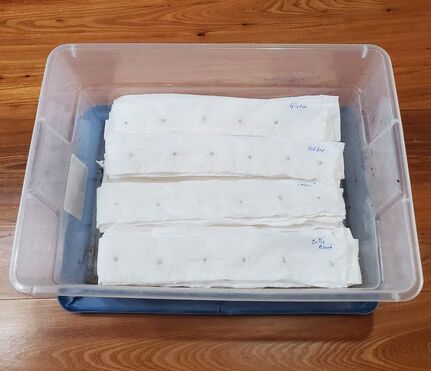
I fold up the seed tapes once they are dry and store them in a plastic tote until it is time to plant.
​Last, some lessons I learned using seed tapes:
  1. The seed tapes are rather delicate so be careful not to rip them. Also, do not make your flour mixture too runny as too much water wets the tape too much, making it more prone to tearing.
  2. Do not attempt to plant seed tapes on your own when it is windy, trust me, you will regret it.
  3. Do not forget to close your garden gate after planting seed tapes (or any seeds) allowing your chickens to get in your raised beds and destroy all your hard work.

Share

0 Comments
Details

    Author

    In 2016, my family and I  moved from the New York City area to small town Wisconsin. Our move, this website and blog (and our previous Etsy store) is the result of our desire over the past several years to simplify our lives, increase our quality of life, reconnect with nature, and enjoy a more self-sufficient life. I grew up as a country kid in central Pennsylvania working on my grandfather's fruit farm and as a corn "de-tassler" at a local seed farm. My background is in biology where my love of nature originated. I am a former research scientist and professor and have now transitioned to a part-time stay-at-home mom, self-employed tutor, and small business owner. Thank you for taking the time to check out my site.
    ​Marisa

    Archives

    January 2025
    December 2024
    November 2024
    October 2024
    September 2024
    August 2024
    July 2024
    June 2024
    May 2024
    April 2024
    March 2024
    February 2024
    January 2024
    December 2023
    November 2023
    March 2023
    January 2023
    May 2019
    March 2019
    November 2018
    October 2017
    September 2017
    August 2017
    February 2017
    January 2017

    Categories

    All
    3-Pronged Cultivator
    Aerogarden
    Antique
    Apothecary Glasses
    Apple Cider
    Apple Varieties
    Aronia Berries
    Artichokes
    Atlas Gloves
    ATV
    Bacillus Thuringiensis
    Bare Root Trees
    Beer Glasses
    Berries
    Black-Eyed Susan
    Bleached Pinecones
    Bleached Pinecone Wreaths
    Blossom End Rot In Tomatoes
    Books
    Bt
    Butterflies
    Cabbage
    Canning
    Celery
    Chamomile
    Chard
    Chemistry Glasses
    Chickens
    Chicken Tractor
    Cider
    Cold Crops
    Cold Frame
    Collards
    Compost
    Concord
    Coneflowers
    Cornish Cross
    Daisies
    Deer
    Deer-fencing
    Dehydrating Food
    Dried Flowers
    Drip Irrigation
    Dual Purpose Chickens
    Ducks
    EBay
    Echinacea
    Edelweiss
    Eggs
    Environment
    Extend The Growing Season
    Fall Crops
    Fall Gardening
    Farm Life
    Favorite Gardening Tools
    Fermentation
    Fermenting Wine
    Flower Gardening
    Food Preservation
    Frost Dates
    Fruit Trees
    Fruit Wine
    Garden Hod
    Garden Huckleberries
    Gardening
    Garden Pests
    Garden Seat
    Garlic
    Garlic Scapes
    GMO Seeds
    Goldenrod
    Grapes
    Greenhouse
    Growing Herbs
    Health
    Heirloom Seeds
    Herbs
    Hill Crops
    Home Decor
    Homemade Jam
    Hori Hori Soil Knife
    Hot Sauce
    How To Start Seeds
    Hybrid Or F1 Seeds
    Hydroponics
    Insecticides
    Itasca
    Japanese Weeding Sickle
    Jerusalem Artichokes
    Kale
    Karner Blue Butterfly
    Lactic Acid Fermentation
    Leatherman Multi-Tool
    Lettuce
    Lupine
    Maple Syrup
    Marquette
    Meat Birds
    Milkweed
    Monarchs
    Mulch
    Native Plants
    Nightshades
    No-Mow May
    Onions
    Open-pollinated-seeds
    Orchard
    Organic Gardening
    Organic Pest Control
    Overwintering Fall Crops
    Peas
    Peppers
    Pepper Varieties
    Pest Control
    Pickles
    Pinecone Wreath
    Pinecone Wreaths
    Pruners
    Purple Coneflower
    Raised Beds
    Ranger Chickens
    Rudbeckia Flowers
    Sauerkraut
    Save Money
    Seed Companies
    Seed Saving
    Seed Tapes
    Self-Sufficiency
    Slow-Mow Summer
    Soaker Hoses
    Square-Foot Gardening
    Squash And Pumpkin Species
    Storage Onions For Northern Climates
    Sun Hat
    Sustainability
    Tansy
    Ticks
    Tomatoes
    Tomato Varieties
    Trailer
    Turnips
    Two Ponds Farm
    Vegetable Gardening
    Vintage
    Wine
    Wine Grapes
    Wine Grapes For Northern Climates
    Wood-Fired Evaporators
    Wreaths
    Yarrow

    RSS Feed

© 2024 Two Ponds Farm All Rights Reserved

  • Home
  • About
  • Blog
  • Contact
  • Privacy Policy
  • Garden Pictures
  • Chicken and Duck Pictures
  • Native Plant Pictures
  • Game Camera Pictures