Open-Pollinated, Heirloom, Hybrid, and GMO Seeds I see a lot of confusion online about the different types of seeds that are available for purchase. Here I will attempt to clarify the differences between them, allowing you to make the best-informed decision about what types of seeds are best for your garden. Open-Pollinated vs Heirloom SeedsOpen-pollinated and heirloom seeds are similar in that both types of seeds can be saved year after year as long as they are grown distanced from different varieties of the same species to prevent cross-pollination (1). These seeds are genetically stable and manifest similar phenotypes (physical characteristics) when grown (1). Open-pollinated seeds arise from cross-pollination of separate plants of the same species AND variety or self-pollination from the same flower or separate flowers on the same plant (1). Self-pollinating varieties can generally be grown closer together with less risk of cross-pollination but unless you isolate the flower and hand-pollinate there is always the risk that the wind or an insect cross-pollinated for you if another variety of the same species is growing nearby (1). Tomatoes and peppers are probably the most saved seed by home gardeners, and I found that peppers are more likely to cross than tomatoes. I do not attempt to isolate my plants because I am only saving seeds for my use, and I do not mind the uncertainty of growing a possible hybrid the following year. Heirloom seeds are an older variety of open-pollinated seeds (1). Generally, any seed older than 50 years is considered an heirloom but that is not universally agreed upon (2). Heirloom seeds must be open-pollinated but open-pollinated seeds are not necessarily heirlooms. If you are interested in saving seeds and want to make sure the seeds you collect will grow to be the same as their parents, then you must use open-pollinated or heirloom seeds. New varieties of open-pollinated plants can be made using labor-intensive traditional plant breeding methods that involve crossing 2 varieties, collecting the seeds from plants manifesting the characteristics you are looking for, growing new plants from those seeds, and repeating for many years until you have a stable seed that produces the same type of plant year after year. Although new open-pollinated plants can take years to develop, once you have stable seeds, they can be propagated easily via saving seeds (assuming no other varieties were nearby to cross-pollinate). Hybrid or F1 SeedsHybrid seeds (also known as F1, or first generation after the cross seeds) are from cross-pollination of two genetically different varieties of the same species of parent plants (1). The usual way to create these can take years and lots of testing to determine that the phenotypes you want (characteristics such as color, disease resistance, size, etc.) are present and stable in the offspring. Because of the time it takes to generate new varieties of hybrid plants and because to make seed a grower needs to perform this cross-pollination each year (1), which is labor-intensive, is why hybrid seeds cost so much more than open-pollinated or heirloom seeds. Hybrid vigor is a phenomenon that often arises when two different plants are crossed and is one of the reasons why hybrids are so popular (1). You can save seeds from hybrid plants but there is no guarantee that the plant that grows from the saved seed will be the same as the parent. I have successfully re-grown some hybrids (but not most) from seeds that looked just like the parents so if you are willing to experiment there is no reason you cannot save hybrids. If you are not interested in experimentation, simply stick to saving open-pollinated or heirloom seeds. Importantly, hybrid seeds are NOT GMO (genetically modified organism) seeds. GMO SeedsGMO seeds are developed by genetically engineering the genes from one species into another (2). This is done for a variety of reasons such as disease resistance, pesticide resistance, or increasing a desirable trait such as more nutrition. Most gardeners appear to be vehemently opposed to GMO seeds, but they may not be aware that 70% of the processed foods in the United States come from GMO ingredients (2). However, although you may be unwittingly eating GMO crops, GMO seeds are generally NOT available to the average home gardener (see update below!), they are primarily used by commercial farmers to grow corn, soybeans, canola, sugar beets, and cotton (FDA). Other non-processed foods that may be GMO in the United States include certain varieties of potatoes, apples, summer squash, papaya, and pink pineapples (FDA). Many people want to avoid every GMO crop which although extremely difficult is certainly an option. I think GMO crops and seeds need to be taken case by case. As an example, the Hawaiian papaya would likely have gone extinct due to a ringspot virus but was saved by genetically engineering a resistance gene into the plant. On the other hand, the practice of engineering pesticide-resistance genes into our commercial crops so that we can spray more herbicides on our crops without killing the crop itself is not a practice I am in favor of. UPDATE on 02/07/24: As of February 2024, the first bioengineered seeds are available to home gardeners from the Norfolk Healthy Produce company. They inserted a purple color gene from an edible snapdragon plant into a tomato genome. This makes a very purple tomato with increased anthrocyanin, an antioxidant that gives purple vegetables their color. This tomato has been vigoroursly tested and is deemed safe by both the USDA and FDA. Because these seeds are under patent the fruit, seeds, or plants cannot be sold by anyone other than the company that developed them, they are also very expensive! If you want a very purple tomato that is non-GMO Baker Creek Heirloom Seeds is trying to bring the Purple Galaxy Tomato to market. They were supposed to be available early this year but due to production issues will no longer be available to purchase (they even featured it on the cover of their 2024 seed catalog, oops!) Hopefully seeds will be available soon! In the meantime, there are lots of other heirloom and open-pollinated purple and black tomato varieties available, try them all! ConclusionI grow mostly open-pollinated and heirloom seeds (especially my tomatoes and peppers), but I will occasionally grow hybrids usually for specific reasons such as disease resistance, reduced bolting, or easier growth. I lost all my cucumber crop one year to downy mildew so ever since then I have grown at least one type of downy mildew-resistant cucumber variety along with my open-pollinated varieties. It is also possible that you can find open-pollinated disease-resistant varieties if you do not wish to grow any hybrids however in many cases disease resistance may not be as well documented, so it may take some trial and error with different varieties to find one that works. The other type of crop I generally grow from hybrid seed is broccoli and cauliflower. We tend to have large temperature fluctuations in the spring, and I grow much more consistent heads of broccoli and cauliflower with hybrid seeds than open-pollinated ones. One last note on the “organic” seed label. Organic simply means a seed was grown under organic conditions as defined by the USDA’s National Organic Program (1) This means that any fertilizer, pesticides, or any other treatment used to grow the plants must all be labeled organic, and the seeds cannot contain any genetically modified genes. There is no difference genetically between a seed of the same species and variety that was grown organically versus one that was not. You can purchase organic hybrid seeds just like you can purchase non-organic heirloom seeds. References
0 Comments
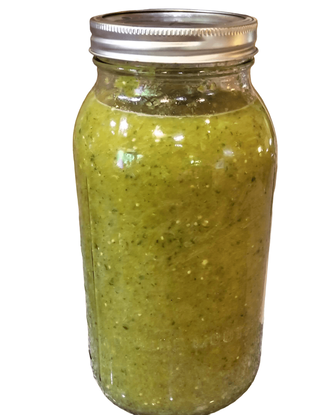
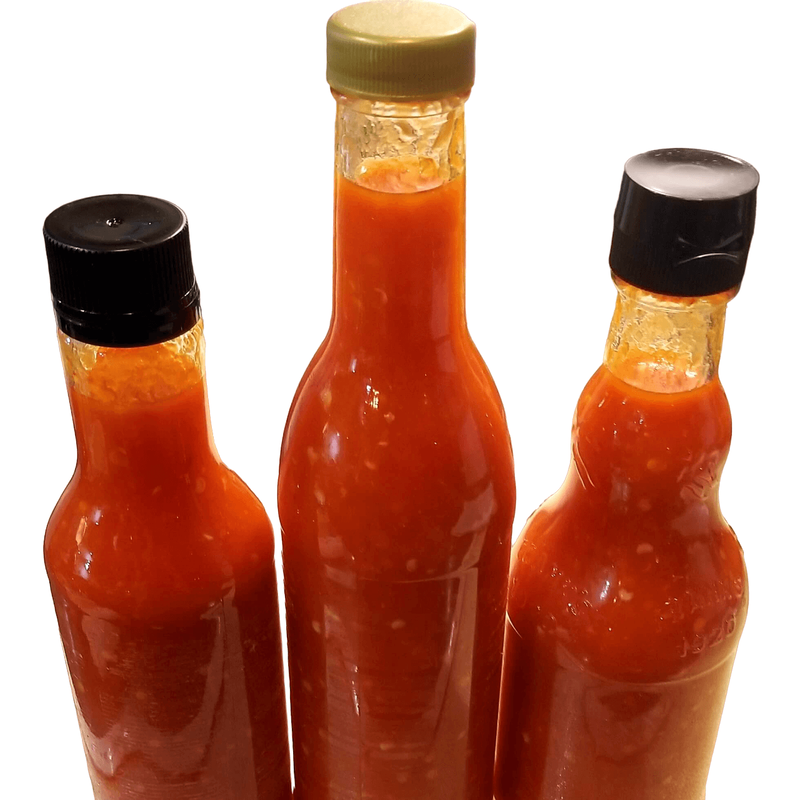
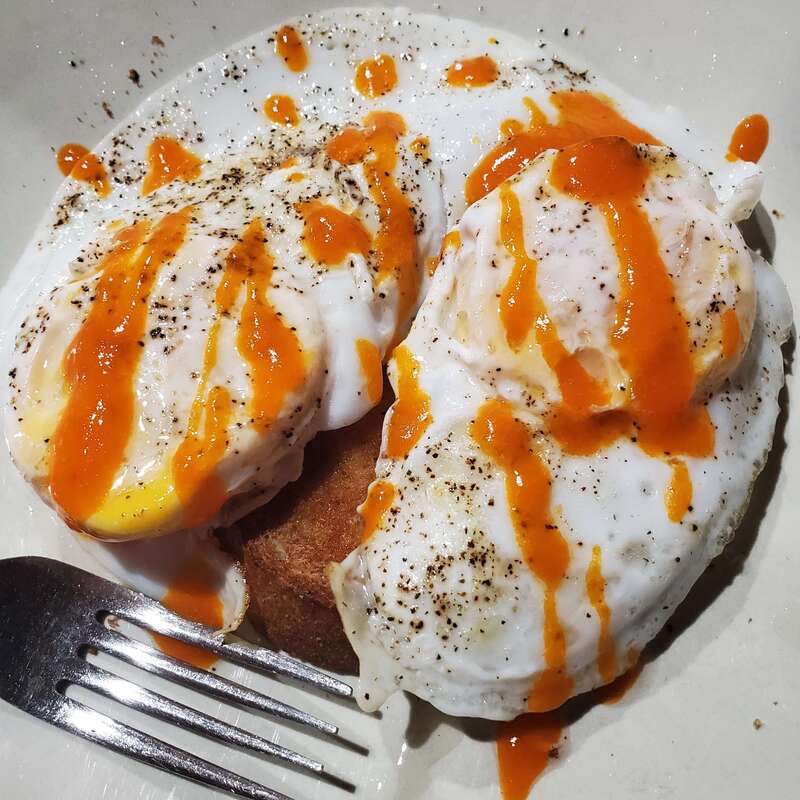
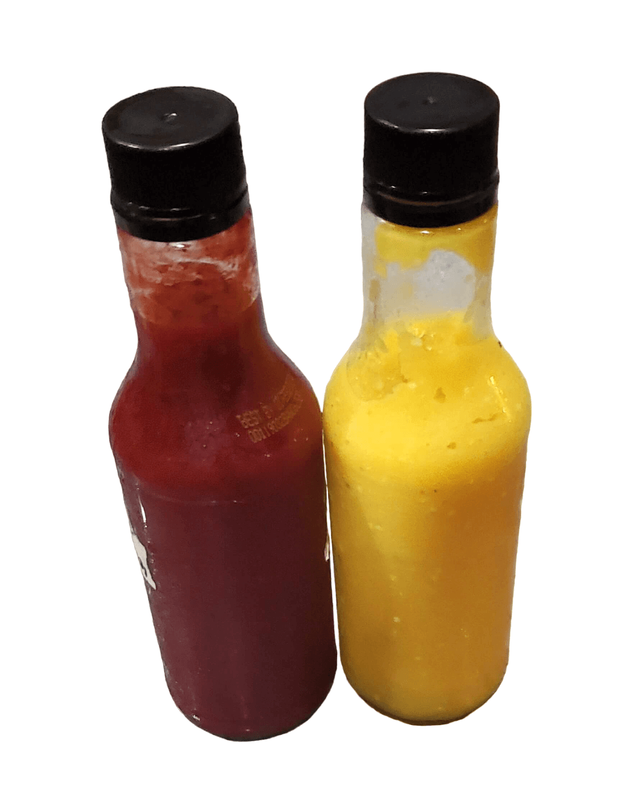
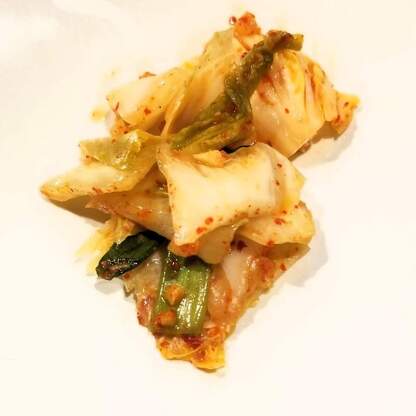
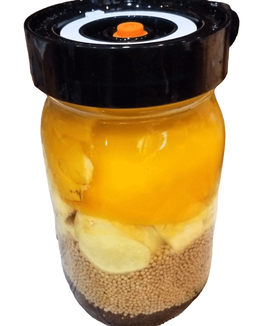
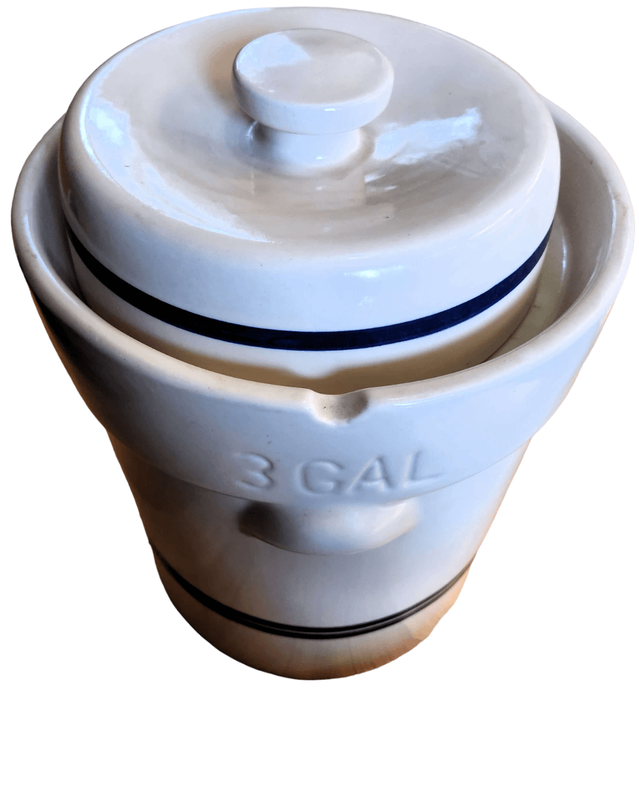
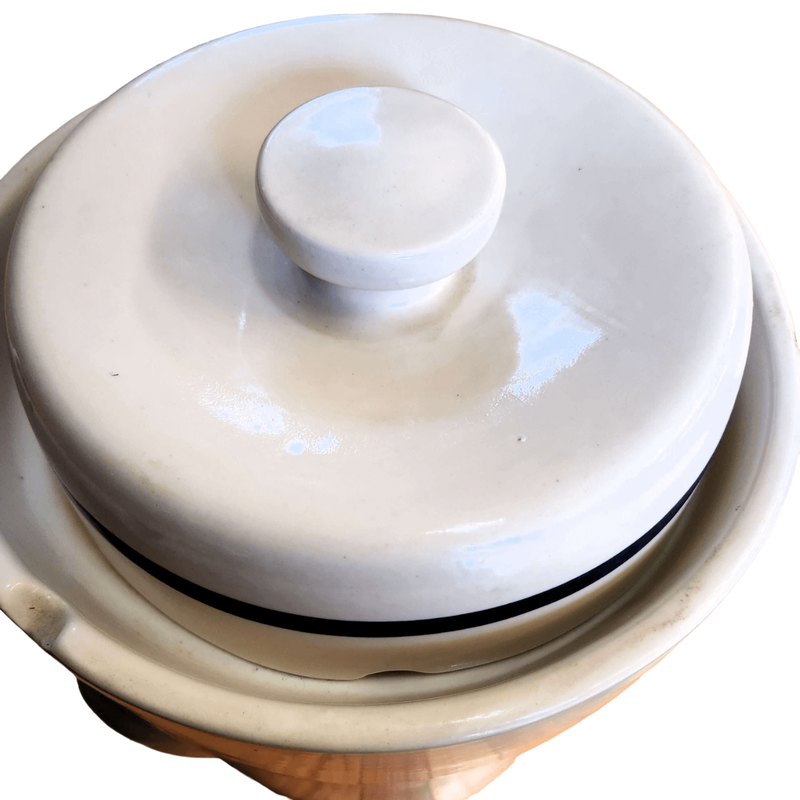
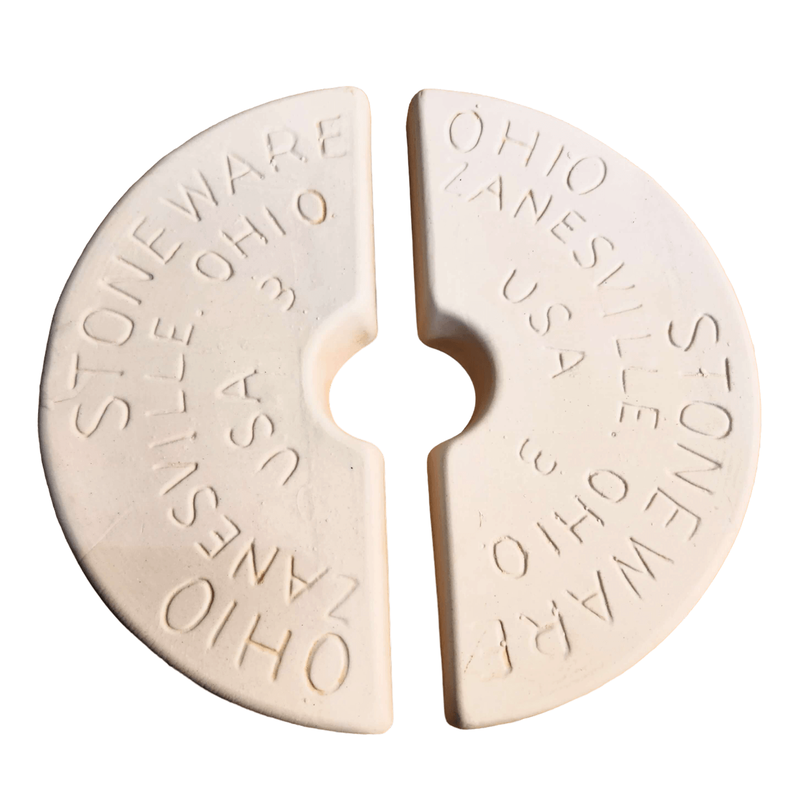
Lactic Acid FermentationWhat is Fermentation?Fermentation is the anaerobic (without oxygen) breakdown of substances such as sugars and carbohydrates into other substances often acid or alcohol via microorganisms such as bacteria and yeast (1, 2). Microorganisms ferment to make energy, while acid, carbon dioxide, and ethanol (alcohol) are side products that we utilize (1). For food purposes, two different types of fermentation are most often used: ethanol and lactic acid fermentation (also known as lacto-fermentation). Yeast, specifically certain wine and beer strains or bread strains of Saccharomyces cerevisiae, which you can purchase, is generally used to make alcohol or bread, respectively (1). Carbon dioxide is released which is what causes bread to rise or it is off-gassed in the case of ethanol fermentation (1). In contrast, wild lactic acid bacteria, particularly certain strains of Lactobacillus, Leuconostoc, and Streptococcus, generally perform lacto-fermentation, although other bacteria may also play a role (1). Lacto-fermentation is used to make many common food products such as sauerkraut, kimchi, pickles, hot sauces, cheese, yogurt, and more (1, 2). A third type of fermentation sometimes performed at home uses acetic acid bacteria which are used to make vinegar and kombucha (2). Various fermented hot sauces and one of my favorite ways to use hot sauce, over eggs! Why Ferment?Fermentation is a form of food preservation. Before refrigeration, freezers, and safe canning equipment existed, fermentation was used to preserve the harvest and make food safer to store. Fermentation can also make food more nutritious and more digestible (2). Most cultures have food preservation techniques based on lacto-fermentation, ethanol fermentation, or both. I ferment not only to preserve the produce I grow but also because I like the taste. Fermented hot sauces and pickles taste different than a typical vinegar-based hot sauce or pickle. I am also prone to acid reflux and find that fermented foods are easier on my stomach than the typical vinegar-type pickle (although I love vinegar as well!). How to FermentFermentation is a very safe method of food preservation assuming you start with enough salt. A good rule of thumb is to use at a minimum 2% salt, although some vegetables require more. For example, cucumbers consist of a lot of water therefore, up to 5% salt is better to prevent mold formation. For a good chart on how much salt to use and more information on how to make up the salt solution, I like this website. Because fermentation is one of the safest ways to preserve food, I am often willing to follow random internet recipes for fermentation (unlike canning where I only follow safe, tested recipes) because generally if a fermentation goes bad, you know. Just double-check how much salt to add to that vegetable for any fermentation recipe. If your fermentation turns slimy or moldy (anything fuzzy), throw it out! What is commonly called Kahm yeast (a white coating on top of the ferment that is not fuzzy) is safe to eat but can give the food an off flavor. The key to successful fermentation is to keep everything below the brine and eliminate as much oxygen as possible at the top of the ferment. Anaerobic lactic acid bacteria grow without the presence of oxygen however mold contamination always occurs at the top of the ferment as it requires oxygen to grow. Once the fermentation gets started enough carbon dioxide is produced to push out excess oxygen and the risk of mold contamination is reduced. To keep oxygen from re-entering ferments I like wide-mouth mason jars (quart or half-gallon sizes are great), with glass weights to hold everything below the liquid brine and a lid to keep the air out. I often use the Easy Fermenter Lids or simple airlocks used for alcohol fermentation as they self-burp, so you do not need to keep opening the lids. If you use an actual lid you will need to release the gas produced often enough to keep the jar from exploding but you also run the risk of incorporating oxygen into the top of your ferment every time you crack the lid which can allow mold to grow. For larger ferments, you will likely want a fermentation crock. I like the water seal fermentation crocks with a lid in a moat at the top that holds water, forming an airlock. A small hole in the lid allows the gas to escape but the hole is covered by water to keep oxygen from entering the crock. A 3 gallon water sealed fermentation crock from Ohio Stoneware. The top moat is filled with water and the hole in the lid that allows gas to escape is visible in the second picture. Most fermentation crocks also come with stone weights to hold the vegetables below the brine. For a basic fermentation, you make up your salt solution (some things like sauerkraut are traditionally brined dry, meaning you add salt directly to the vegetables and the salt pulls liquid out) and pour it over your prepped vegetables. Make sure all the vegetables are covered, add your weight to keep the vegetables submerged, and attach the lid. Most ferments such as hot sauce go at least 30 days but commercially made Tabasco is generally aged 3 years, sauerkraut generally takes 6-8 weeks, and cucumbers are usually much shorter, 5-7 days although you can go longer if you want a sourer pickle. I tend to do shorter cucumber ferments to reduce the risk of mold formation and because I like crunchier pickles. In general, the longer the ferment the softer the vegetable will become. ResourcesFor sauerkraut and cucumber-fermented pickles, I follow Ball (one of the safe canning resources) recipes. Their online website only has a fermented tomato salsa recipe, but other fermentation recipes such as sauerkraut, pickles, hot sauces, and Worcestershire sauce are available in several of their books. See my Canning post for more information on the Ball books that are currently available. Pickles are more likely to mold in my experience, so I like the Ball recipe because it uses a little vinegar at the beginning of the ferment to help reduce the risk of contamination before the fermentation gets started. However, there isn’t enough vinegar added to inhibit fermentation. For fermentation resources other than Ball, I like the Insane in the Brine website, particularly for his hot sauce recipes. The author has also written a couple of books, which feature even more of his recipes than are available online. Other books I recommend include “The Noma Guide to Fermentation” by Rene Redzepi and David Zilber, “The Art of Fermentation” and “Wild Fermentation” by Sandor Ellix Katz, “Fermented Vegetables” and “Fiery Ferments” by Kirsten and Christopher Shockey, and “The Kimchi Cookbook” by Lauryn Chun. References
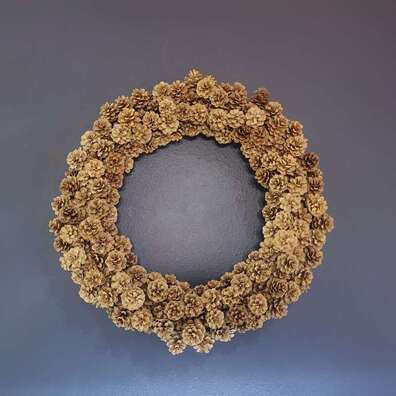
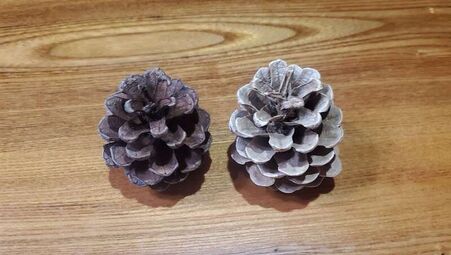
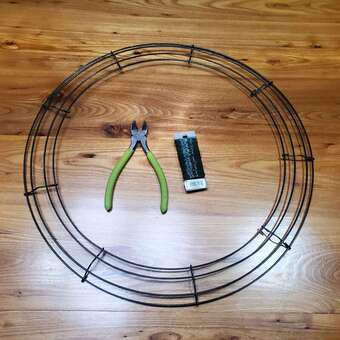
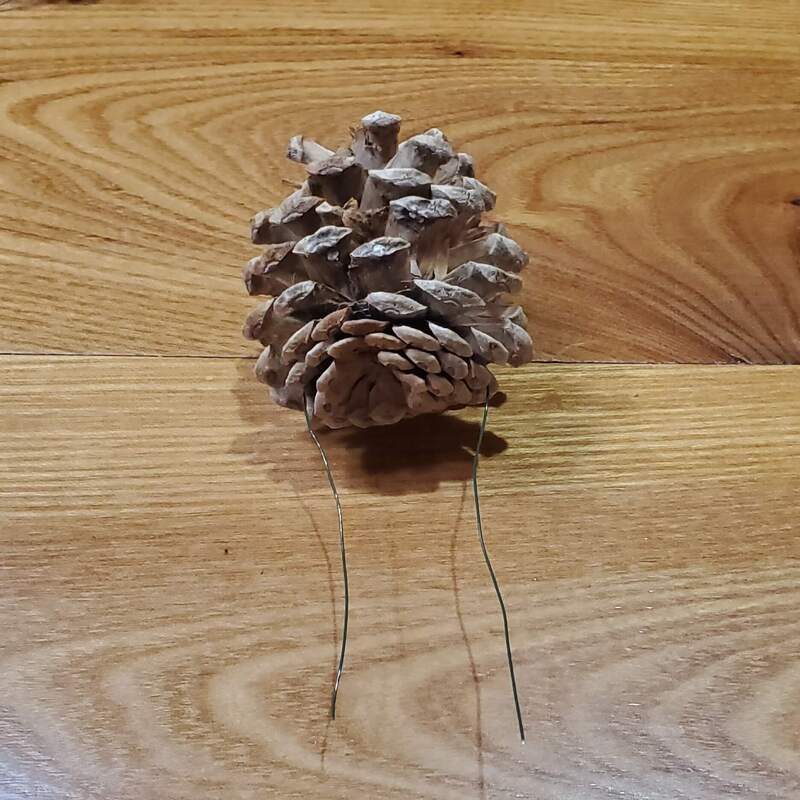
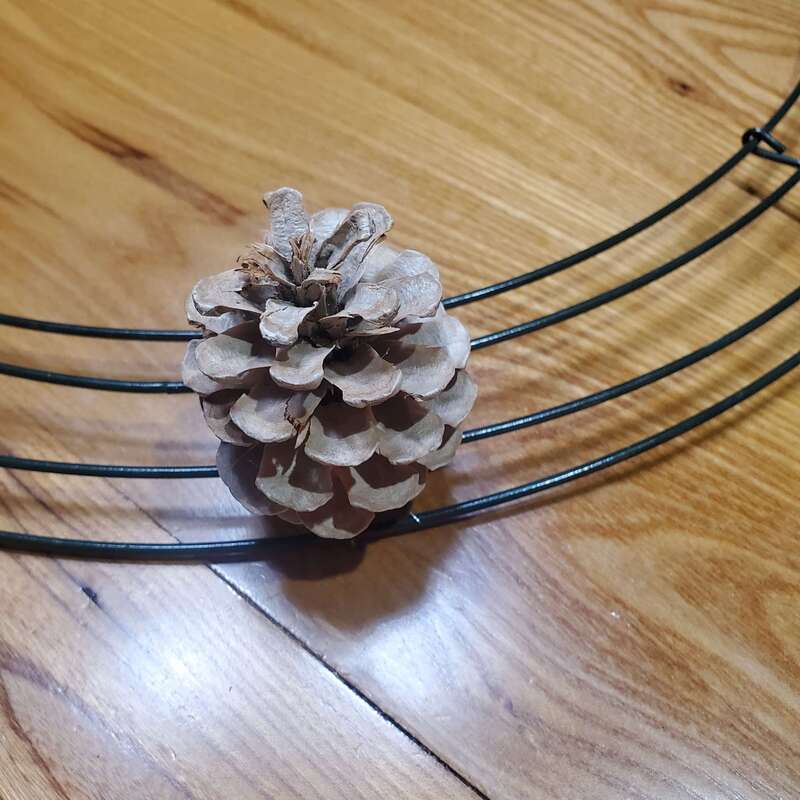
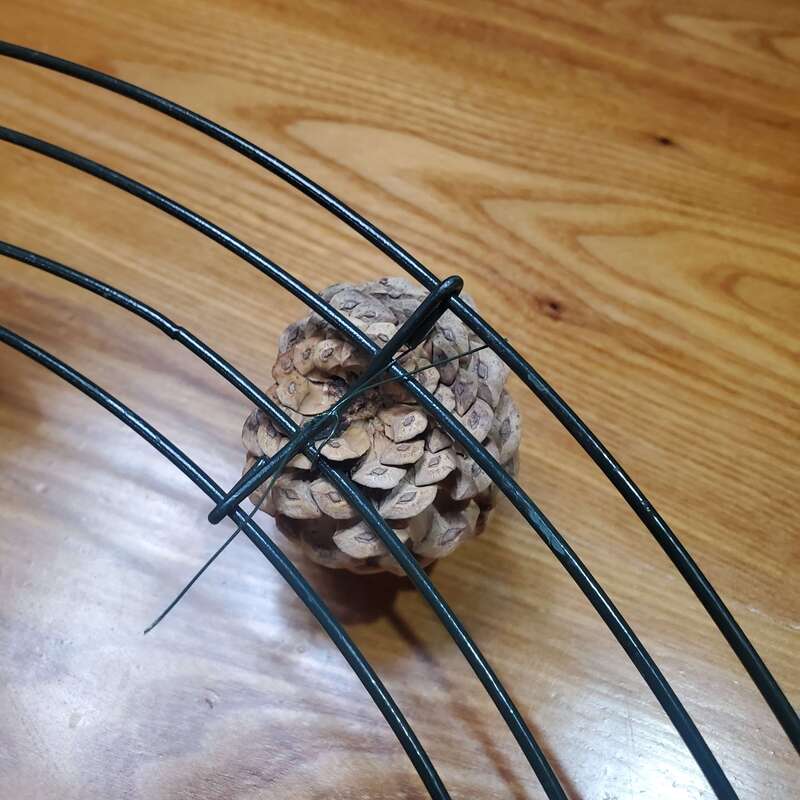
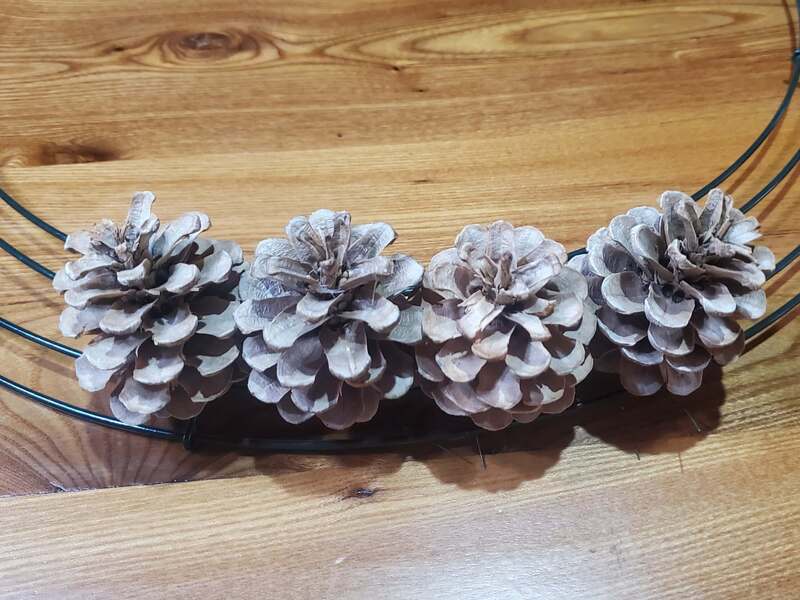
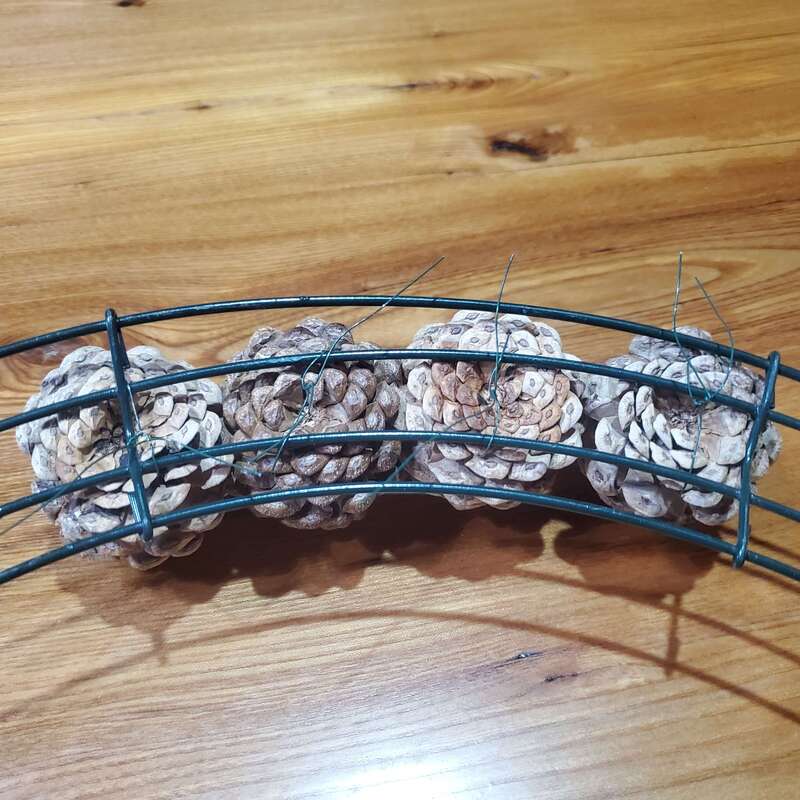
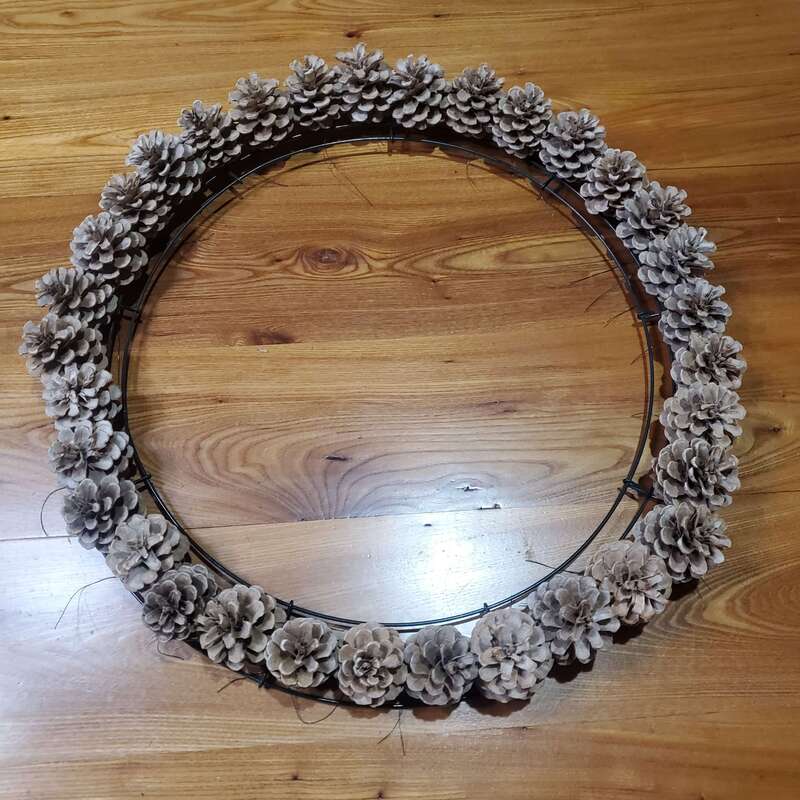
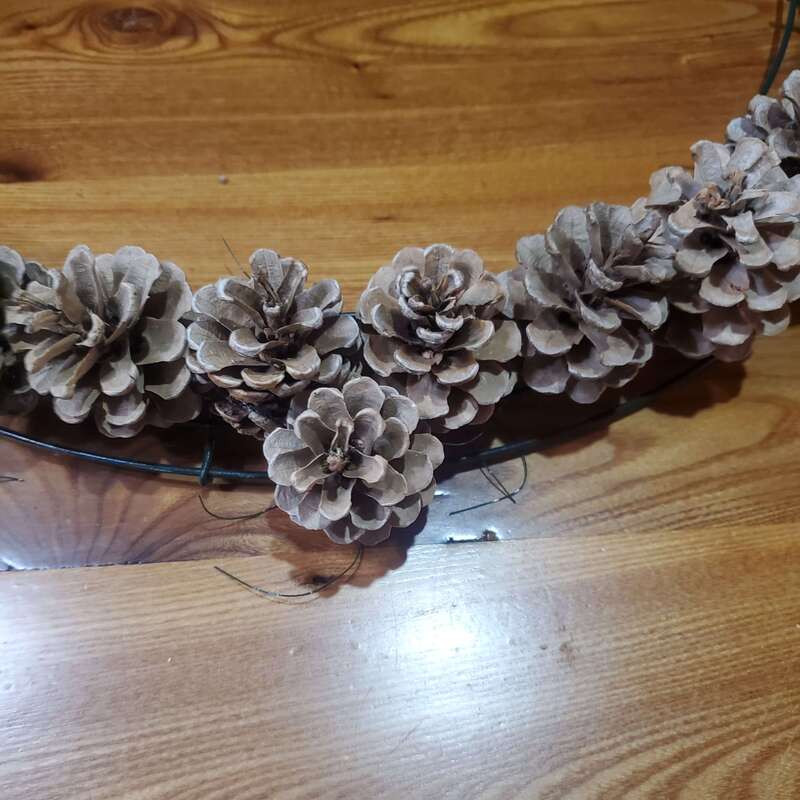
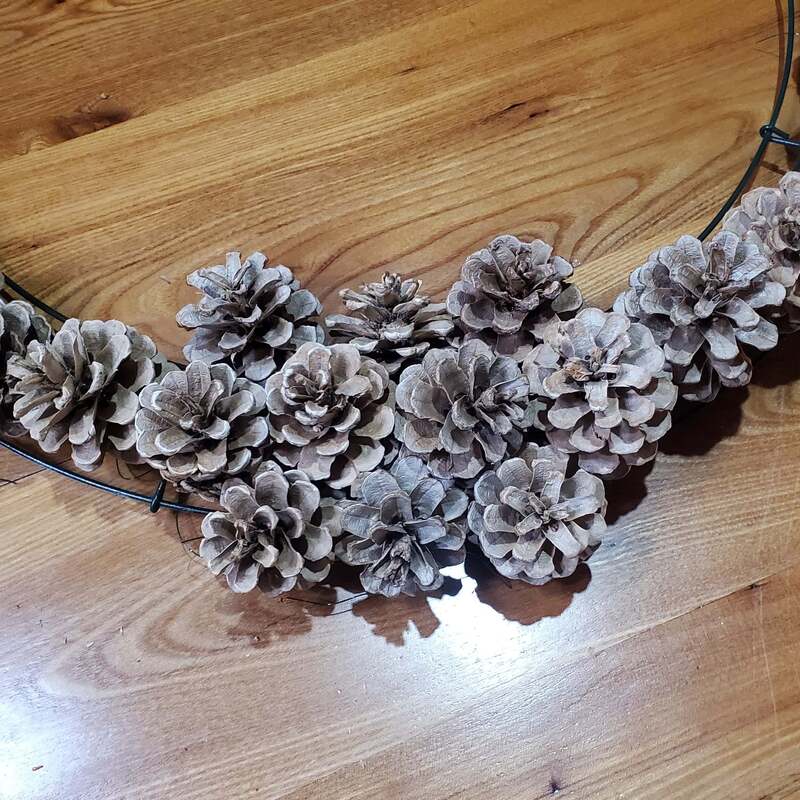
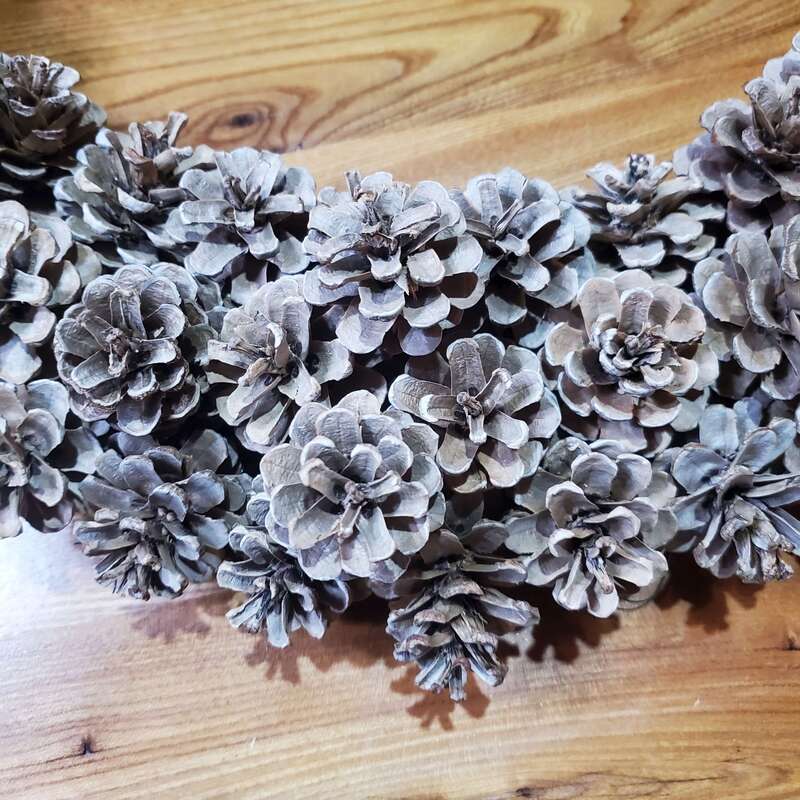
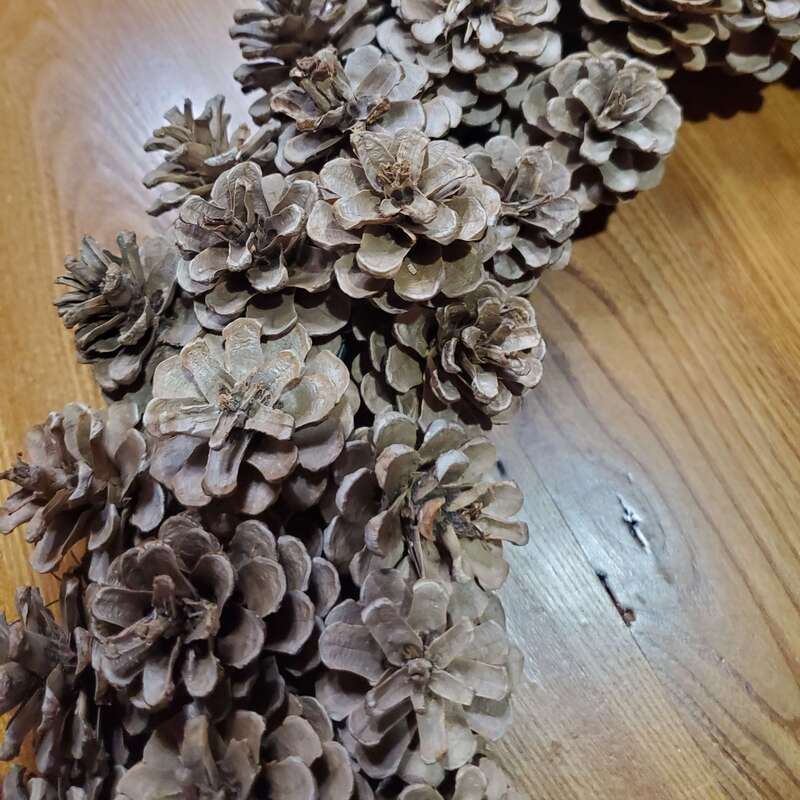
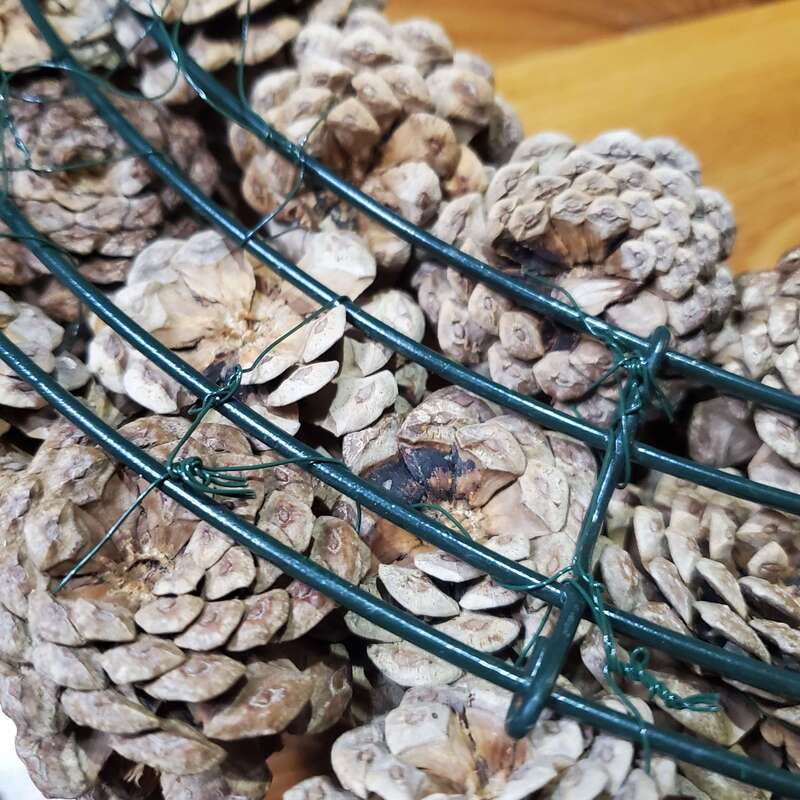
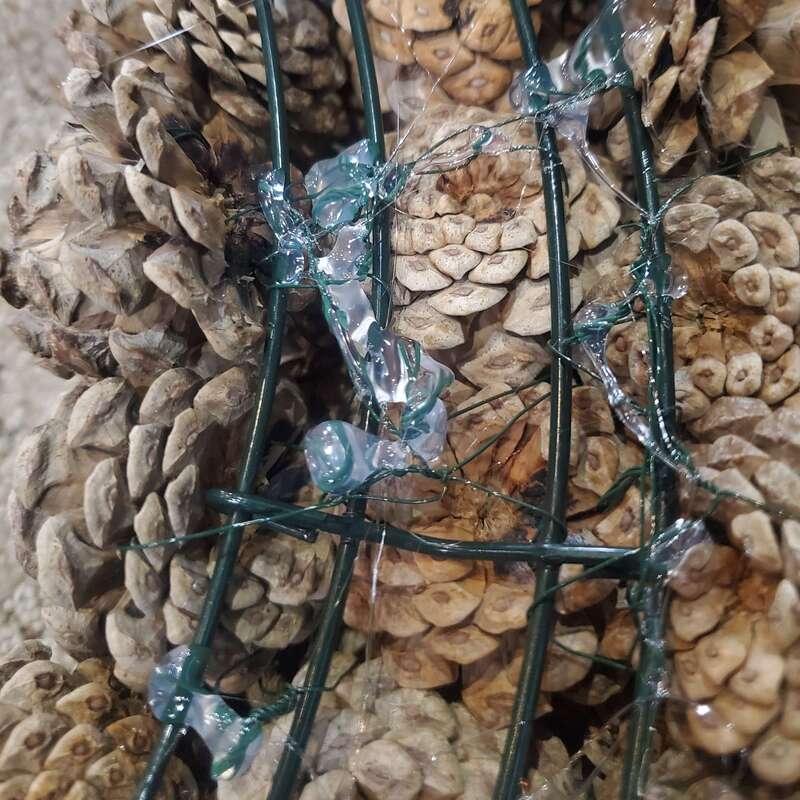
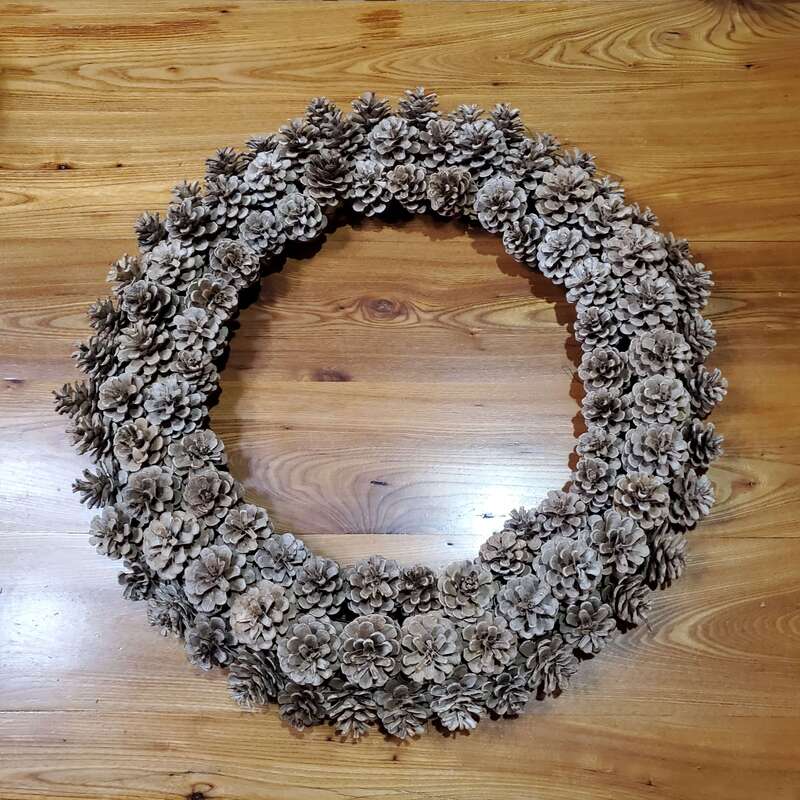
How to Make a Pinecone Wreath Using Bleached Pinecones from the Red Pine TreeOne of my early, and more popular, blog posts was on How to Make a Pinecone Wreath. Today I am going to update that post using a different type of pinecone. The first post used pinecones from white pine trees. These cones are elongated and make a very different wreath than pinecones from red pines, the focus of today's post, which are much smaller and roughly 2”x 2”. They are also more challenging to work with due to their different shape. Additionally, I use bleached pinecones so I will also discuss how to bleach pinecones. Bleach the PineconesFirst, it is important to note that bleaching pinecones does not turn them white. If you want a white wreath you will have to spray paint the cones. Instead, bleaching pinecones turns them into a beautiful, driftwood-type color (see the above picture). I have found that to bleach pinecones it is preferable to use older pinecones that are not covered in sap. These types of cones bleach better as the bleach can soak into the pinecones better. Please note it is important to use protective gear when working with large amounts of bleach. Googles to protect the eyes, a respirator mask to avoid breathing fumes, and old clothes or even a rain jacket are necessary. It is also preferable to bleach the cones outside or in a well-ventilated space. I use a 10% bleach solution and bleach my cones in a 5-gallon bucket with a weight, like a heavy plate with a rock on top, to keep the cones submerged. To make a 10% solution mix 1 part bleach with 9 parts water, for example, 1 cup of bleach to 9 cups of water. I usually bleach the cones for at least 24 hours. After 24 hours most of the bleach is deactivated as once diluted it does not stay active for long. This is especially important if you have a septic tank as you do not want to kill the good bacteria in your tank by pouring lots of active bleach down the drain. After draining off the bleach water I rinse multiple times to remove any residual bleach. After rinsing I lay out the cones in a single layer on newspaper or cardboard to dry. This can take several days depending on the local humidity. If you plan on displaying your wreath outside you may want to spray the cones with a clear acrylic waterproof spray to help them last longer when exposed to the weather. I usually did this after the wreath was complete so I would not waste spray on cones that I potentially would not use. However, spraying after does not allow for as great coverage as spraying each one individually will. Regardless of whether you spray it or not, I do recommend displaying the wreath in a sheltered location if possible if you do choose to put it outside as this will expand the lifespan of the wreath. How to BeginOnce the cones are completely dry it is time to start constructing the wreath. First, you will need a wire wreath frame (I have used 12” and 18” frames) and floral wire (the green wire available in most craft, big box stores, and online retailers). I like the 26 or 22-gauge wire. The 26-gauge wire is easier to work with since it is thinner, but 22-gauge can be helpful when trying to thread the wire through the wreath after the first 3 rows of cones are attached since it is stiffer and less likely to bend. Some people hot glue the cones to a foam frame but I highly recommend individually wiring the pinecones to a metal frame. These wreaths are very delicate but at least by wiring them, you do not need to worry about them falling off! You will also need wire cutters and I have found needle nose pliers come in handy when adding the last group of pinecones to grab the wires and pull them toward the back of the frame. Step 1: MaterialsYou will need a wreath frame, floral wire, wire cutters, needle nose pliers, and pinecones. For red pine pinecones, you will need a lot of cones, much more than for a white pine pinecone wreath! As an estimate, you will need about 100 cones for a 12” frame and about 200 for an 18” frame. For the wreath pictured, I used an 18” frame and used about 36 cones for each of the first 3 bottom rows which equals 108 cones for the bottom layer. I like to add in a second layer to fill in any gaps using as many pinecones as necessary until it looks “pleasing” to the eye. Step 2: WiringI cut approximately 6-8" pieces of floral wire and wrap it around the stem end of the cones (go a few scales down from the end) at least twice. Then insert the top of the cone with the floral wire outside the two wires in the center of the frame with the floral wire sticking out the back. Twist several times to attach the cone to the frame. Repeat this process for the entire middle section of the frame. I find it easier to start in the center for the red pine pinecones versus the outside for the white pine pinecones. I usually use my larger pinecones on the first layer of the wreath and save the smaller ones for the top layer and to fill any holes at the end. For the cones at the end, you may need a longer wire (8-10") to reach through the wreath with enough remaining to grip and twist to secure the pinecone. I also find that pushing the cones as close as possible while you wire them in place makes the entire wreath more secure. I try to interlock the scales of cones next to each other to make them more stable. Step 3: Trim the WiresFilling in the next ring of the wreath is much easier if you first trim off the excess floral wire. Otherwise, you often grab the wrong wires when attaching the second row of pinecones. Make sure each cone is secure and the wire is tight. I often twist the wires of 2 different cones together first to maximize the stability of the cones and wire. Then trim the excess wire, wrap the cut end around the frame, and push the cut end inward to avoid scratching yourself when handling the wreath. When the wreath is complete, I hot glue the ends of the wires for extra security and to avoid scratches on the wall. Wreath comparison with just the first three bottom rows complete (left) versus additional pinecones added on top to fill in any gaps and complete the look (right). Step 4: Complete the WreathAfter you trim the excess wires from the first row, move on to the second row, trim the wires from this row, and then wire in the third row. Each row gets subsequently harder to wire because there is less room to fit the cones and your fingers however, with a little patience you will soon have all three rows wired. Next, fill in any gaps with the smallest cones you have on hand. I have found it helpful to hang the wreath on the wall to determine where the gaps are. Sometimes taking a picture of the wreath on the wall is also helpful as it is easier to notice problems with the wreath from a picture than on the table or wall. You may also find it necessary to adjust or even remove certain cones that do not fit quite right. If a cone is sticking out too much you can often wire it to pull it closer to the remaining cones. If this does not work, simply remove it, and replace it with one that fits better. Once the wreath is complete and you are happy, finish trimming the wires and hot glue them to keep them from scratching the wall or you can back the wire frame with felt. Regardless, hang the wreath and enjoy! |
Details
AuthorIn 2016, my family and I moved from the New York City area to small town Wisconsin. Our move, this website and blog (and our previous Etsy store) is the result of our desire over the past several years to simplify our lives, increase our quality of life, reconnect with nature, and enjoy a more self-sufficient life. I grew up as a country kid in central Pennsylvania working on my grandfather's fruit farm and as a corn "de-tassler" at a local seed farm. My background is in biology where my love of nature originated. I am a former research scientist and professor and have now transitioned to a part-time stay-at-home mom, self-employed tutor, and small business owner. Thank you for taking the time to check out my site. Archives
July 2024
Categories
All
|



 RSS Feed