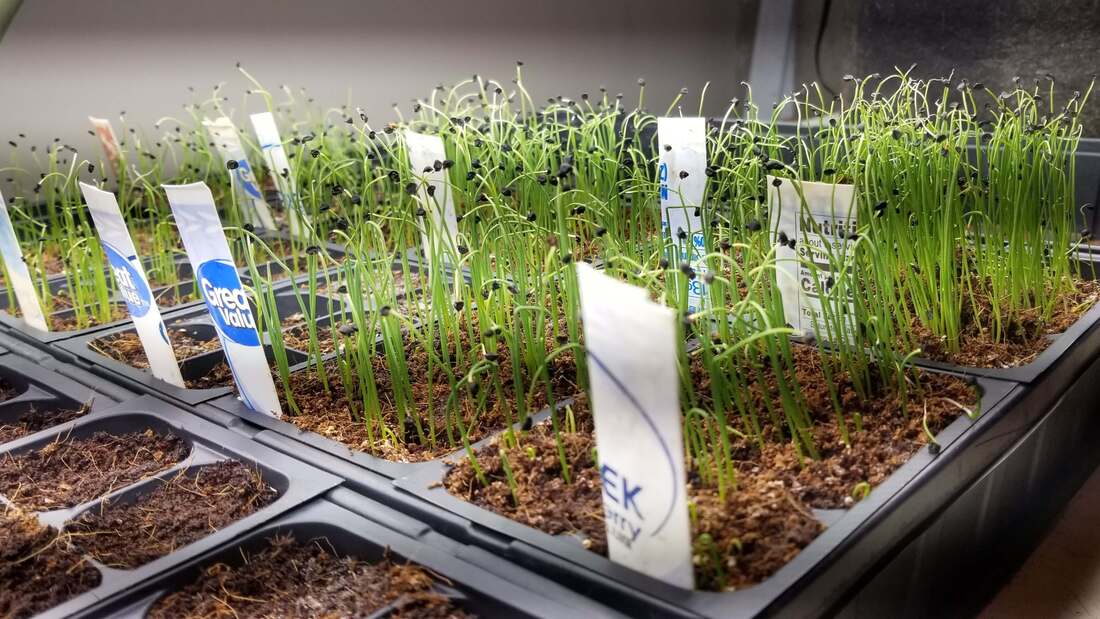
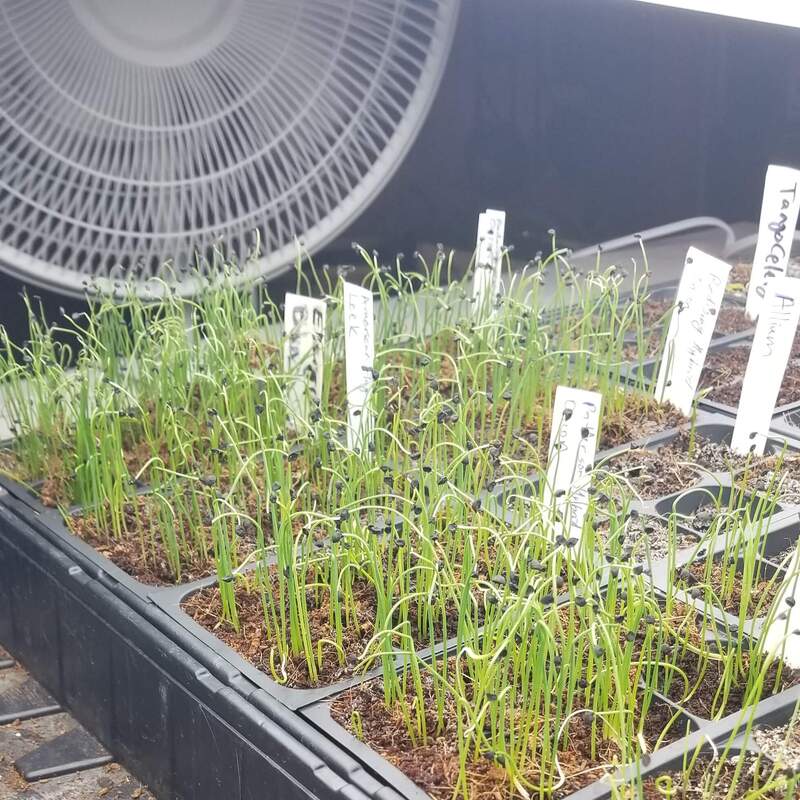
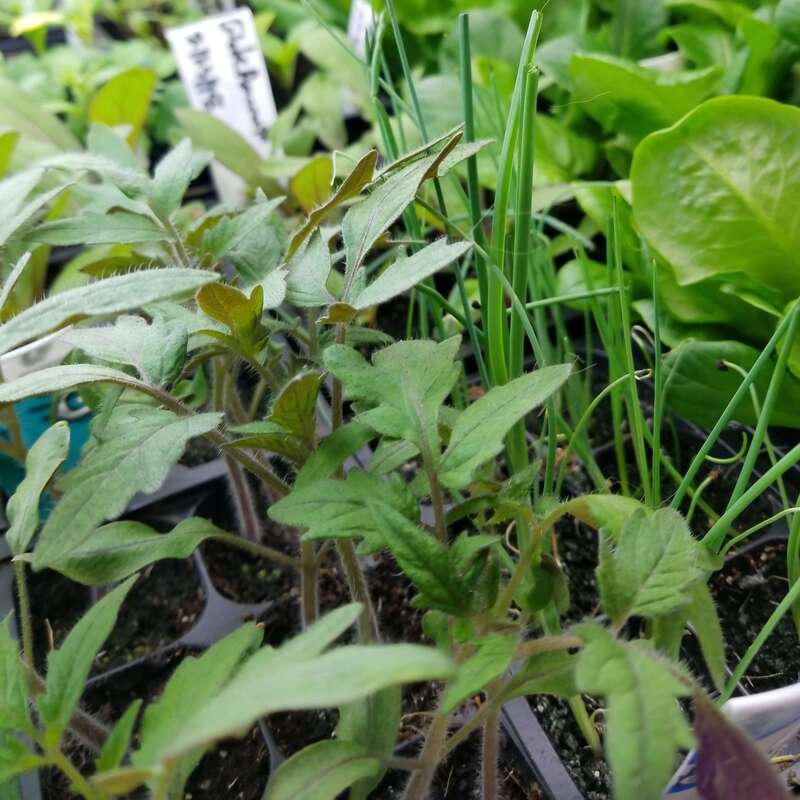
Two Ponds Farm
  • Home
  • About
  • Blog
  • Contact
  • Privacy Policy
  • Garden Pictures
  • Chicken and Duck Pictures
  • Native Plant Pictures
  • Game Camera Pictures

2/7/2024

The Basics of Seed Starting

0 Comments

Read Now
 
Picture

The Basics of Seed Starting

​I started growing my vegetable plants from seed rather than buying seedlings from big box stores or local greenhouses for several reasons. First, I love working with soil and plants so by starting seeds I get to start gardening (albeit indoors) earlier than I would if I bought seedlings. Second, I have a very large garden, so I save money by buying seeds and starting them rather than buying plants. Lastly, one of my favorite parts of having a garden is to try many different varieties of vegetables, especially tomatoes and peppers. If I buy my seedlings from big box stores or even independent greenhouses my selection is much more limited than if I buy seeds and start my own.
Before I get into the supplies you will need to start seeds let's discuss timing. I see this question asked all the time in my online gardening groups and there is not a simple answer. The easiest way to get a rough idea of when to start your seeds is to first figure out your average last frost date in spring. There are lots of different websites and I would recommend checking several, but this one has worked well for me and gives dates close to many other sites. Once you enter your zip code, look for the 50% chance of last frost at 32°F, which for me is mid-May. Remember, this is an average and in any given year the date could easily fluctuate by a week or two. Realistically, I generally do not get my warm season crops, both directly sowed seeds and transplants, planted until the soil warms up more which is usually the first week of June for me.
​Once you know your average last frost date count back, however many weeks is recommended (check your seed packet or do an online search), to figure out when you need to start seeds. For slow-growing and slow-germinating seeds like onions, celery, artichokes, and some herbs like parsley I start seeds 8-10 weeks before my last average frost date. For many cold crops like cabbage, kale, broccoli, and cauliflower I plant 7-8 weeks ahead.  For peppers which can take weeks to germinate (especially the super hots), even with a heat mat, I start about 7-8 weeks before my average frost date, but I generally plant them out 2 weeks after my last frost date since peppers do not like the cold. Lastly, for tomatoes, which germinate and grow more quickly than peppers I start later, about 4 weeks before my last frost date. Again, I usually wait a week or 2 after my last frost date to transplant to make sure the air temperature and soil temperature are warm enough.
The reason seed starting dates is not an exact science is because even knowing your average last frost date you may live in an area with a microclimate that is either warmer or cooler than average. You can start tracking your temperatures where you live, but that would take years to get good data or learn to enjoy a little trial and error. As mentioned above the actual last frost date can vary because it is based on an average. Also, the temperature in which you are growing makes a difference. I found that when I started putting my seedlings into a greenhouse for a couple of weeks before I planted them, they grew much faster than when I had them growing in my cooler basement. So, I had to adjust my dates and start my seeds later to account for faster growth. The best resources I have found to help you calculate dates are from Johnny’s Selected Seeds which has SO MANY freely available calculators and tools, some of which are downloadable. My favorite tools are their seed-starting date calculator for seedlings and their fall-harvest planting calculator. They also have a succession-planting calculator which I have never used it as I do not have much time to replant most seeds due to my short growing season.
​Once you have your seeds organized and dates figured out it is time to get all the supplies you need. Some of these supplies are optional so buy what you can depending on your budget. I also recommend starting just a few different types of seeds in your first year and if it goes well increase the number you grow in the years after if you want. You do not want to end up overwhelmed or with a bunch of leggy, or even worse dead seedlings because things went wrong (trust me I’ve been there).
Seedlings in 6-cell pots with a fan blowing (middle) to strengthen them and help avoid damping-off.

Supplies

Before you start seeds, you need to stock up on a few supplies.
  1. Seed starting mix. I have had good luck with Burpee Organic Seed Starting Mix (I cannot find this anymore both locally and online, perhaps Burpee discontinued it?), preferably in the bag, not the blocks but I have also successfully used Pro-Mix as well, which is what I use when potting up my seedlings. Although coco coir-based seed-starting mix is preferable to peat from a renewable, more environmentally friendly perspective, be sure to buy from a reputable company as it is high in salts and can kill seedlings if it hasn’t been prepared properly for gardening use. If you chose a peat-based product, which I prefer for starting seeds because it seems to work better, choose Canadian peat as it is managed sustainably and is therefore more environmentally friendly. If you use straight coco coir or Pro-Mix you can also try adding in some perlite, which is cheap and readily available, to loosen up the material a little.
  2. 6 cell pots. Twelve 6-cell pots will fit in a 1020 tray (see below). You can also buy other sizes that can fit more or fewer cells in a 1020 tray but I prefer the 6-cell. I use cheap plastic ones and although I have heard many people have trouble reusing these, mine have lasted over 5 years. You can buy better quality plastic ones from Bootstrap Farmer or Epic Gardening or try soil blocking which eliminates the need for plastic.
  3. 1020 trays. 1020 trays get their name because they are approximately 10 inches by 20 inches in size. I LOVE the Bootstrap Farmer 1020 trays. I used to use the cheap 1020 trays you can buy at big box stores but one year my trays started leaking and since I grow my seedlings on a 4-shelf vertical system, the water dripped down onto my LED lights and ruined them. I switched to the Bootstrap Farmer 1020 trays after that, and they have lasted several years so far with no indication of cracking or leaking. Even though the Bootstrap Farmer ones are pricey, I have saved money by not continuing to buy the cheap trays which need replaced each year, plus I haven’t ruined any more lights!
  4. Lights! What type of light to use can be very complicated and differs depending on the type of vegetable you want to grow under the lights. To start seeds, I started out using cheap fluorescent 4-foot fixtures because that was all I could afford. And they work well! I used this website to help me decide the color of the bulb but, if you just want to start seeds and then plant outdoors when they get big enough you do not need anything fancy and can stick to a cooler blue light bulb in the 5000-7000 Kelvin range. I now use 4-foot 5000K LED fixtures, which I switched to after one of my brand new cheap fluorescent fixtures caught fire (luckily the store let me return it!). It gets more complicated if you want your plants to flower and fruit indoors, in that case, you want more warm light in the 3500-4500 range, you can alternate lights in different ranges (i.e. 3500K bulb with a 5000K bulb) or you can use full spectrum grow lights. You also probably want stronger lights for purely indoor growth if you do not have any windows for supplemental light, but that can get pricey. If you go the 5000K fluorescent or LED route you want your seedlings very close to the light, approximately 1-2 inches away. If you buy a stronger grow light you will need to keep the light further away, anywhere from 6-18 inches. Because I grow my seedlings separately from my other indoor plants, I like the less strong lights so I can fit the lights plus the plants all in the space between 2 shelves, roughly 1 foot in height. I use the upper shelves to hang the lights and put the plants directly below on the lower shelves.
  5. Potting soil. Seed starting mix generally has very little nutrients so once your seedlings get a few true leaves (not the first leaves that emerge, which are called the cotyledons) you will need to up-pot them into bigger pots with potting soil, or leave them in the 6-cell pot with the seed starting mix but expect to start fertilizing with diluted fertilizer once they get their first few true leaves. Even if I up-pot into potting soil I still generally start fertilizing because the soil I prefer to use, Pro-Mix, does not contain a ton of fertilizer.
  6. Fertilizer. Generally, you will need to start fertilizing your seedlings once they get their first true leaves. Any all-purpose type of fertilizer is good, at this stage, you want more nitrogen for vegetative growth and less phosphorus which is needed for fruiting, but I always dilute it to ¼ or ½ strength to not burn the seedlings with too much fertilizer. Once your plants get bigger you can ease them up to full-strength fertilizer.
  7. Larger pots. You can transplant directly from 6-cell pots into the garden, but for many plants, I prefer to pot them up into 3.5” square nursery pots.  This includes my cabbage, broccoli, and cauliflower. You can fit 18 of these size pots in a 1020 tray. For my peppers and tomatoes, I usually pot them up a second time into 6-inch nursery pots. I buy the cheap round pots if I am selling or giving away my seedlings, but I prefer the 5.5” sturdier square pots for my use. You can fit only 8 of these larger pots in a 1020 tray. If you choose to pot up your seedlings into larger pots make sure you have room for all the trays. I have run out of space more than once when I underestimated how much space my seedlings would take after potting up.
  8. Heat mat. A heat mat is not necessary, especially if your house is on the warm side or you have a heated greenhouse, but it can speed up germination time, especially for pepper seeds which can take a long time to germinate. I usually put my pepper seeds in a damp paper towel inside a plastic bag and place them directly on the heat mat. Once the seeds start germinating, I move them into my 6-cell pots with soil. This way I do not waste soil or pots on seeds that are not going to germinate. For seeds that are less difficult to germinate, such as tomatoes, I simply place the heat mat under the 1020 tray and move the seedlings once they have all germinated onto a shelf without the heat mat (or turn off the mat if I am done germinating).
  9. Humidity dome. To be honest I do not use a humidity dome, although lots of people swear by them. I find the soil stays too damp and increases your chances of damping-off (a fungal disease that will kill the seedlings). I make sure my soil stays moist but not overly wet and I get great germination. If you are gone for longer periods and cannot keep the soil moist, especially if on a heat mat as the soil dries out quickly, then a humidity dome could be helpful.
  10. Fan. A fan is helpful for two reasons. First, it reduces mold and fungus formation which in many cases is not harmful but one disease, called damping-off, is caused by a fungus that quickly kills seedlings. If you notice your seedlings suddenly topple over and die or have a brown stem, they will likely not make it. The best way to avoid this, other than a fan, is to not overwater. Second, a fan mimics the wind outside so this will help strengthen the seedling's stems and get them used to harsher outdoor conditions.
  11. Plant labels. Plant labels are helpful to keep your seedlings organized. I have bought labels and use the wooden ones I purchase online (at Johnny's or A.M. Leonard) for in my garden since they degrade and do not need to be removed every year. But, for indoors I like plastic labels (the wooden ones degrade too quickly to use for both seed starting and then in the garden). I often cut up old yogurt or sour cream containers to save money buying new plastic labels, I clean off the marker (I like industrial Sharpies as it lasts through the growing season, both indoors and out) with 100% acetone or 91% isopropyl alcohol so I can re-use the labels. 
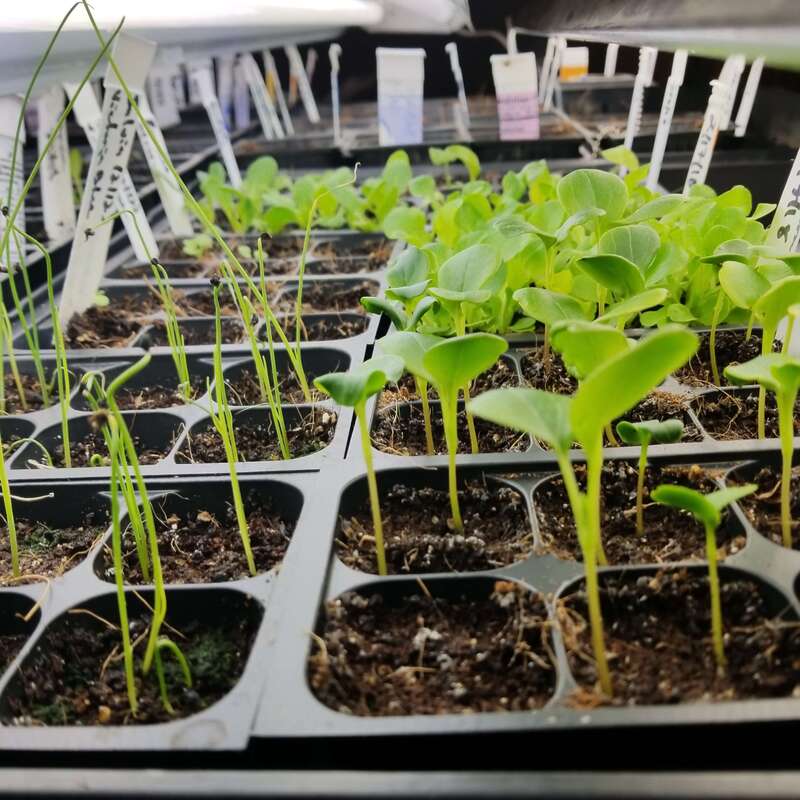
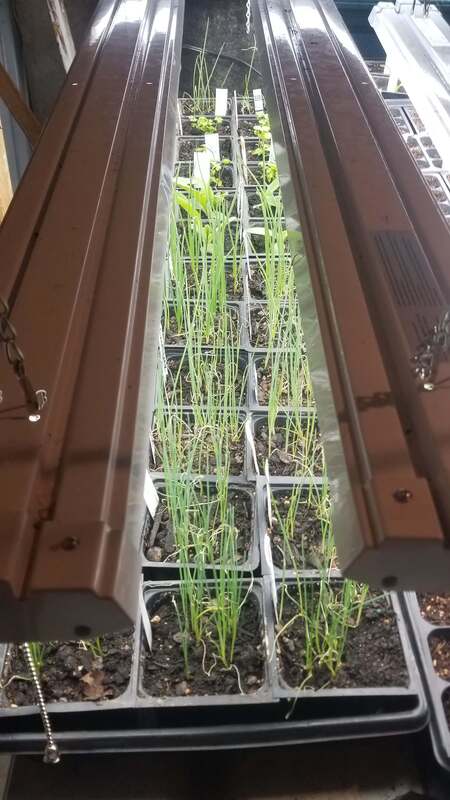
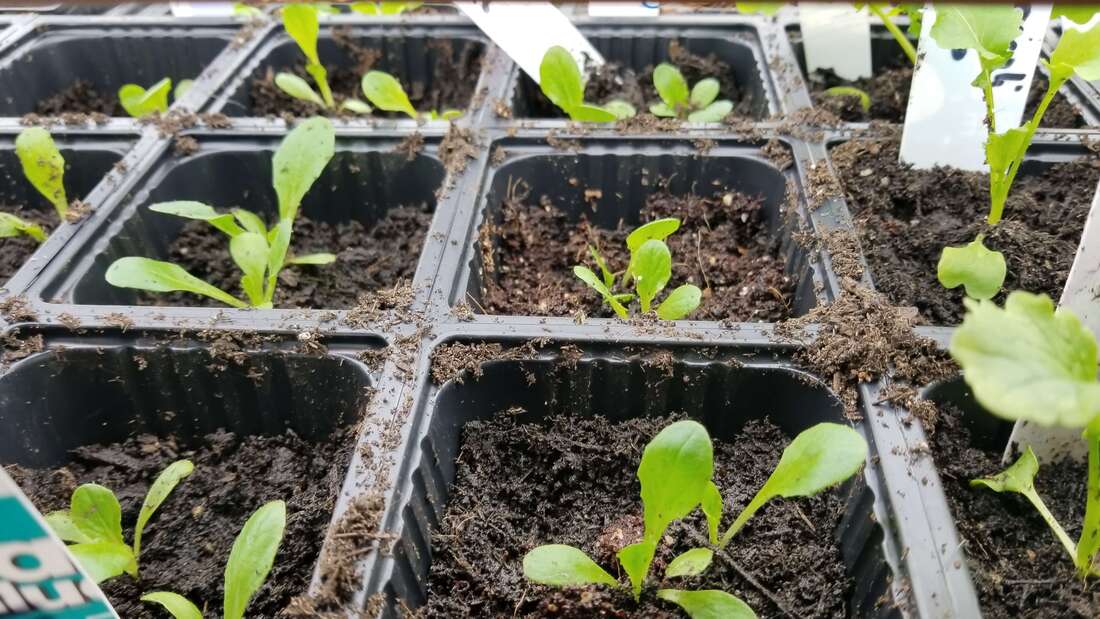
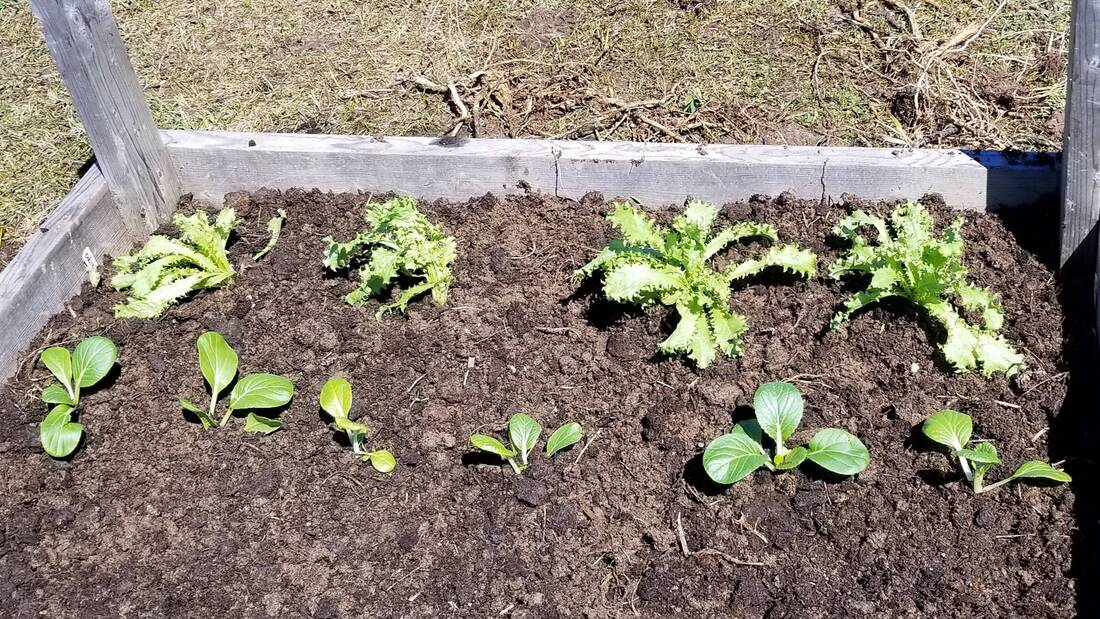
From left to right, onion seedlings under 4 foot LED 5000K lights, lettuce seedlings potted up into 3.5 inch square pots, and endive and pac choi recently transplanted into a raised bed.

Conclusion

I love starting my own seeds and hopefully you will too. Just remember if it does not work out great your first time, try again! My first time I started seeds I went on vacation and the person who was checking in on my seedlings overwatered them because she thought they were dying. It turns out they were dying because I had problems with damping-off (this was not her fault, some had started dying before I even left for vacataion). Unfortunately, watering even more makes damping-off worse so I lost about half or more of my seedlings that year.  I have since learned that less water is usually better and I also try to time my vacations until after the majority of my plants are in the ground! Good luck and feel free to contact me with any questions!
Picture
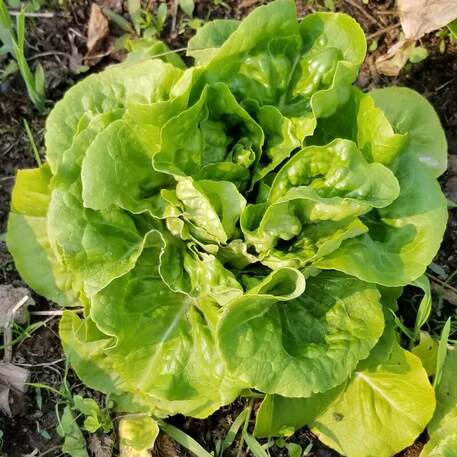
Fully grown lettuce that I started from seed in my basement and transplanted outdoors in my raised beds.

Share

0 Comments


Leave a Reply.

Details

    Author

    In 2016, my family and I  moved from the New York City area to small town Wisconsin. Our move, this website and blog (and our previous Etsy store) is the result of our desire over the past several years to simplify our lives, increase our quality of life, reconnect with nature, and enjoy a more self-sufficient life. I grew up as a country kid in central Pennsylvania working on my grandfather's fruit farm and as a corn "de-tassler" at a local seed farm. My background is in biology where my love of nature originated. I am a former research scientist and professor and have now transitioned to a part-time stay-at-home mom, self-employed tutor, and small business owner. Thank you for taking the time to check out my site.
    ​Marisa

    Archives

    January 2025
    December 2024
    November 2024
    October 2024
    September 2024
    August 2024
    July 2024
    June 2024
    May 2024
    April 2024
    March 2024
    February 2024
    January 2024
    December 2023
    November 2023
    March 2023
    January 2023
    May 2019
    March 2019
    November 2018
    October 2017
    September 2017
    August 2017
    February 2017
    January 2017

    Categories

    All
    3-Pronged Cultivator
    Aerogarden
    Antique
    Apothecary Glasses
    Apple Cider
    Apple Varieties
    Aronia Berries
    Artichokes
    Atlas Gloves
    ATV
    Bacillus Thuringiensis
    Bare Root Trees
    Beer Glasses
    Berries
    Black-Eyed Susan
    Bleached Pinecones
    Bleached Pinecone Wreaths
    Blossom End Rot In Tomatoes
    Books
    Bt
    Butterflies
    Cabbage
    Canning
    Celery
    Chamomile
    Chard
    Chemistry Glasses
    Chickens
    Chicken Tractor
    Cider
    Cold Crops
    Cold Frame
    Collards
    Compost
    Concord
    Coneflowers
    Cornish Cross
    Daisies
    Deer
    Deer-fencing
    Dehydrating Food
    Dried Flowers
    Drip Irrigation
    Dual Purpose Chickens
    Ducks
    EBay
    Echinacea
    Edelweiss
    Eggs
    Environment
    Extend The Growing Season
    Fall Crops
    Fall Gardening
    Farm Life
    Favorite Gardening Tools
    Fermentation
    Fermenting Wine
    Flower Gardening
    Food Preservation
    Frost Dates
    Fruit Trees
    Fruit Wine
    Garden Hod
    Garden Huckleberries
    Gardening
    Garden Pests
    Garden Seat
    Garlic
    Garlic Scapes
    GMO Seeds
    Goldenrod
    Grapes
    Greenhouse
    Growing Herbs
    Health
    Heirloom Seeds
    Herbs
    Hill Crops
    Home Decor
    Homemade Jam
    Hori Hori Soil Knife
    Hot Sauce
    How To Start Seeds
    Hybrid Or F1 Seeds
    Hydroponics
    Insecticides
    Itasca
    Japanese Weeding Sickle
    Jerusalem Artichokes
    Kale
    Karner Blue Butterfly
    Lactic Acid Fermentation
    Leatherman Multi-Tool
    Lettuce
    Lupine
    Maple Syrup
    Marquette
    Meat Birds
    Milkweed
    Monarchs
    Mulch
    Native Plants
    Nightshades
    No-Mow May
    Onions
    Open-pollinated-seeds
    Orchard
    Organic Gardening
    Organic Pest Control
    Overwintering Fall Crops
    Peas
    Peppers
    Pepper Varieties
    Pest Control
    Pickles
    Pinecone Wreath
    Pinecone Wreaths
    Pruners
    Purple Coneflower
    Raised Beds
    Ranger Chickens
    Rudbeckia Flowers
    Sauerkraut
    Save Money
    Seed Companies
    Seed Saving
    Seed Tapes
    Self-Sufficiency
    Slow-Mow Summer
    Soaker Hoses
    Square-Foot Gardening
    Squash And Pumpkin Species
    Storage Onions For Northern Climates
    Sun Hat
    Sustainability
    Tansy
    Ticks
    Tomatoes
    Tomato Varieties
    Trailer
    Turnips
    Two Ponds Farm
    Vegetable Gardening
    Vintage
    Wine
    Wine Grapes
    Wine Grapes For Northern Climates
    Wood-Fired Evaporators
    Wreaths
    Yarrow

    RSS Feed

© 2024 Two Ponds Farm All Rights Reserved

  • Home
  • About
  • Blog
  • Contact
  • Privacy Policy
  • Garden Pictures
  • Chicken and Duck Pictures
  • Native Plant Pictures
  • Game Camera Pictures