Raised Beds Why Grow in Raised Beds?I love my raised beds and usually add 1 to 2 more every year to my garden. There are several advantages to using raised beds to grow vegetables.
 Raised beds made out of untreated 2x10s with 2x4s for support (not placed in their final position, at least 3 feet between raised beds is recommended). A second layer of 2x10s can be added to increase depth. These raised beds have lasted 7 years in central Wisconsin, even with untreated wood. MaterialsWhat materials to build your raised beds with is a hotly debated topic. I prefer untreated wood, although I would be comfortable using treated wood today as copper is used as a preservative rather than arsenic. A study by Oregon State University (4) has found that only one inch of soil along the edge of the bed shows increases in copper levels, and that increase was small (20 ppm over untreated raised beds). We started with untreated lumber as it was cheaper than treated and even using untreated 2x10 boards our raised beds have lasted about 7 years. We built our first raised beds in 2017 and only this year (2024) have we started to replace some of the sides. We bought an Alaskan sawmill this spring and own a red pine plantation that needs thinning, so my husband has been milling 6x6s to build new raised beds and replace our older raised beds. The big advantage of 6x6s is that you can more comfortably sit on the edge of the bed to plant or weed. The gold standard for raised beds is cedar wood. I would love raised beds made out of cedar 6x6s but cedar wood is unfortunately extremely expensive. If you are only going to build one or two raised beds you could consider cedar depending on your budget. However, I have 19 raised beds and the cost of cedar is unrealistic. There are also other rot-resistant wood types, such as redwood, but they can be hard to source and expensive. Metal-raised beds, usually steel galvanized with zinc to prevent rusting, are becoming more popular. Although zinc can be toxic in large amounts it seems unlikely that enough would leach into a raised bed to cause toxicity issues. We also use galvanized food and water containers for our chickens and ducks and galvanized water tanks for livestock have been used for a long time. Therefore, I feel a galvanized metal raised bed is unlikely to cause health issues. Furthermore, I have heard good things about some of the metal raised bed kits (such as Epic Gardening Birdies Metal Raised Garden Beds[6]) you can buy regarding longevity and ease of construction, but I have no experience with them myself. If you decide to buy a galvanized livestock tank to use as a raised bed instead of a raised bed kit, just be sure to add drainage holes and ensure it is tall enough to accommodate the roots of your plants. Concrete (cinder) blocks are often used because they are easily available, relatively cheap, and heavy so no extra supports are needed. I would not use concrete blocks because, in addition to cement, sand, and gravel they also contain fly ash which is a byproduct of burning coal. However, this will likely only leach into the soil in large amounts if the integrity of the block is compromised. If you use concrete blocks, in good condition, this may be an acceptable choice for a raised bed. You can also choose to line your concrete blocks with a food-safe plastic liner, however, many people do not like growing food in plastic, even food-safe plastic. Materials I do not recommend are railroad ties, due to the creosote used as a preservative which is also a carcinogen. I also see old tires being used locally as raised beds, but this is not recommended since tires are made of petroleum-based products. Rubber degrades with exposure to UV light from the sun which will then leach petroleum chemicals into your soil.  New raised beds made in 2024 of 6x6s we milled on our property from red pine trees. Ignore the unhealthy melon plants, massive amounts of rain made this the worst gardening year I have ever experienced. SizeA typical raised bed size is often 4x8 feet. The first raised beds we ever built were five feet wide. This was too wide to easily reach the center of the bed for planting and weeding. I suggest limiting your raised beds to no more than four feet across, but three feet is also acceptable, particularly if you are on the short side. The distance in length does not matter although I suspect eight feet is often used because wood is readily available in eight-foot sections, and it is easier to transport. There is no reason however that you cannot make longer raised beds, you would just need support along the way. Many people also get creative and make raised beds in different shapes to make meandering pathways between them. I am unfortunately not that creative and line mine up in two rows with each bed running north-south. My older raised beds were made using 2x10s so they were roughly 9.25 inches high or, if we added two layers, for example, to grow asparagus with deep roots, were 18.5 inches high. These were a great height but made it difficult to sit on the edge given the sides were only 1.5 inches wide. Our new raised beds made with 6x6s are currently only one layer high, so 6 inches (these are actually 6 inches high since we milled them ourselves, if you buy 6x6s in a lumber yard they will likely be 5.5” unless you can find rough sawn wood). We plan to slowly add more layers of 6x6s as we have the time to mill more logs. Ideally, a raised bed is 12-18 inches tall, but I found having the wider 6x6s raised beds easier to work with than the taller 2-inch-wide boards so am willing to sacrifice height temporarily until we mill more 6x6s. Even a 6-inch raised bed provides advantages to growing directly in the ground. As far as spacing is concerned, I like 3-4 feet between each raised bed. I found that 2 feet is too small to easily work in between raised beds.  We drilled holes and used large 12 inch spikes to hold together our raised beds made with 6x6s. Buy or Build?Whether you buy or build your raised beds comes down to two different factors: budget and DIY ability. We chose to build our raised beds because I wanted quite a few of them which made buying them too expensive, and my husband and I are reasonably handy. We already had the tools needed (saws, drills, etc.) to build wooden raised beds. If you do not already have tools available weigh the cost of buying a raised bed kit with the cost of buying or renting tools plus lumber to build your own. Many hardware stores will also cut lumber to size for you so that could eliminate the need to buy a saw. When we built our raised beds with 2x10s we used screws to hold the boards together with a 2x4 at the corners. When we used 6x6s we pre-drilled holes through the 6x6s and then pounded a long spike through to hold them in place. In general, screws are preferable to nails because if you make a mistake, you can easily remove the screw. One thing we did not add to our raised beds is hardware cloth lining the bottom. This is used to prevent rodents from burrowing underneath and eating the roots. This has not been a problem for us but if you have high rodent pressure in your area I would recommend it. SoilWhen starting a raised bed from scratch I like to combine peat moss (make sure you buy the sustainable Canadian peat moss), topsoil or garden soil (about 50%), compost/composted manure, and sometimes a little sand. We usually get our topsoil/garden soil delivered as it is cheaper than bags if you need large amounts. Our compost is either our own (kitchen scraps mixed with used pine shavings from our chickens and ducks that have been composted sufficiently to reduce any pathogen load) or compost in bags we get from our local home improvement store. Sometimes peat moss is not recommended because it can cause your bed to dry out too much. I add no more than half a bag to my 4x8 foot raised beds and have not had a problem. After a raised bed is established, I usually add an inch or two of compost each year to maintain the fertility of the soil. I also grow many plants in pots and when I need to refresh the soil in my pots, I often dump the leftover potting soil into my raised beds (assuming no diseases were present). Potting soil usually has good drainage so this can also increase the health of your raised bed soil. The cost of filling a raised bed can be as expensive or more expensive than the cost of a raised bed itself, so be sure to add up the total cost before you build too many raised beds you cannot afford to fill. This is why we have slowly added 1 or 2 raised beds per year rather than making them all at once. ConclusionI love raised bed gardening and firmly believe the advantages outweigh the time and cost required to build or buy them. The vegetables in my raised beds routinely outperform my other vegetables in both output and health. If you wish to learn more about raised bed gardening, I encourage you to read or listen to Joe Gardener’s blog/podcast (links below) which is very comprehensive, and check out the other resources provided. References and Resources
0 Comments
 Baby persimmon tree just starting to get its first set of true leaves. Starting Persimmon Trees from SeedI purchased fifty Early Golden Persimmon seeds, from Perfect Circle Farm in late winter of 2024. Early Golden is a cold-hardy American persimmon (Diospyros virginiana) variety. Not surprisingly American persimmons are native to the United States from much of the east coast to the mid-west. According to BONAP they are not native to Wisconsin (where I live) but are found nearby in Iowa and Illinois. They are also native to similar and even more northern latitudes in New York. I chose the Early Golden variety because it is supposed to be hardy to zone 4, where I live. Like many tree seeds in northern climates, persimmon seeds require cold stratification. You can keep them moist, wrapped in a paper towel, or sphagnum moss, in a plastic bag in the refrigerator. They need a 60–90-day stratification period. After stratifying, I moved the seeds to a heat mat on March 1st, keeping them moist. I checked them every couple of days and first noticed that some seeds looked like they started germinating on March 16th. I then put the seeds in nursery pots designed for trees (see below) and waited much longer than expected for them to emerge (maybe I was mistaken about their earlier germination).  Persimmon seed just starting to form the root. After GerminationI bought some deep nursery pots on Amazon that are 4-5 inches wide at the top and 12 inches tall. These types of pots are used for trees to accommodate long tap roots. As soon as I noticed germination I moved my seeds to potting soil in the nursery pots and covered them with a thin layer of soil. I moved them off the heat, and until they start sprouting (seeds put their roots out first, before their first leaves) they do not need light, just moisture. I waited until our days warmed up in late spring before I moved the pots outside, but it was not until June 26th that I first saw seedlings emerge from the soil. I was surprised because I assumed the seeds were not viable as it took so long to see growth. So far about 8 have sprouted (update, about 3 dozen have sprouted by 7/24/24). When the seedlings get big enough (maybe 6 inches) I will transplant them. I plan on putting these trees in our fields, partly for our use but mostly for wildlife.  Persimmon seedling just starting to emerge. Growing ConditionsAmerican persimmon trees prefer full sun and moist but well-drained slightly acidic soil. The trees get large so they should be planted 30-50 feet apart. Make sure you dig a hole at least twice as deep and wide as the pot and fertilization should not be necessary unless you are planting in poor soil. These trees do require a second tree of a different variety for pollination. If these trees survive their first few winters, I will buy another persimmon variety for pollination. Other varieties hardy to zone 4 that would work as pollinators include Yates, Garretson, and Elmo. Prok is another variety that can be used as a pollinator, hardy to zone 5. All these trees, including Early Golden, can also be purchased from Stark Brothers Nursery (and probably others) if you do not wish to start from seed. I have also found American Persimmon trees at my local home improvement store in the spring.  Early Golden Persimmon seeds with quarter shown for size. Persimmon UsesPersimmons must be fully ripe, or they will be tannic and very astringent. When ripe they are often eaten fresh and used in various desserts and breads or dried and eaten like prunes. Many animals also eat persimmon fruit including deer and birds, and even skunks, raccoons, opossums, and foxes. References
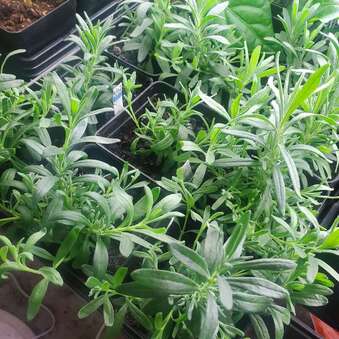
Karner Blue Butterfly and Wild LupineWild blue lupine (Lupinus perennis), or sundial lupine, is the only food source for the endangered Karner Blue Butterfly (Lycaeides melissa samuelis). Lupine has tall, light blue-purple spiked flowers and prefers dry, sandy soil. My first introduction to lupine was after taking a trip from my home in central Wisconsin to the Upper Peninsula in Michigan. The lupines were blooming profusely along the roadside. Unfortunately, after some online research, it appears that these are non-native Bigleaf lupines (Lupinus polyphyllus) that outcompete and even hybridize with native lupines and do not support the Karner Blue Butterfly. Bigleaf lupine, native to the western United States from California and Nevada, and north into Canada and Alaska, are not native to the Midwest or East Coast like L. perennis. Because L. perennis is the only food source of the Karner Blue Butterfly and because Bigleaf lupine is outcompeting and hybridizing with L. perennis (hybrids also cannot support the Karner Blue Butterfly), the butterfly has become endangered. Although it was first classified as endangered in 1992, its status has not improved in the past 30 years. In many areas, the butterfly's lack of food source has led to local extinctions. Once found continuously from Wisconsin to the Atlantic states, the Karner Blue is only found in parts of Wisconsin, Michigan, Ohio, New York, and New Hampshire. Other than non-native lupine encroaching on the native blue lupine’s habitat, factors like clearing land for farming, and development of commercial and residential properties have all played a role in the loss of wild lupine. This is one of the reasons for arguments in favor of planting plants native to your region, no matter where you live. This concept is explored in detail in Doug Tallamy’s book, Bringing Nature Home. If suburban (and any other) landowners would carve out as much lawn as possible and return it to native trees and flowers, then native insects with a specific food source and habitat would have a greater chance of survival. This also directly helps birds who feed on native insects and seeds. Most baby birds, no matter what they eat as adults, require an insectivorous diet to survive to adulthood. There is nothing wrong with having and enjoying a lawn and I will never completely get rid of my lawn because it provides an area for my child and dogs to play. However, I highly encourage adding native plants (and removing invasive ones) to your property to help native birds, bees, butterflies, and other insects. In addition to homeowners, as family farms are being bought by larger farming companies, the tree, hedge, and flower rows that used to exist between fields are being plowed under and turned into farmland. These rows of (sometimes) native plants used to provide a respite that native insects and birds could survive in, particularly for migrating birds, providing resting stops and food as they migrated. The loss of even these small habitats can make a huge difference to our native organisms. If you wish to help the Karner Blue Butterfly and live in a state where it and wild lupine has traditionally thrived (check the BONAP map) plant native L. perennis. Furthermore, if you have any non-native lupine on your property be sure to remove it before planting native to reduce the chances of cross-pollination and hybridization. References
Wine Grapes for Northern ClimatesMost grapes that grow well in northern climates (for this blog I consider zones 3-5 to be northern) are not always known for their wine, particularly dry red wines. However, in recent years several grape varieties have been developed, mostly through the University of Minnesota, that can make very nice, dry to semi-sweet wines. Most table grapes grown by homeowners in the United States are cultivars of the native Vitis labrusca grape also known as the fox grape. These grapes include Concord, Niagara, Edelweiss, Bluebell, and Valiant. These grapes are generally used for juice or jelly but can also be used to make sweeter wines. However, the Labrusca grapes develop strong “foxy” flavors when grown to high Brix levels (22°-24°), used for winemaking. For those unfamiliar with winemaking terminology, Brix is simply percent sugar. If you ferment to dryness, the higher the starting sugar content, the higher the alcohol of your wine. American grapes are usually harvested at a lower, 14°-16° Brix, to avoid these off flavors. Additional sugar can be added to increase the alcohol content to a more typical 11-15% found in most wines. When most people think of wine, such as California wines, they generally think of the Vitis vinifera grape varieties, native to Europe, the Mediterranean, and parts of Asia. These grape varieties make some of the best, classic dry to semi-sweet wines including Chardonnay, Pinot Grigio, Cabernet Sauvignon, Merlot, Pinot Noir, Zinfandel, and Shiraz. Most of these grapes, except Riesling (zone 6), are hardy to zone 7, eliminating them from my zone 4 location in Central Wisconsin. Table GrapesTable grapes are usually eaten fresh or made into jelly or juice. I highly recommend investing in a steam juicer to make juice. It uses steam to extract the juice, which can be canned or made into jelly. The juice is concentrated and not diluted by water like other extraction methods. Some table grapes can also be used to make wine, although they are usually produced with some residual sweetness. These grapes tend to make wine with a “grapey” flavor, similar to drinking alcoholic grape juice. Edelweiss and NiagaraEdelweiss is a white table grape developed by Elmer Swenson and the University of Minnesota. It is hardy to zone 4 and we have had good luck growing this grape variety in central Wisconsin. It is more disease-resistant than our wine grapes and thrives. It is similar to the Niagara grape, but Niagara is hardy to zone 5 and was not a good choice for our area. Like other American “fox” grapes, Edelweiss is usually picked earlier (14°-16° Brix) for wine to avoid off flavors and is generally finished sweet. We made our first Edelweiss wine dry, which I usually prefer, but I believe this wine would do better with just a touch of residual sweetness. The wine is light and fruity and has a definite “grapey” flavor. Edelweiss and Niagara are also great table grapes for eating fresh or making juice or jelly.  Edelweiss grape harvest, fall 2023, from 2 vines. Swenson RedSwenson Red is a red table grape developed by Elmer Swenson while at the University of Minnesota and released in 1978. It is hardy to zone 4. This variety can be used to make a white wine as fermentation with the skins is not recommended, but I have heard some make a Rosé wine by fermenting for a short time with the skins on. St. Pepin St. Pepin is a table grape developed by Elmer Swenson, released in 1983, that can also be used to make white wines. It is hardy to zone 4. It is a lower-acid grape so it could be blended with higher-acid grape wines to balance the acidity. It is often used for German-type wines and ice wines. Table Grapes for Red WinesBluebell, Concord, and ValiantWe grow Bluebell, Concord, and Valiant grapes, which are blue/black grape varieties. We mostly grow them to eat fresh and make them into juice and jelly but they can also be made into wine. Bluebell grapes, developed by the University of Minnesota in 1944, are similar to the classic Concord, released almost 100 years earlier in 1848. Valiant grapes were bred by South Dakota State University and released in 1982. Bluebell and Valiant grapes are hardy to zone 3 rather than zone 4 for Concord. Bluebell and Valiant grapes also ripen a little earlier in the growing season, generally by a week or two. These grape varieties are often used for juice and jelly, but you can also use them to make wine, usually sweeter, and harvested earlier to avoid “foxy” flavors. We have yet to try making these varieties into wine, but I have tasted some delicious Concord grape wines.  Concord grape harvest, fall 2023, from 2 vines. St. CroixSt. Croix is a blue/black table grape also used to make red wine. It is very cold hardy, to Zone 3, and was released by Elmer Swenson in 1983. It tends to make a light wine due to its low sugar content and low tannin levels, so it is often used for blending, although it can make a nice light wine on its own. Wine GrapesThere are limited grape varieties bred specifically for wine-making that also grow in cold climates. We currently grow Marquette and Itasca as we prefer dry wines, but I have included a description of many of the wine grapes available to grow in Northern Climates. Most of the more recently released varieties were developed by the University of Minnesota but several older releases were developed by Elmer Swenson, well known for his northern grape varieties. Red Wine Grapes for Northern ClimatesFrontenacFrontenac (aka Frontenac noir) was one of the first varieties of grapes that made a dry red wine in Northern climates (zone 3-4, and higher). However, it tends to have high acidity which must be addressed when making wine. It was released in 1996 by the University of Minnesota. We opted to plant Marquette grapes instead of Frontenac, purely due to the lower acidity levels (although still high) found in Marquette. MarquetteThe Marquette grape is a blue/black wine grape variety used to make dry red wines. It is similar to Frontenac but tends to have lower acidity, although it can still be a touch high for wine, so we used a yeast that reduces acidity along with malolactic fermentation. It can mature with high sugar levels (22°-25° Brix) used to make wine yielding 13-15% alcohol by volume. It was developed in 2006 by the University of Minnesota and is hardy to zone 3. The biggest problem we have had with our Marquette grapes is a fungal disease, anthracnose, which requires close attention to spraying to reduce disease. Marquette can also have a fairly early bud break which can make it susceptible to late frosts.  A bunch of our Marquette grapes, harvested fall 2023. We ended up with approximately 6 gallons of must and 5 gallons of finished wine. Petit PearlPetit Pearl, released by Tom Plocher of Plocher-Vines LLC in Hugo, MN, in 2009, is another option for a red wine grape. It is hardy to Zone 5 and some parts of zone 4. It is less acidic than Frontenac but is not as cold-hardy. It is also harvested about a week or two after Marquette due to its later bud break, which makes it less likely to get injured by a late spring frost. White Wine Grapes for Northern ClimatesItascaItasca is one of the first grape varieties, hardy to Zone 3, to be developed to make a dry white wine. It was released in 2017 by the University of Minnesota. We have just planted these vines (spring of 2024) but according to reports, it is a disease-resistant, lower-acid grape (this is generally a good thing in Northern climates) that can develop high sugar levels. ClarionClarion is a white grape released by the University of Minnesota, in 2022. Clarion may be hardy to Zone 4 but is better as a Zone 5 or higher grape. This grape is supposed to make nice dry white wines but due to its recent release has yet to hit the commercial market. Frontenac Gris and Frontenac BlancBoth Frontenac Gris (2003) and Blanc (2012) are derived from the Frontenac Noir grape. Both were developed by the University of Minnesota and are used to make white wines. Frontenac Blanc is a white grape that can be harvested earlier than Frontenac Gris and is hardy to Zone 4 and parts of zone 3. Frontenac Gris is more of a pink/gray-skinned grape that can be prone to high acidity but with similar hardiness as Frontenac Blanc. La CrescentLa Crescent is a white wine grape typically used to make off-dry to sweet wines, released in 2002. It was developed by the University of Minnesota but has some Elmer Swenson grapes in its parentage. It is hardy to Zone 3. AlpenglowAlpenglow is a light red grape used to make white wine. This variety was developed by Elmer Swenson and is hardy to zone 4. The grapes make a low-acid, low-sugar wine so they are generally used only for blending with high-acid wines to balance them out. BriannaBrianna is another Elmer Swenson variety that can be grown in zones 3-5. It is a white wine grape generally used to make semi-sweet wines. LaCrosseLaCrosse was developed by Elmer Swenson as a white wine grape. It is used to make dry to semi-dry fruity wines. It is often lower in sugar (19°-21° Brix) making the wines higher in acid and lower in alcohol. It is hardy to zone 4. ConclusionsIf you do not want the hassle of growing your own wine grapes or wish to try a specific wine before investing in vines, you can buy the wine itself or the grape juice to practice making your own wine. AA vineyards recently started selling juice from many of the vines they sell, including some juice from northern grapes that is typically harder to find from mainstream wine kit companies. References
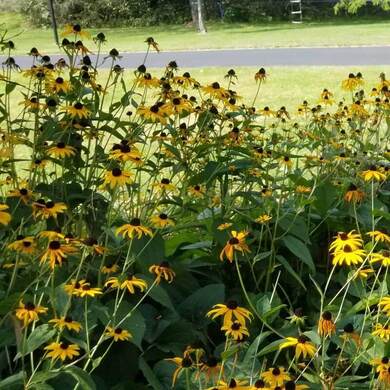
Coneflowers (Echinacea)Coneflowers are native flowers that belong to the genus Echinacea in the Asteraceae family, which includes asters, daisies, and sunflowers. The genus name, Echinacea, comes from echinos, a Greek word meaning sea-urchin. Echinos refers to the cone in the center of the flowers, which has spikes reminiscent of sea urchins. Probably the best-known coneflower species is the purple coneflower although there are about 9 other species in the Echinacea genus, only one of which is yellow (Bush’s coneflower). Coneflowers are perennial plants; most species contain a taproot making them drought-tolerant. Most coneflowers do not tolerate overly moist soils with poor drainage. The purple coneflowers were medicinal plants used by many Native American tribes and can still be found today in many herbal teas. Many pollinators including bees are attracted to coneflowers and butterflies and hummingbirds often feed on their nectar. In the fall, birds, such as Goldfinches, are attracted to the spent flowers to eat the seeds, which is one reason to keep the dead flowers around all winter. Bush’s Coneflower (Echinacea paradoxa) Bush’s coneflower also known as Ozark coneflower, is unusual as it is yellow (giving it its species name of paradoxa). It reaches about 3 feet high in full to partial sun with dry to medium moist soils. It blooms earlier in the summer than many other coneflowers, starting in June. The name comes from its native range in the Ozark region of Arkansas and Missouri but can also be found (rarely) in Oklahoma and Texas. In general, this is a rare flower and would be helped by planting it, especially if you live in its native range although it will grow well from the Midwest to the East Coast. It is also deer-resistant and like the other coneflowers it attracts many bees and butterflies, and birds enjoy the seeds. Other coneflowers may cross-pollinate and lead to oddly colored flowers in your flower bed.  Coneflowers are easy to start from seed or you can buy plugs or plants from native nurseries. Narrow-Leaved Coneflower (Echinacea angustifolia)Narrow-leaved coneflower is similar to purple coneflower but its leaves, as the name suggests, are narrower. It grows best in dry to medium-dry soil with full sun and is drought-resistant. Like other coneflowers, it attracts many pollinators. It (even more than the pale purple coneflower) is important for the life cycle of the Ottoe-skipper butterfly (Hesperia ottoe), an endangered species. Its native range is in the center of the United States from Minnesota to Montana, as far north as Canada and south into Texas. Ozark Coneflower (Echinacea simulata)The Ozark coneflower, not to be confused with Bush’s coneflower, which is also known as Ozark coneflower, is found mostly in the Ozark region of Missouri and Arkansas. Other common names include Wavyleaf Purple Coneflower and Glade Coneflower. This flower is very similar to the Pale Purple Coneflower and can be hard to distinguish, although their pollen color differs. The Ozark coneflower reaches about 3 feet high when grown in full to partial sun with medium to medium-dry soil. This flower blooms earlier in the summer, usually in June and July. Pale Purple Coneflower (Echinacea pallida)Pale purple coneflower, as its name suggests, is a pale purple to pink colored flower. It has a long taproot that makes it very drought resistant once established but it therefore does not transplant easily. It grows best in full to partial sun with dry to medium soil. Pale purple coneflower grows up to 3 feet tall and blooms earlier in the summer when many other flowers have not yet flowered. If you plant this flower with purple coneflower which starts flowering in mid-summer, you can have blooms from early to late summer. In addition to attracting birds, bees, and hummingbirds the larva of the Ottoe-skipper butterfly (Hesperia ottoe), an endangered species, also eats the leaves. The native range of this flower is from much of the east coast into the Midwest and north into Canada. Purple Coneflower (Echinacea purpurea) Purple coneflower has a fibrous root system, making it less drought-tolerant although it is still reasonably drought-tolerant once established. It prefers full to partial sun and can tolerate dry to medium-wet soils. It is also deer-resistant. Purple coneflower can be found from the East Coast to the Midwest and Canada. It can grow up to 4 feet high and is a favorite of bees, butterflies, and other pollinators with its long flowering time of 2 months in mid to late summer. If you deadhead the old flowers, it will sometimes re-bloom in the fall. Purple coneflower can be planted with the earlier blooming pale purple coneflower to have consistent flowering from early to late summer.  Purple coneflower growing wild on my property in central Wisconsin. Tennessee Coneflower (Echinacea tennesseensis) The Tennessee coneflower is only found in Tennessee. Until recently it was considered an endangered species. The flowers bloom for most of the summer and like other coneflowers, also attract many butterflies and bees. It has a long taproot making it drought-tolerant and grows best in full to partial sun with dry to medium-dry soil. It only reaches approximately 2 feet in height. References
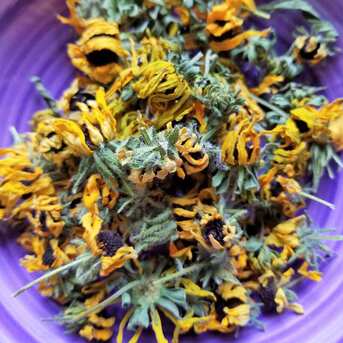
Dehydrating FoodI use three main forms of food preservation: canning, freezing, and dehydrating. All three forms have advantages and disadvantages. Canning is the most complicated and freezing is the simplest. Dehydrating is slightly more complex than freezing because it requires specialized equipment, a dehydrator, and a little more time. Air drying is possible for foods like herbs, especially in dry climates, but is generally too slow to be safe for most other foods. Some people use solar dehydrators but I do not have experience with that method and will not discuss it here. There is a third method of preserving food, freeze drying, however, the machines to freeze dry are expensive, a minimum of $2500 and I do not have any experience with this method. Freeze-drying is superior to dehydrating in that the food rehydrates better and many things that cannot be dehydrated for long-term shelf-stable storage can be freeze-dried, such as meat and eggs. What Dehydrator Should I Buy The type of dehydrator to purchase depends on your budget. Many small, round, plastic dehydrators are reasonably priced at around $50 or less. One common brand is Nesco, and it is a great beginner unit. Larger, square dehydrators, usually with the fan in the back, are more efficient and even at drying, and generally cost $150-$250 or more. You can also find these in stainless steel if you are trying to avoid plastic. I bought a LEM, stainless steel dehydrator but other brands that receive good reviews include Excaliber, Cosori, Cabela’s, and more.  My LEM, stainless steel, dehydrator. One feature to look for is temperature control, preferably as low as 95°F for delicate herbs. My dehydrator’s top temperature is 145°F. Jerky is supposed to reach 160°F but NCHFP recommends pre-heating your meat to a safe temperature before dehydrating it or heating it after it is dry. This way you do not need a unit to reach 160°F to make jerky but some units on the market do reach 160°F. Some dehydrators also include a timer. A timer is not something to pay extra for as it is unnecessary. Instead, you want to dry your food until it is done. You can find ballpark drying times but you cannot guess the exact time needed as it depends on the water content of the food and the local humidity where you are dehydrating. You also do not want to put on a timer, have it stop while you are away from home or overnight, and have the food re-absorb moisture from the air or worse start to mold, before you get back to check on it. Where to Find Produce?I use dehydration primarily as a way to preserve food from my garden. That said, there is nothing wrong with dehydrating produce from the grocery store, farmers market, produce auction, or anywhere else you can find it. Usually, at least one vegetable in my garden fails each year so I sometimes need to buy produce. The first place I check for fresh vegetables is the local Amish produce stands, but not everyone lives in Amish country. I also sell or give away my extra produce on Facebook Marketplace so Marketplace or Craigslist is also a great place to look. Some people also get great deals at produce auctions. How to DehydrateThe beginning steps to dehydrate food are similar to those to freeze food. Most vegetables store and rehydrate better if you blanch them first but there are exceptions like peppers, mushrooms, and onions that do not need blanching. Fruits generally do not need to be blanched, although you may want to soak them in something like Fruit Fresh which contains citric acid to reduce browning, and neither do herbs. I like to follow the Ball Blue Book or NCHFP guidelines for whether or not a food needs to be blanched and how long. Before blanching you should wash your produce and chop it if necessary. Once chopped, blanch it in either boiling water or steam and immediately move it into an ice bath so it cools quickly. Blanching inactivates enzymes in the food that lead to reduced quality or color during preservation. If you only plan to store your dehydrated food for a short period you can often skip this step but long-term storage benefits from blanching. Dehydrated food also rehydrates better if blanched first. Next, you dehydrate your food at the recommended temperature. Generally 95°F for herbs, 125°F for vegetables, 135°F for fruit, and jerky should be as high as your dehydrator goes (usually 145-160°F), but finish at 160°F in the oven for safety according to NCHFP or Ball directions. How long to dehydrate depends on many factors such as ambient humidity and how much water content the food has. To check if your food is completely dried, allow it to cool for about 15 minutes and then check for residual moisture. Many foods should snap or crack when cool (some foods with more sugar like fruits, including tomatoes, may be more leathery). Next store your food in an airtight container. I prefer mason jars with canning lids (the lids can be old lids). I store my dehydrated with a food-safe silica packet and let the jar sit on my counter for a few days, checking for moisture. If no water droplets appear you can store them long-term (usually up to 1 year). As long as the food stays dry you can store it longer but nutritional quality and color may suffer. I also sometimes vacuum seal my jars using a mason jar attachment with my vacuum sealer for longer storage.  Dehydrated tomatoes (left) and potatoes (right) with food safe silica packets in half gallon mason jars and canning lids. How to Use Dehydrated FoodDehydrated food that is subsequently rehydrated will not be the same as fresh, canned, or frozen. It often has a different texture that some people will not like. I use most of my dehydrated food in soups or stews so it rehydrates as it cooks. Some of my favorite things to dry are herbs, tomatoes, onions, garlic, ginger, turmeric, peppers, carrots, parsnips, and many fruits. Many of these I powder as needed to make onion powder, garlic powder, ginger powder, chili or paprika, etc. to use as seasonings. I also dry zucchini in long slices for lasagna as it rehydrates nicely if you add extra sauce when cooking. Kale and other greens dry and powder nicely for smoothies, meatloaf, and more. Many people dehydrate eggs and meat (fully cook them first) but I choose not to because even once dried, the best practice is to store them in the freezer to reduce the risk of fats going rancid. ResourcesI listed some links to safe resources on dehydration below. The best source for food preservation is always the National Center for Home Food Preservation (NCHFP). Although they have limited funding, they continue to test preservation recipes for safety. Ball is another good online resource. Ball also has books, including the Ball Blue Book Guide to Preserving (a new version released in 2024) that includes canning, freezing, and dehydrating information. Ball also tests their recipes for safety although they occasionally have errors in their books so if in doubt double check with NCHFP for a similar recipe and use an up-to-date book (2016 or newer). A third great resource is a blog called “The Purposeful Pantry”. The woman who runs this blog also runs a Facebook group called “Dehydrating Tips and Tricks.”
Rudbeckia Species: Black-Eyed Susans and More |


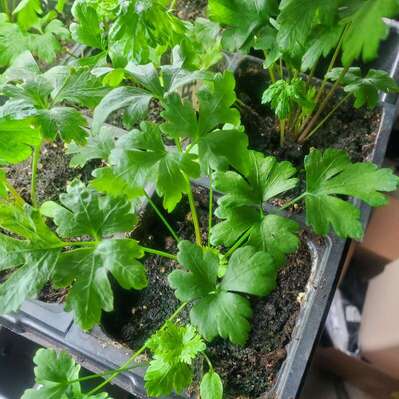

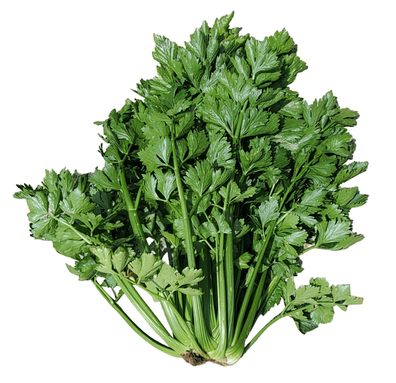
Growing Celery
Favorite Varieties
Starting Celery From Seed

Growing Celery
Harvesting Celery
Celery Diseases
Caution
Conclusion
References
- Cox, Jeff. 1988. How to Grow Vegetables Organically. Artichokes, p. 107-111. Rodale Press, Inc.
- Johnny’s Selected Seeds. Celery & Celeriac – Key Growing Information. https://www.johnnyseeds.com/growers-library/vegetables/celery-and-celeriac/celery-and-celeriac-key-growing-information.html
- UMass Extension Vegetable Program. Celery, Anthracnose. 2020. https://ag.umass.edu/vegetable/fact-sheets/celery-anthracnose
- University of Minnesota Extension. Fruit and Vegetable News. Leafhopper Watch: Hot Weather and Aster Yellows Risk. 2021. https://blog-fruit-vegetable-ipm.extension.umn.edu/2021/06/leafhopper-watch-hot-weather-and-aster.html
- Finkelstein E, Afek U, Gross E, Aharoni N, Rosenberg L, Halevy S. An outbreak of phytophotodermatitis due to celery. Int J Dermatol. 1994 Feb;33(2):116-8. doi: 10.1111/j.1365-4362.1994.tb01539.x. PMID: 8157392.
Author
In 2016, my family and I moved from the New York City area to small town Wisconsin. Our move, this website and blog (and our previous Etsy store) is the result of our desire over the past several years to simplify our lives, increase our quality of life, reconnect with nature, and enjoy a more self-sufficient life. I grew up as a country kid in central Pennsylvania working on my grandfather's fruit farm and as a corn "de-tassler" at a local seed farm. My background is in biology where my love of nature originated. I am a former research scientist and professor and have now transitioned to a part-time stay-at-home mom, self-employed tutor, and small business owner. Thank you for taking the time to check out my site.
Marisa
Archives
July 2024
June 2024
May 2024
April 2024
March 2024
February 2024
January 2024
December 2023
November 2023
March 2023
January 2023
May 2019
March 2019
November 2018
October 2017
September 2017
August 2017
February 2017
January 2017
Categories
All
3-Pronged Cultivator
Aerogarden
Antique
Apothecary Glasses
Artichokes
Atlas Gloves
ATV
Bacillus Thuringiensis
Bare Root Trees
Beer Glasses
Berries
Black-Eyed Susan
Bleached Pinecones
Bleached Pinecone Wreaths
Bt
Butterflies
Cabbage
Canning
Celery
Chard
Chemistry Glasses
Chickens
Chicken Tractor
Cold Crops
Cold Frame
Collards
Compost
Concord
Coneflowers
Cornish Cross
Daisies
Deer
Deer Fencing
Dehydrating Food
Dried Flowers
Drip Irrigation
Dual Purpose Chickens
Ducks
EBay
Echinacea
Edelweiss
Eggs
Extend The Growing Season
Fall Gardening
Farm Life
Favorite Gardening Tools
Fermentation
Flower Gardening
Food Preservation
Frost Dates
Fruit
Fruit Trees
Fruit Wine
Garden Hod
Garden Huckleberries
Gardening
Garden Pests
Garden Seat
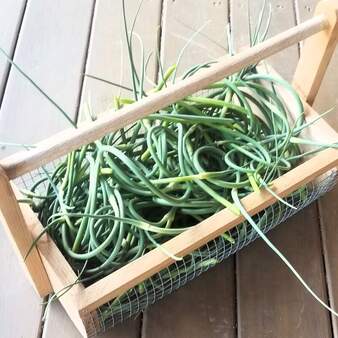
Garlic Scape Recipes
Garlic Scapes
GMO Seeds
Goldenrod
Grapes
Greenhouse
Growing Garlic
Growing Herbs
Health
Heirloom Seeds
Herbs
Hill Crops
Home Decor
Homemade Jam
Hori Hori Soil Knife
Hot Sauce
How To Start Seeds
Hybrid Or F1 Seeds
Hydroponics
Insecticides
Itasca
Japanese Weeding Sickle
Jerusalem Artichokes
Kale
Karner Blue Butterfly
Lactic Acid Fermentation
Leatherman Multi-Tool
Lettuce
Lupine
Maple Syrup
Marquette
Meat Birds
Milkweed
Monarchs
Mulch
Mulching
Native Plants
Nightshades
Onions
Open Pollinated Seeds
Orchard
Organic Gardening
Organic Pest Control
Peas
Peppers
Pest Control
PIckles
Pinecone Wreath
Pinecone Wreaths
Pruners
Purple Coneflower
Raised Beds
Ranger Chickens
Rudbeckia Flowers
Sauerkraut
Save Money
Seed Companies
Seed Saving
Seed Tapes
Self-Sufficiency
Soaker Hoses
Square-Foot Gardening
Sun Hat
Sustainability
Tansy
Ticks
Tomatoes
Trailer
Turnips
Two Ponds Farm
Vegetable Gardening
Vintage
Wine
Wine Grapes
Wine Grapes For Northern Climates
Wood-Fired Evaporators
Wreaths
Yarrow
 RSS Feed