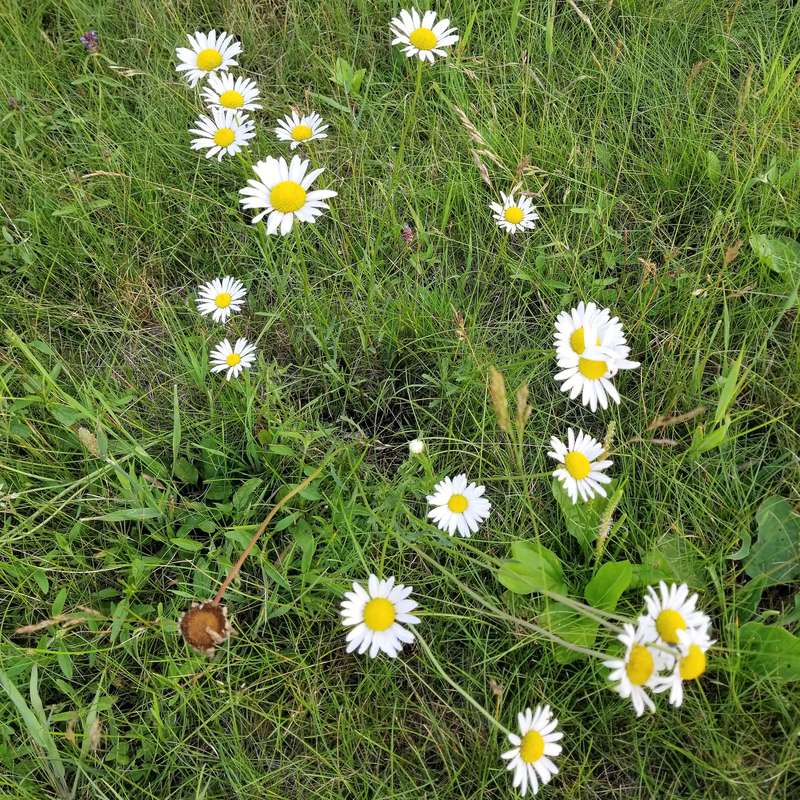
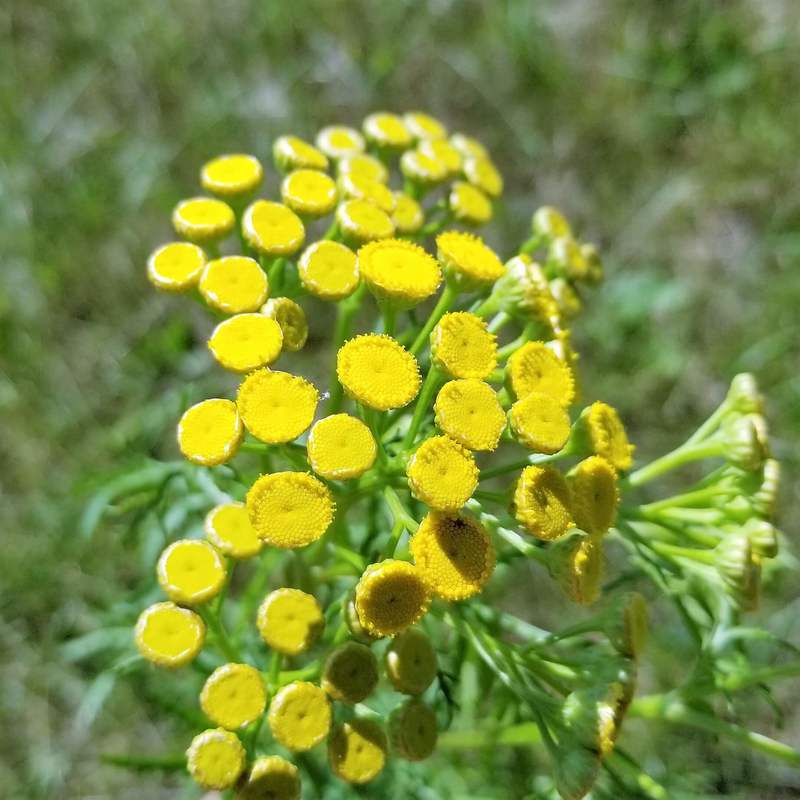
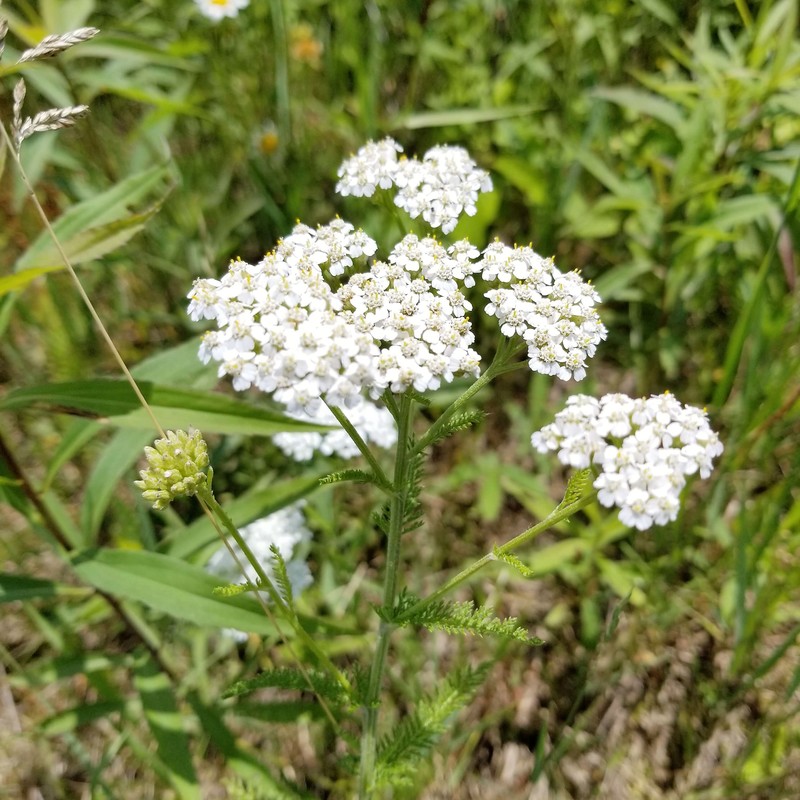
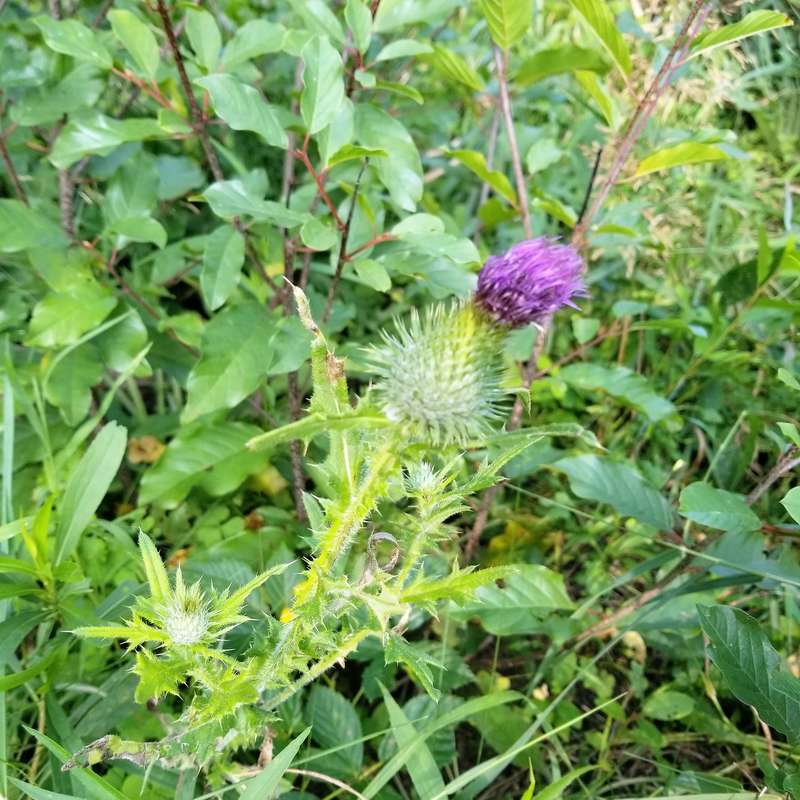
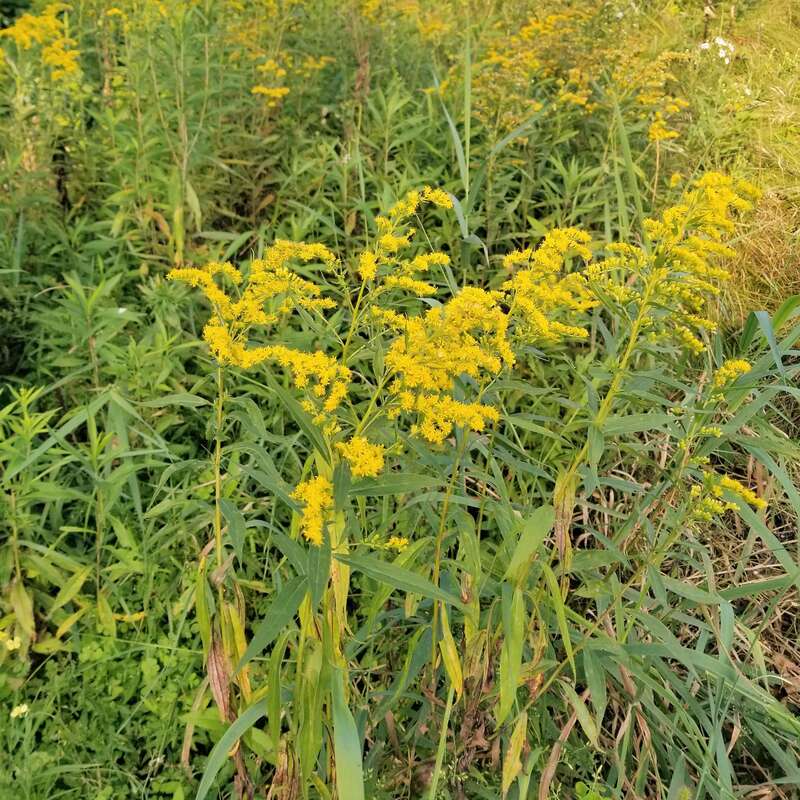
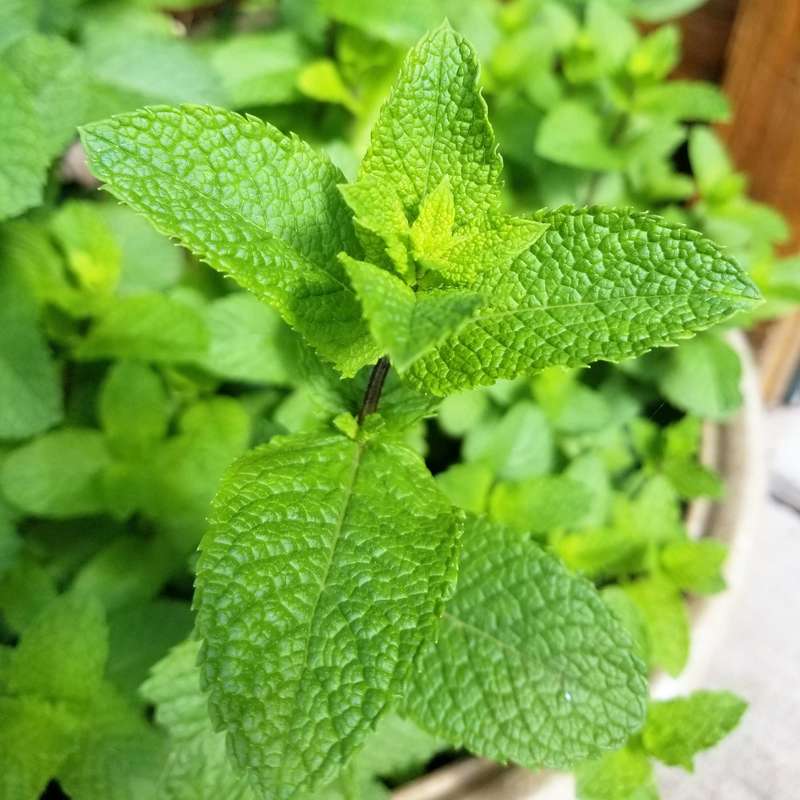
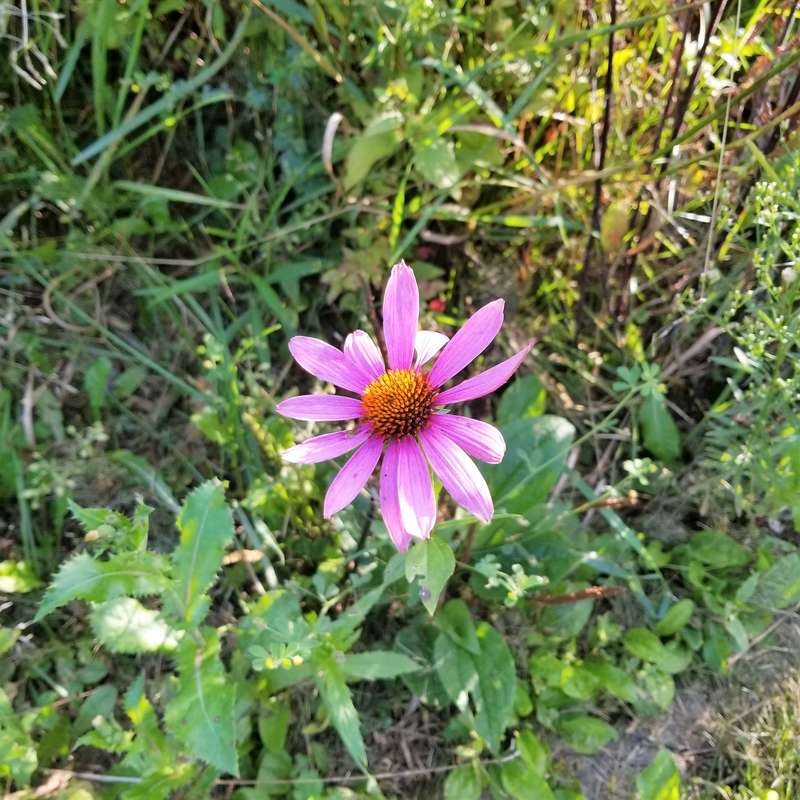
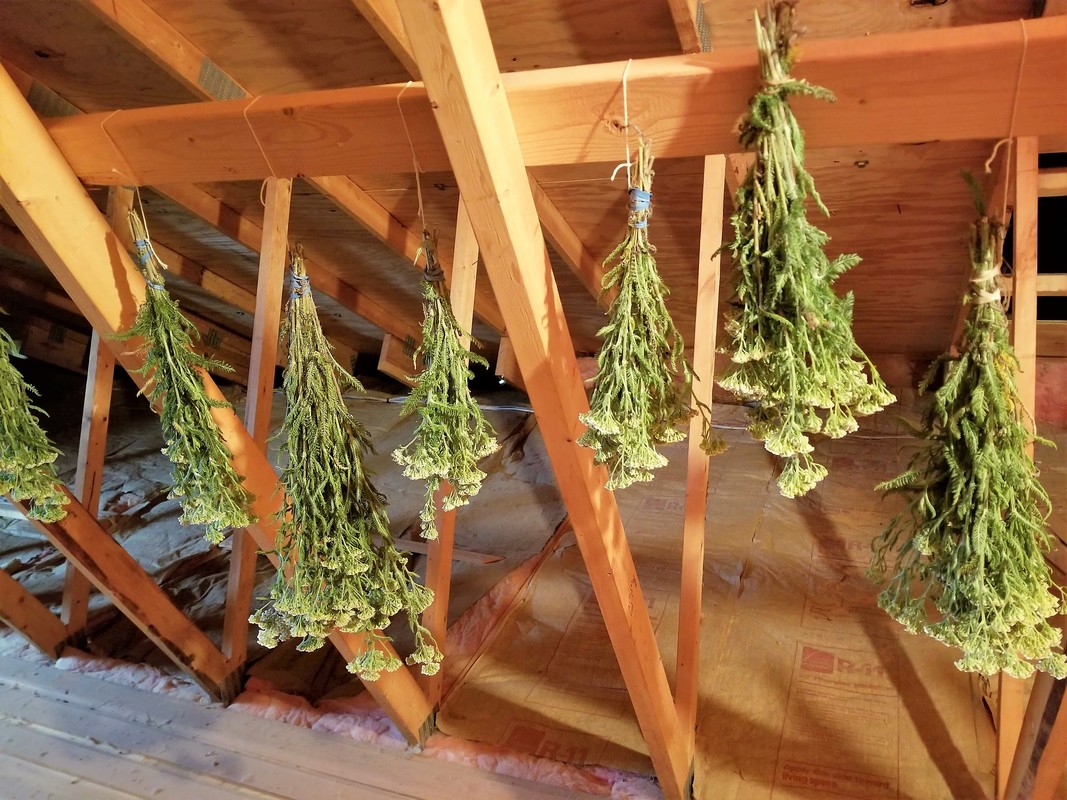
Drying Wildflowers I have recently started drying both wildflowers and cultivated flowers to sell on my Etsy and eBay sites (update, I no longer sell online). I love gardening but have minimal experience with ornamental gardening and flower gardening. I prefer vegetable and herb gardening (mostly because I like cooking and eating). When we moved into our home last summer we had so many flower beds that were only partially or not at all maintained. We did what we could last year to improve the flower beds and this Spring we bought a load of mulch to help reduce weeds and bring the beds back to life. Some flower beds have received more attention than others but hopefully, over the next few years, we will get them all back to their former glory. I have also slowly begun filling in the beds with multi-purpose herbs. Herbs are beautiful in flower beds and most can also be used in cooking or teas. I have also begun the long task of identifying all the bushes, shrubs, flowers, and ground covers in our beds. In addition, we have tons of wildflowers growing on our property some of which I am familiar with but many others are unknown to me. Pictured below are some of the wildflowers on our property which I have managed to identify. Unfortunately, many of them are invasive or not even native to my area. Wildflowers Oxeye Daisy Yellow Tansy White Yarrow |


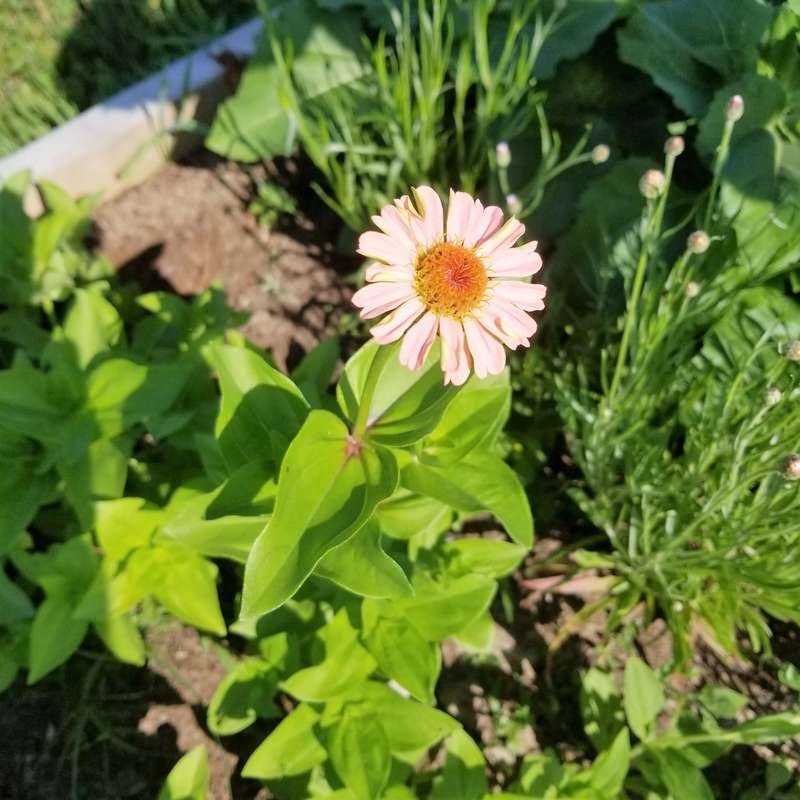


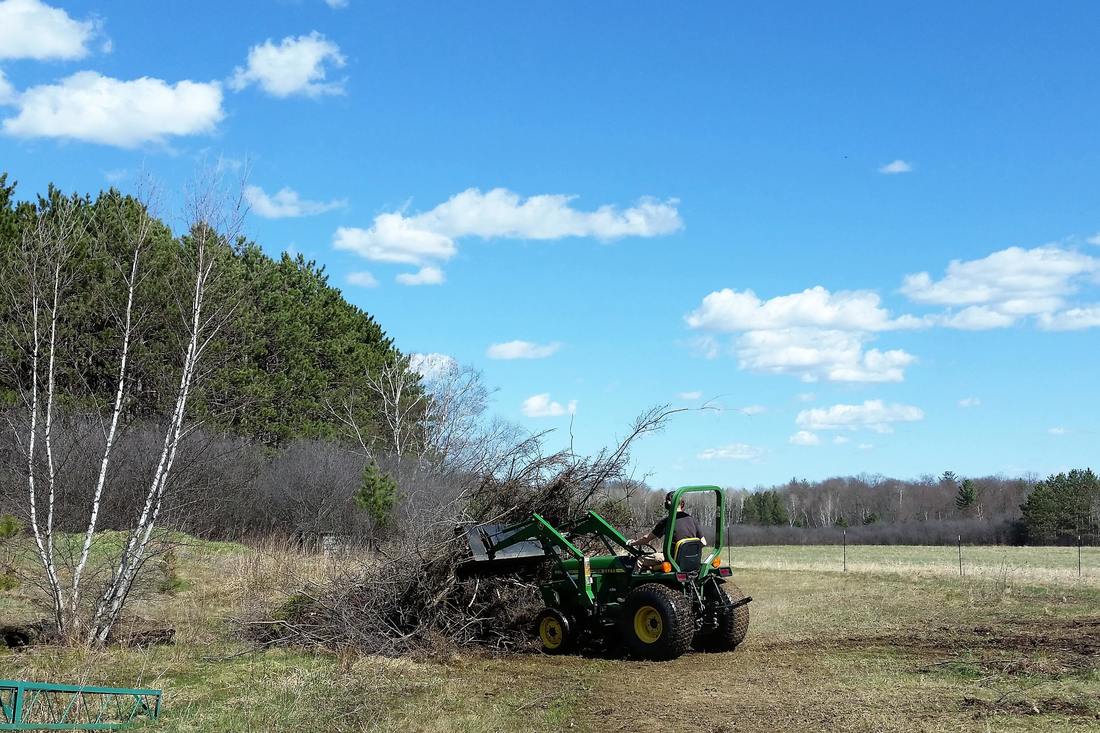
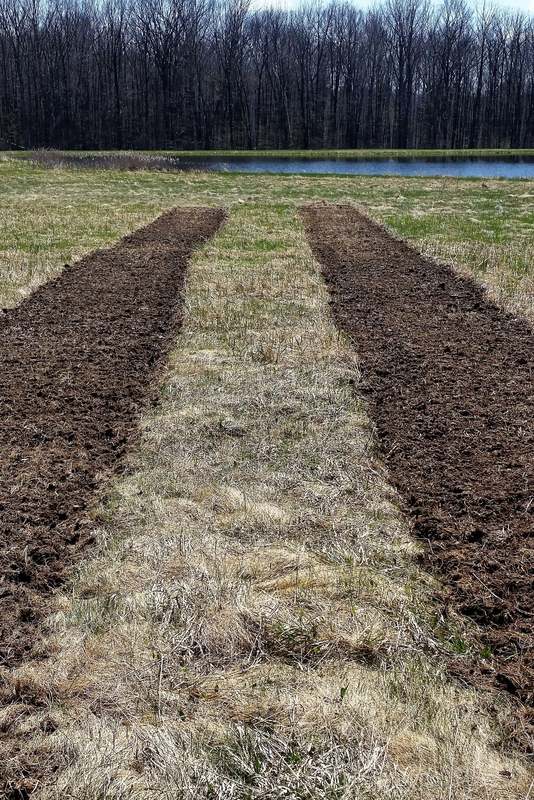
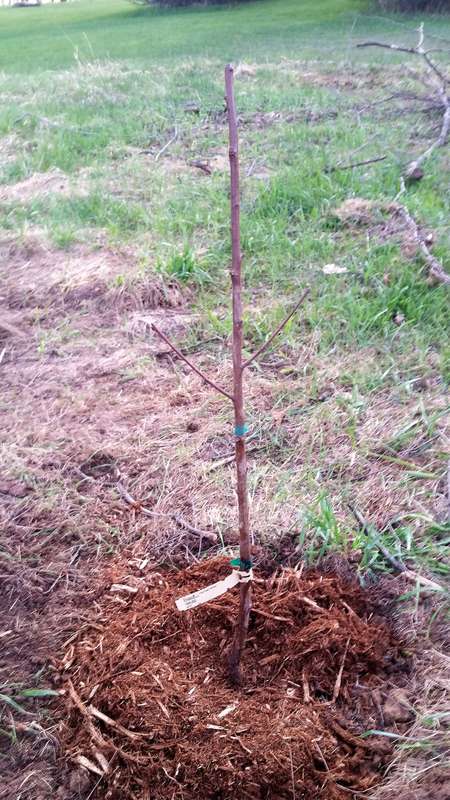
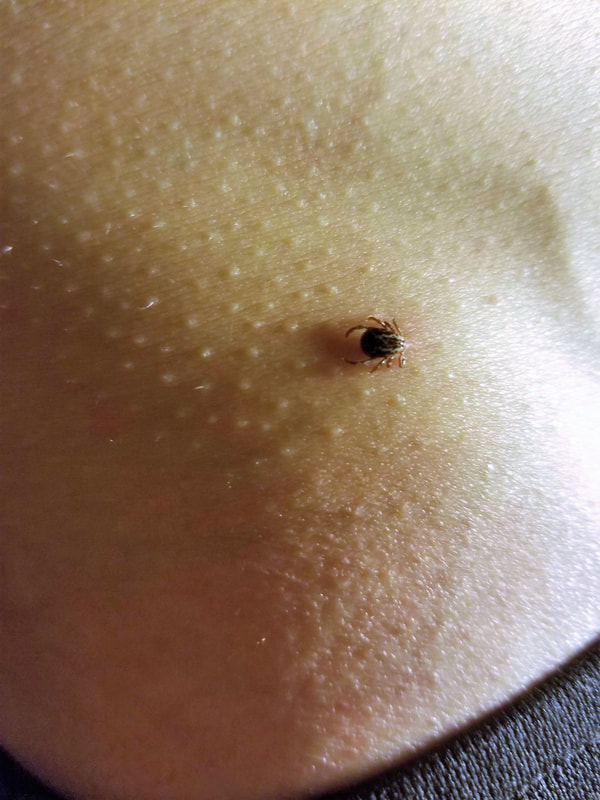
| Once our plot was tilled, we needed to put up a fence as quickly as possible. We have a large number of deer on our property and in the surrounding area (as evidenced by the fact that we hit three deer in a six-month period with our vehicles!) so a fence is absolutely necessary. We fenced in roughly a half acre, a 150’ x 150’ square. We used poultry netting for the bottom 3 feet with an extra 1 foot that we turned outward at the base to discourage digging under the fence. The top 3 feet of the fence we strung with 3 electric fencing wires. Because we do not have electricity close enough by for the fence we bought a solar powered electric fencer to power the fence which works very well. Once the fence was done and the grapes and fruit trees planted we focused on our vegetable garden. In addition to our large roto-tilled area where we planted corn, lots of vine crops, beans, tomatoes, and peppers, my husband made two raised beds for me (with hopefully many more in the future!). One we used for asparagus, the other I planted with annual flowers for cutting and drying. Other things we have done this summer include build a wooden play set for our daughter which we promised to do as we had to leave her other one in New York when we moved. We are currently in the process of sanding and re-staining our log home (a much bigger task than anticipated)! We discovered some logs were beginning to rot so this was definitely a necessary task this summer. Lastly, we have spent the entire spring and summer fighting the ticks which will likely be a separate blog post in the future. We mostly have dog or wood ticks but have also found some deer ticks which carry Lyme disease. We had a huge problem with deer ticks in NY (in fact we lived in one of the worst counties for Lyme disease in the US) so we are glad to exchange them for wood ticks. But we have so many wood ticks here that we find them everywhere including our house, clothes, yard, field, play set, fish tank, and more. Daily tick checks are a must! |

How to Make a Pinecone Wreath

First, you will need a wire wreath frame and floral wire, which is the green wire available in most craft, big box stores, and online retailers. I like the 26 gauge wire because it is easier on my fingers to twist, but 22 guage is also good if you want a stiffer wire. Some people hot glue the cones to a foam frame but I highly recommend individually wiring the pine cones to a metal frame. These wreaths are very delicate but at least by wiring them, you do not need to worry about them falling off! You will also need wire cutters and I have found needle nose pliers come in handy when adding the last group of pine cones to grab the wires and pull them toward the back of the frame.
Last, you will need pine cones and lots of them! I have only used the Eastern White Pine cones because I have most of them available, but I also prefer the look of these wreaths. Here is where the creative part of the process comes into play. You can use natural pine cones which you can spray with a matte or glossy acrylic spray if you wish to help protect them. A spray is not necessary but may help protect the wreath for long-term storage or if you plan on displaying the wreath outdoors. Regardless of whether or not you spray the cones, I do recommend displaying the wreath in a sheltered area as wet pine cones will close. A second option is to use bleached pine cones. Bleaching turns the cones into a beautiful driftwood color which I plan to post about in the future so stay tuned! Or the pine cones can be spray painted any color you desire.
I use spray paint that specifically states it can be used with wood. I have found that you often get less coverage with lighter colors (not really surprising) but if you like the look of the wood grain of the pine cone coming through the paint these can be beautiful. In general, the glossy colors provide better coverage than the matte/flat or satin/semi-gloss. You will also likely find that your color choices/finish are severely limited by what is available in the store and some brands of spray paint provide better coverage than others. Feel free to experiment with different brands, colors, and finishes to figure out what you like, or message me if you have specific questions.
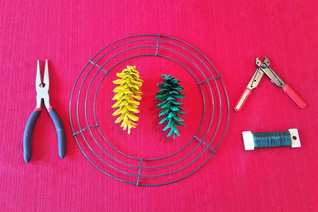 | Step 1: Materials You will need a wreath frame, floral wire, wire cutters, needle nose pliers, and pine cones. I generally use ~2-5" Eastern White pine cones which requires ~60 cones for a 12" frame and ~100 cones for an 18" frame. If you use bleached cones you will need more since these cones do not open as widely. |
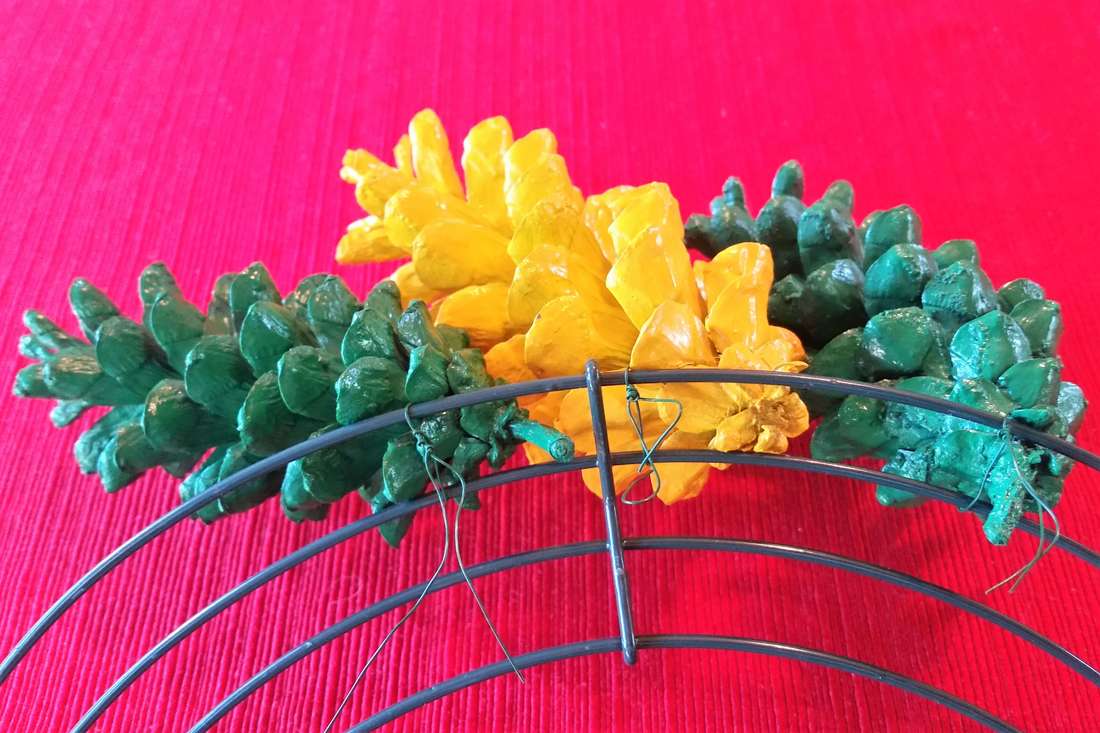
I cut approximately 6-8" pieces of floral wire and wrap it around the top of the cones (go a few scales down from the top) at least twice. Then insert the top of the cone between the outer two wires on the frame with the floral wire sticking out the back. Twist several times to attach the cone to the frame. Repeat this process for the entire outside of the frame. I usually use my largest (~5") pine cones on the outside of the frame and save the smaller ones for the inner rings and to fill holes at the end. For the cones at the end you will need longer wire (~10") to reach all the way through the wreath with enough remaining to grip and twist to secure the pine cone.


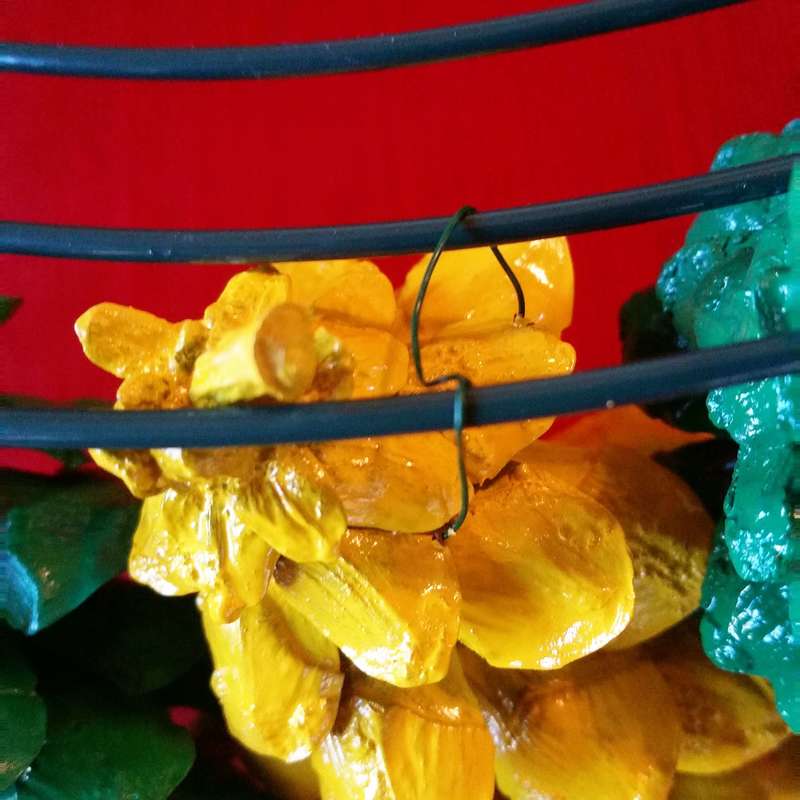 | Step 3: Trim the Wires Filling in the next ring of the wreath is much easier if you first trim off the excess floral wire. Otherwise you often grab the wrong wires when attaching the second row of pine cones. Make sure each cone is secure and the wire is tight. Then trim the excess wire, wrap the cut end around the frame, and push the cut end inward. When the wreath is complete hot glue the ends of the wires for extra security and to avoid scratches on the wall. |
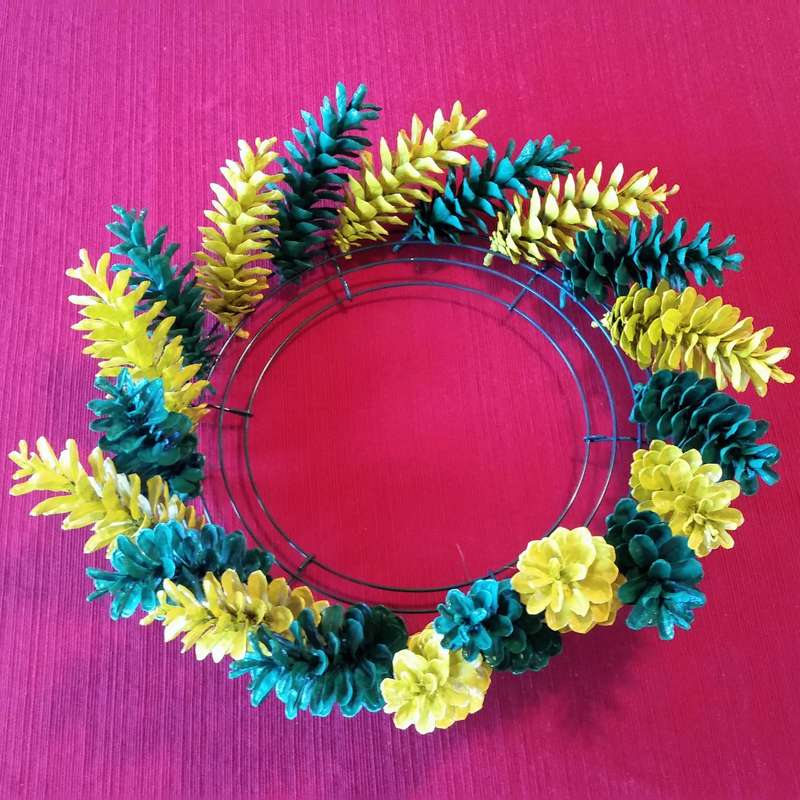
After you trim the excess wires from the first row, move on to the second row, trim the wires from this row, and then wire in the third row. Each row gets subsequently harder to wire because there is less room to fit the cones and your fingers however, with a little patience you will soon have all three rows wired. Next, fill in any gaps with the smallest cones you have on hand. I have found it helpful to hang the wreath on the wall to determine where the gaps are. Sometimes taking a picture of the wreath on the wall is also helpful as it is easier to notice problems with the wreath from a picture than on the table or wall. You may also find it necessary to adjust or even remove certain cones that do not fit quite right. If a cone is sticking out too much you can often wire it to pull it closer to the remaining cones. If this does not work simply remove it and replace it with one that fits better. Once the wreath is complete and you are happy with the end product you can hot glue the wires to keep them from scratching the wall or you can back the wire frame with felt. Regardless, hang the wreath and enjoy!

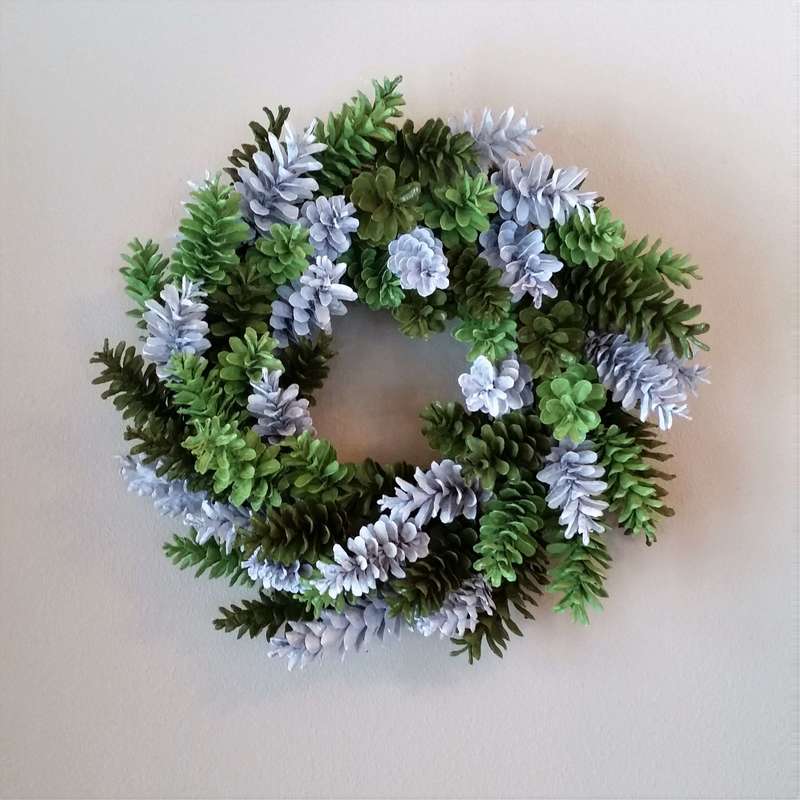
Large Bleached Pine Cone Wreath

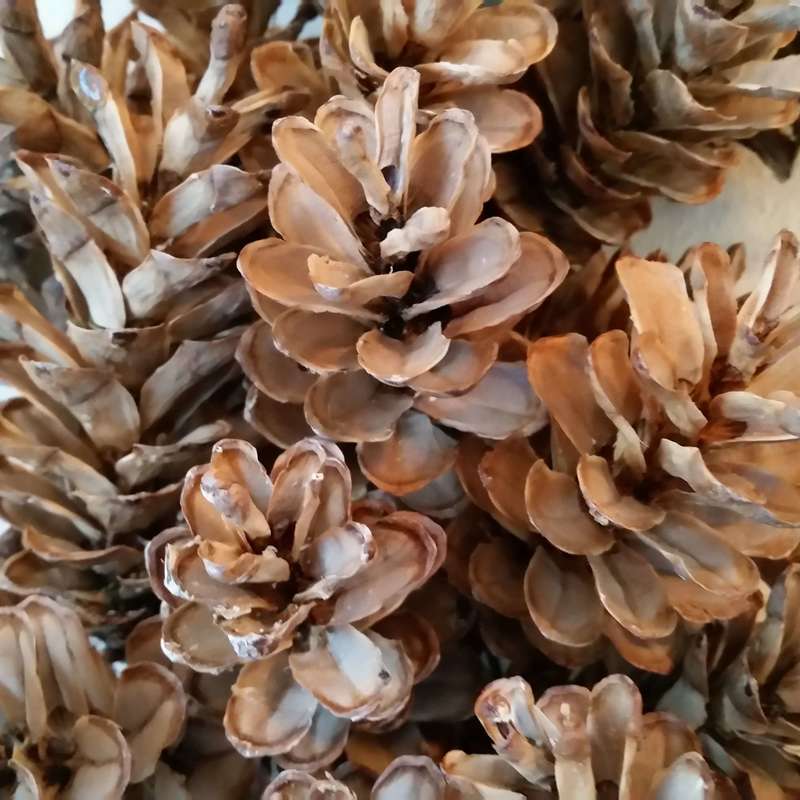
This is a beautiful pine cone wreath that measures approximately 22-24" in diameter. The wreath is on a 18" wire frame although a smaller wreath on a 12" frame can also be produced. The pine cones are from Eastern White Pine trees and are collected by hand, dried and cleaned, and then bleached to lighten their color. If the natural darker look is preferred this can also be made on either frame size. Each pine cone is individually wired onto the wreath frame. If more color is desired a bow, berries, or other adornment can be added. Display in a sheltered area is recommended as moisture will cause the pine cones to close.
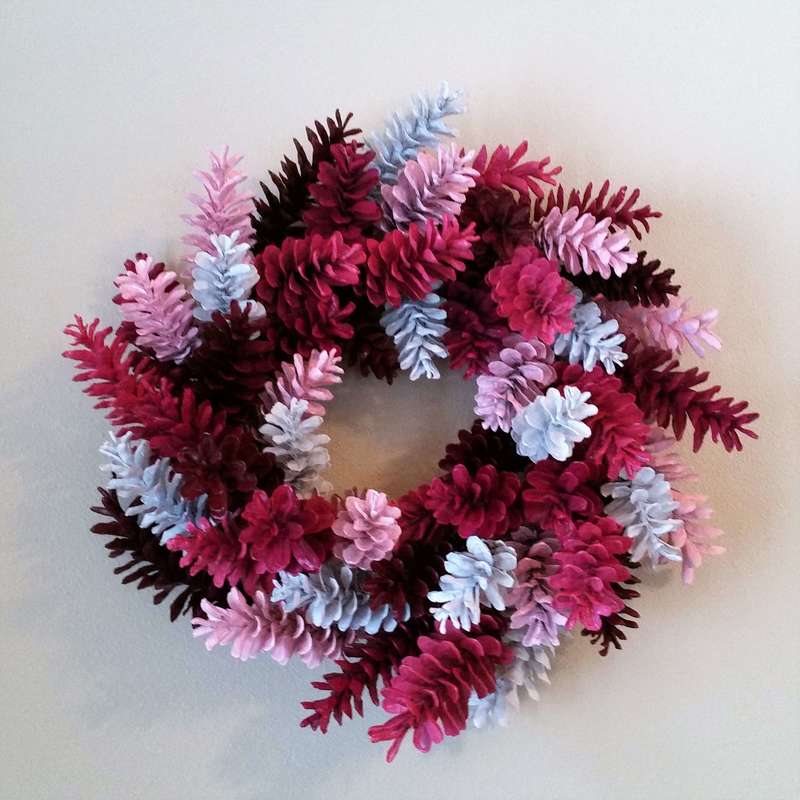
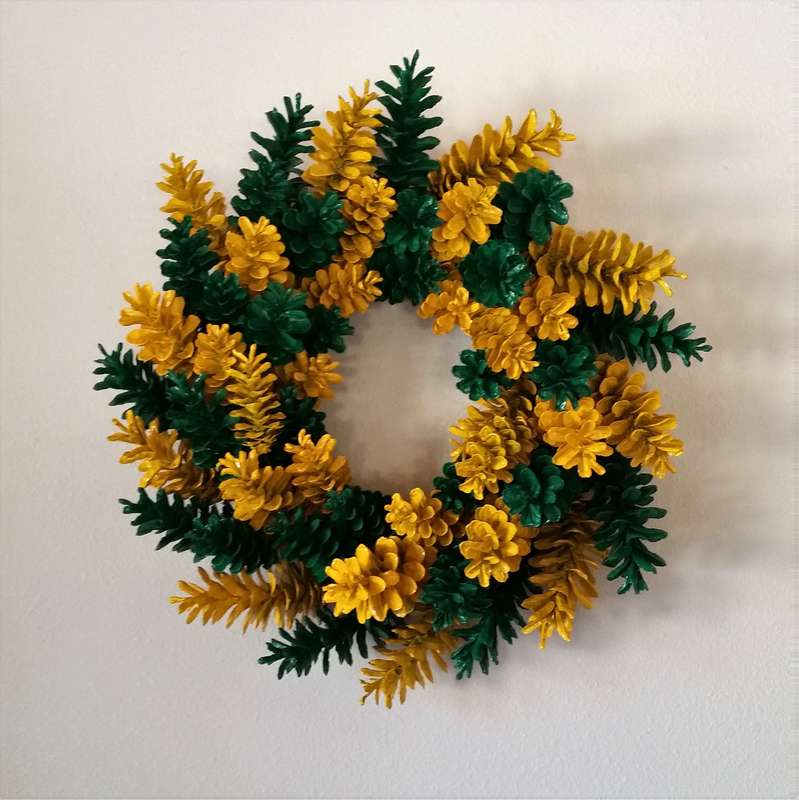
If you prefer a colored wreath, the cones can be spray painted in any color combination to match any room, holiday, or sports team.
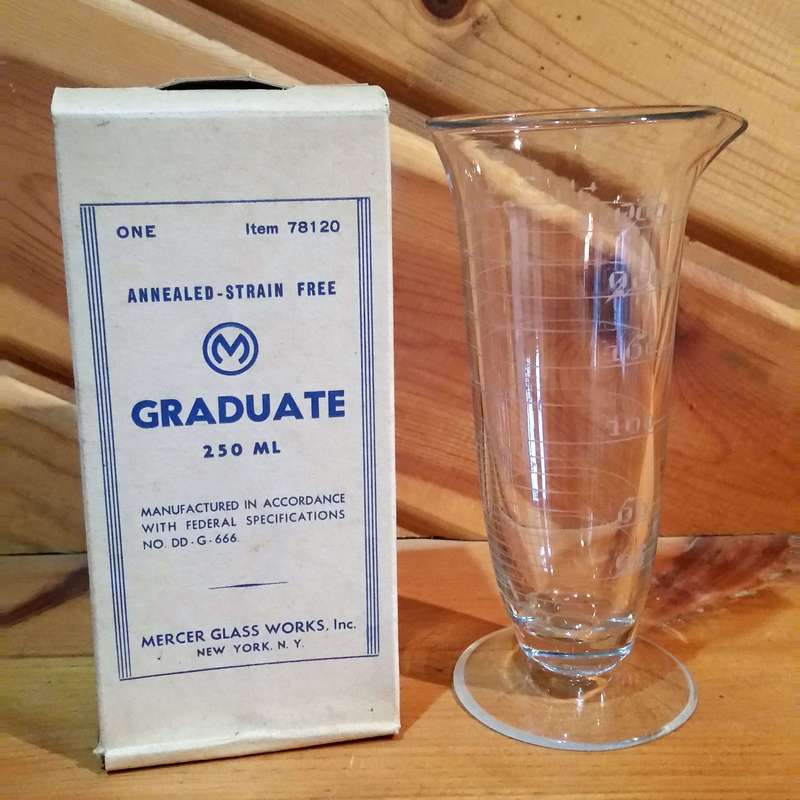
Two Ponds Farm has a new vintage item available; apothecary glasses. These are graduated glasses/beakers that would have originally been used by hospitals or biology or chemistry laboratories. They work well as drinking glasses, beer glasses or a vase! I am not sure how old they are but they were manufactured by the Mercer Glass Works Company in New York City which at the time was based at 17 W 17th street (see current picture from Google maps below). They are still in their original boxes, likely never used! They are solid at almost 1 pound each and measure approximately 7.25 inches high by 3.5 inches in diameter at the top and 3 inches in diameter at the base. Please contact me for more information. Thanks!

Updated: 01/31/24
Author
In 2016, my family and I moved from the New York City area to small town Wisconsin. Our move, this website and blog (and our previous Etsy store) is the result of our desire over the past several years to simplify our lives, increase our quality of life, reconnect with nature, and enjoy a more self-sufficient life. I grew up as a country kid in central Pennsylvania working on my grandfather's fruit farm and as a corn "de-tassler" at a local seed farm. My background is in biology where my love of nature originated. I am a former research scientist and professor and have now transitioned to a part-time stay-at-home mom, self-employed tutor, and small business owner. Thank you for taking the time to check out my site.
Marisa
Archives
May 2024
April 2024
March 2024
February 2024
January 2024
December 2023
November 2023
March 2023
January 2023
May 2019
March 2019
November 2018
October 2017
September 2017
August 2017
February 2017
January 2017
Categories
All
3-Pronged Cultivator
Aerogarden
Antique
Apothecary Glasses
Artichokes
Atlas Gloves
ATV
Bacillus Thuringiensis
Bare Root Trees
Beer Glasses
Berries
Black-Eyed Susan
Bleached Pinecones
Bleached Pinecone Wreaths
Bt
Butterflies
Cabbage
Canning
Celery
Chard
Chemistry Glasses
Chickens
Chicken Tractor
Cold Crops
Cold Frame
Collards
Compost
Cornish Cross
Daisies
Deer
Deer Fencing
Dehydrating Food
Dried Flowers
Drip Irrigation
Dual Purpose Chickens
Ducks
EBay
Eggs
Extend The Growing Season
Fall Gardening
Farm Life
Favorite Gardening Tools
Fermentation
Flower Gardening
Food Preservation
Frost Dates
Fruit
Fruit Trees
Fruit Wine
Garden Hod
Garden Huckleberries
Gardening
Garden Pests
Garden Seat
Garlic Scape Recipes
Garlic Scapes
GMO Seeds
Goldenrod
Grapes
Greenhouse
Growing Garlic
Growing Herbs
Health
Heirloom Seeds
Herbs
Hill Crops
Home Decor
Homemade Jam
Hori Hori Soil Knife
Hot Sauce
How To Start Seeds
Hybrid Or F1 Seeds
Hydroponics
Insecticides
Japanese Weeding Sickle
Jerusalem Artichokes
Kale
Lactic Acid Fermentation
Leatherman Multi-Tool
Lettuce
Maple Syrup
Meat Birds
Milkweed
Monarchs
Mulch
Mulching
Native Plants
Nightshades
Onions
Open Pollinated Seeds
Orchard
Organic Gardening
Organic Pest Control
Peas
Peppers
Pest Control
PIckles
Pinecone Wreath
Pinecone Wreaths
Pruners
Raised Beds
Ranger Chickens
Rudbeckia Flowers
Sauerkraut
Save Money
Seed Companies
Seed Saving
Seed Tapes
Self-Sufficiency
Soaker Hoses
Square-Foot Gardening
Sun Hat
Sustainability
Tansy
Ticks
Tomatoes
Trailer
Turnips
Two Ponds Farm
Vegetable Gardening
Vintage
Wine
Wine Grapes
Wood-Fired Evaporators
Wreaths
Yarrow
 RSS Feed