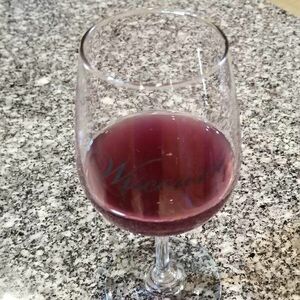
 Our garden huckleberry wine on bottling day. Garden Huckleberry WineAs I mentioned in my previous post, garden huckleberries are a unique berry in the nightshade family. They are toxic when unripe, have little taste when ripe, but when fully ripe AND cooked, they are absolutely delicious and make a beautiful dark purple jam. After making a batch of garden huckleberry preserves, we still had quite a few berries left over in the freezer. Since my husband and I love fermentation we decided to experiment with a one-gallon test batch of garden huckleberry wine. We both have a Bachelor’s degree in biology and I also have a concentration in microbiology so we enjoy the science behind fermented foods and drinks, although neither one of us is an expert. Thus far we have made kombucha, sauerkraut, kimchi, wine and beer from kits, mead, and now garden huckleberry wine. We also currently have a maple wine (which smells absolutely delicious!) undergoing secondary fermentation and will hopefully be the subject of a future blog post. This summer we also would like to experiment with dandelion wine and a spruce-tip beer. We planted wine grapes on our property in the spring of 2017 which will hopefully produce their first grapes this summer (2019) on 3-year-old vines. These grapes, Marquette, are a red grape well suited to our climate (zone 4) however, they can be acidic as short/cool season grapes often have difficulty fully ripening. Therefore, blending is often used to reduce acidity and increase sugar content of these grapes if needed. However, as more growers are cultivating the Marquette variety, they are having success producing a very nice dry red wine or slightly sweet port that is not overly acidic. We are hoping in addition to making 100% Marquette wine we could also find some fruit or other grapes varieties to use for blending. Blackberries or raspberries are commonly used to make a delicious berry-Marquette port. When we realized we had extra garden huckleberries we thought it would be good to practice making wine from scratch rather than a kit and also possibly find a good fruit to blend with the Marquette grapes. In this post, I will assume that the reader already has some experience fermenting. If not, a good place to start is to buy a wine or beer kit, to first determine if you enjoy brewing. Once, you have tried a few kits, read a few books, looked at some websites, and/or listened to some podcasts, it is much easier to experiment with fermenting from scratch. To make our garden huckleberry wine we modified a recipe for blueberry wine (see our modified recipe below). As garden huckleberries must be cooked to bring out their flavor, I first cooked the berries with a little water and crushed them with a potato masher to release the juices. I cooked them for about 20 minutes added 1 tablespoon of lemon juice, cooked an additional 5 minutes, and then added the sugar to the berries and mixed until dissolved. Garden huckleberries are a very tough fruit with an almost leathery skin so in the future I may use an immersion blender to help pulverize the berries rather than just a potato masher. 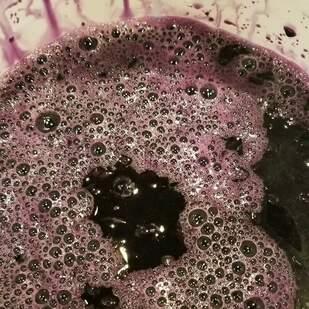 The garden huckleberry must in the primary fermenter after boiling and crushing the berries. After the sugar was dissolved, we brought the water up to 1 gallon. At this point you can check the specific gravity to make sure the sugar content is correct, generally you want to start wines around 1.090 depending on what you would like your final alcohol concentration to be. When making a fruit wine you would generally add in one Campden tablet/gallon or potassium metabisulfite at the correct concentration to kill any wild yeast on the berries. Since we had just boiled our berries, I assumed most wild yeasts would be killed and skipped this step. We then added the tannin, acid blend, pectic enzyme, and yeast nutrient and mixed well. I am not sure if both the lemon juice and acid blend are necessary and may skip the lemon juice next time. The pectic enzyme will digest the pectin in the fruit which otherwise could make the must gelatinous; also excess pectin will also leave your wine hazy and keep it from clarifying properly. Yeast nutrient is used to help give the yeast a boost, yeast energizer can also be added or you can buy them already mixed together under specific brand names. If fermentation slows before completion you can spike in more nutrient and/or energizer to help push fermentation to completion. Some brewers also like to add in grape juice concentrate to their fruit wines, which increases sugar content so make sure to adjust final sugar levels to the correct specific gravity after mixing this in. This will also make your wine fruitier. As we wished to see what a pure garden huckleberry wine tasted like, we did not add any grape juice concentrate. The last step is to add the yeast. Since we had boiled the berries it was important to make sure the must was not too hot, you generally want it around room temperature. We used Lalvin K1-V1116 yeast which is supposed to be good for fruit wines and also has a high alcohol tolerance (18%). This was also important since we wanted to make sure it would ferment to dryness. We dry pitched the yeast and stirred it in, however, most yeast packets will recommend activating the yeast prior to pitching. If you activate first, make sure you follow the instructions exactly as written, otherwise you may shock the yeast too much which will prevent fermentation from starting. We fermented in a 2-gallon bucket fermenter that we had cleaned with one-step cleanser and sterilized with potassium metabisulfite. Make sure everything that comes in contact with your must is as sterile as possible. After everything was mixed well, we covered the fermenter with a lid containing an airlock to let out the CO2 gas released during fermentation. Generally, you should see bubbling in the airlock within 24-48 hours. 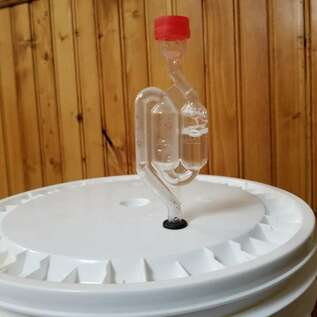 A bubbling airlock which demonstrates active fermentation. With most fruit wines you want to stir the must 1-2 times per day, otherwise the fruit cap will stay on the top and you will have less flavor and color released into the liquid. The more the cap comes in contact with the liquid. the more color, flavor, etc. will be released into the wine. The wine will likely ferment for approximately 2 weeks or even longer depending on the type of yeast used. When bubbling starts to slow you can start testing the specific gravity with your hydrometer and when it reaches 1.010-1.020 you can rack it to a secondary fermenter (a 1 gallon glass carboy/jug) or you can leave it in the primary until it completes fermentation (specific gravity less than 1). Before racking you must strain out the berries and debris and move the wine to a cooler place if possible, to clear. Every week or two, as more debris settles you can rack to a new 1-gallon jug. At this point if fermentation is complete you can cap the jug or use a bung and not worry about the airlock. Make sure fermentation is 100% complete as we have had a batch of mead blow the bung out of the jug when we removed the airlock too soon. You can also add a Campden tablet after each racking or just wait before bottling if you do not like to have too high of sulfite levels in your wine. I do not like to use more than 2 tablets/gallon of wine total. Those who are sensitive to sulfites may wish to try even less or skip it altogether although this does increase the risk of contamination. Once the wine has clarified to your liking you can bottle the wine and age it, generally 3-6 months minimum. If you prefer a sweeter wine you can back sweeten before bottling but you must add in potassium sorbate to prevent fermentation in the bottle. You can also add in potassium sorbate if you wish to age your wine longer and prevent spoilage. We tasted a glass of our wine before bottling and were very impressed by its taste. It was slightly sour (maybe skipping the lemon juice next time would be better), slightly bitter and tannic, with definite flavors of garden huckleberries. Although it started out as a very dark purple color it mellowed to a more red-purple color. If you prefer your wines with more intense flavors you can add more than 3 lbs of fruit and if you prefer them lighter, you can add less. Overall, we liked the initial flavor of the wine well enough that I started dozens of garden huckleberry plants this spring (as opposed to the 6 plants we had last year) so we can hopefully make a larger 3-5 gallon batch next year. 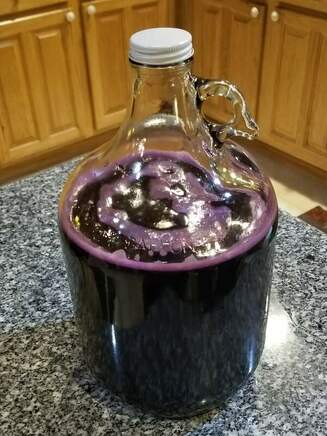 Garden huckleberry wine that has been clarified and is ready to bottle. Garden Huckleberry Wine Recipe (1 Gallon)3 lbs berries (garden huckleberries, blueberries, or other berries) 1 T lemon juice ~1.8 lbs sugar 0.5 tsp acid blend 0.5 tsp pectic enzyme 0.6 tsp yeast nutrient 0.2 tsp tannin Campden tablets (1 tablet per gallon) 1 package yeast (Lalvin EC-1118, Lalvin 71B-1122, Lalvin K1-V1116, or others)  Wine corks ready for bottling.
14 Comments
Debbie
5/3/2019 05:39:21 pm
A lot of good information but sounds like too much work. I guess we'll just have to taste yours.
Juli
9/30/2021 02:34:47 pm
Just a question. We have a Victorio Strainer that we use when making garden huckleberry preserves. We basically cook some huckleberries in water and a little baking soda (removes the bitterness) for about 10 min. Then we rinse the berries until the water runs pretty clear. Then we process them in the Victorio.
Hi Juli,
Tracy
7/26/2023 10:40:09 am
I’m so glad I read the comments because I am getting ready to process Garden Huckleberries and I wondered if running them through the strainer with the berry screen would work. I tried doing this with elderberries and because the seeds are sticky, it was very difficult.
Marisa
7/26/2023 10:50:52 am
Hi Tracy,
kelly
9/5/2022 01:38:17 pm
I make Spruce tip Mugulo syrup. I also make Pine and Fir but Spruce is our favorite. It has a citrus flavor. I will try it in wine next spring. Can't wait.
Marisa
7/26/2023 10:52:36 am
Hi Kelly,
Marisa
8/30/2023 09:21:13 pm
Hi Franz,
Deanna
11/13/2023 05:39:18 pm
So I have 12 pounds of huckleberries ready to go sweeten according to the brix for this must and all my other things in it like campgden tablets yeast nutrient etc … so it’s muss is around two gallons-12 pounds berries … so I would add four gallons of water according to the three pounds berry rule? I’m new to fresh Berry making wine I usually do the kits wuth all prepared. Thank you
Marisa
11/13/2023 05:55:12 pm
Hi Deanna,
Marisa
11/13/2023 05:50:45 pm
Hi Deanna,
Brian Miller
2/23/2024 05:48:44 am
Have you ever fermented garden huckelberry in hot sauce as a blue berry replacement? If so, do you boil and sweeten first?
Marisa
2/23/2024 08:34:44 am
Hi Brian, Leave a Reply. |
AuthorIn 2016, my family and I moved from the New York City area to small town Wisconsin. Our move, this website and blog (and our previous Etsy store) is the result of our desire over the past several years to simplify our lives, increase our quality of life, reconnect with nature, and enjoy a more self-sufficient life. I grew up as a country kid in central Pennsylvania working on my grandfather's fruit farm and as a corn "de-tassler" at a local seed farm. My background is in biology where my love of nature originated. I am a former research scientist and professor and have now transitioned to a part-time stay-at-home mom, self-employed tutor, and small business owner. Thank you for taking the time to check out my site. Archives
July 2024
Categories
All
|
 RSS Feed