 My Favorite Gardening Tools
 Hori Hori soil knife from A. M. Leonard (left), sheath (center), and Barebones Hori Hori (right).
 Fiskars long-handled loppers and pruners.
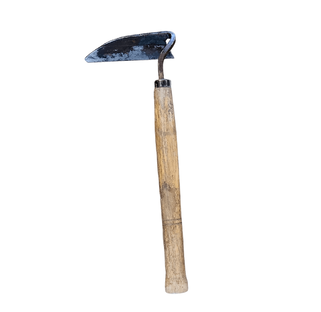 Japanese weeding sickle.
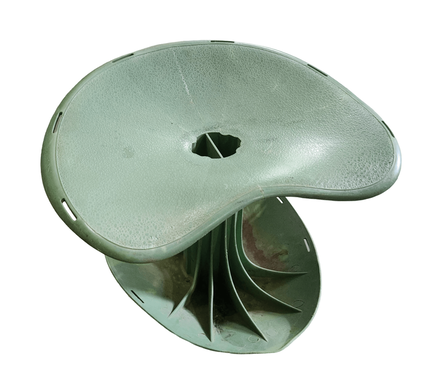 Rocking garden seat.
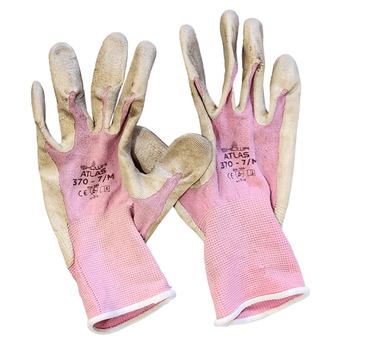 Atlas 370 gardening gloves.
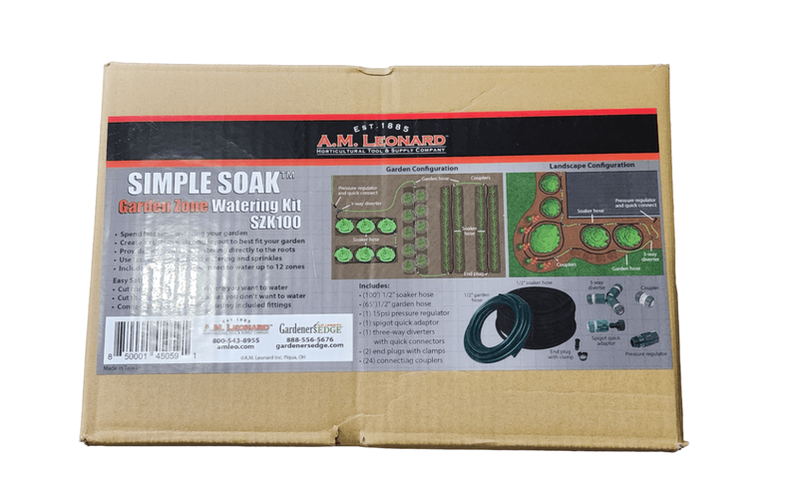 Soaker hose kit from A. M. Leonard.
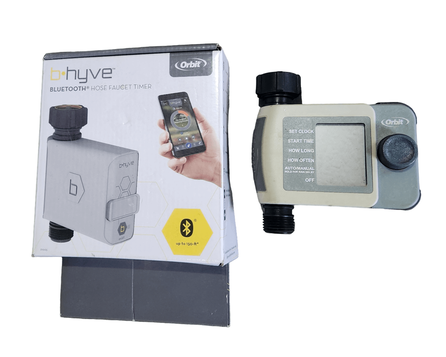 B-Hyve Orbit hose timers. Bluetooth capable (left) and manual (right).
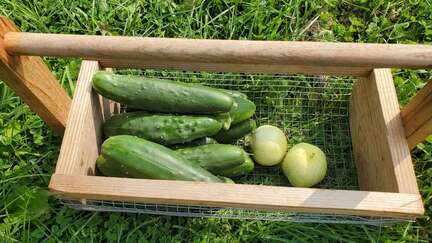 Homemade garden hod.
0 Comments
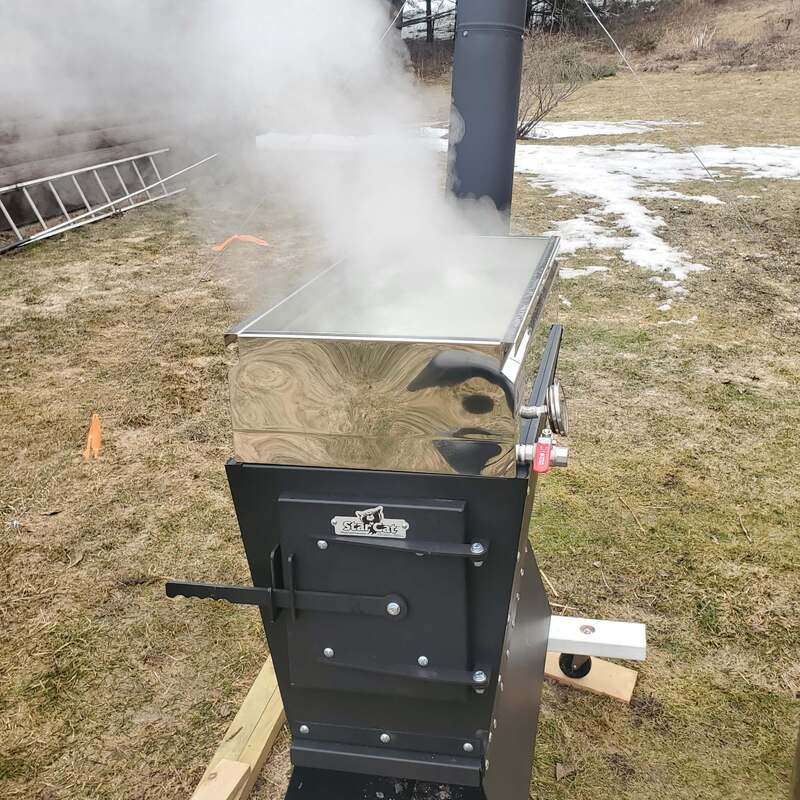
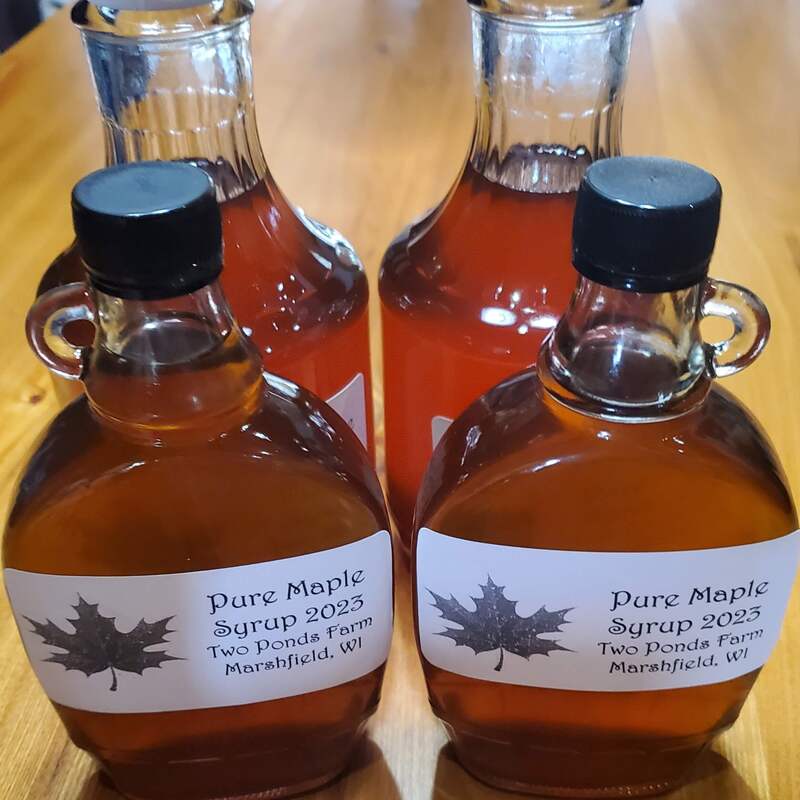
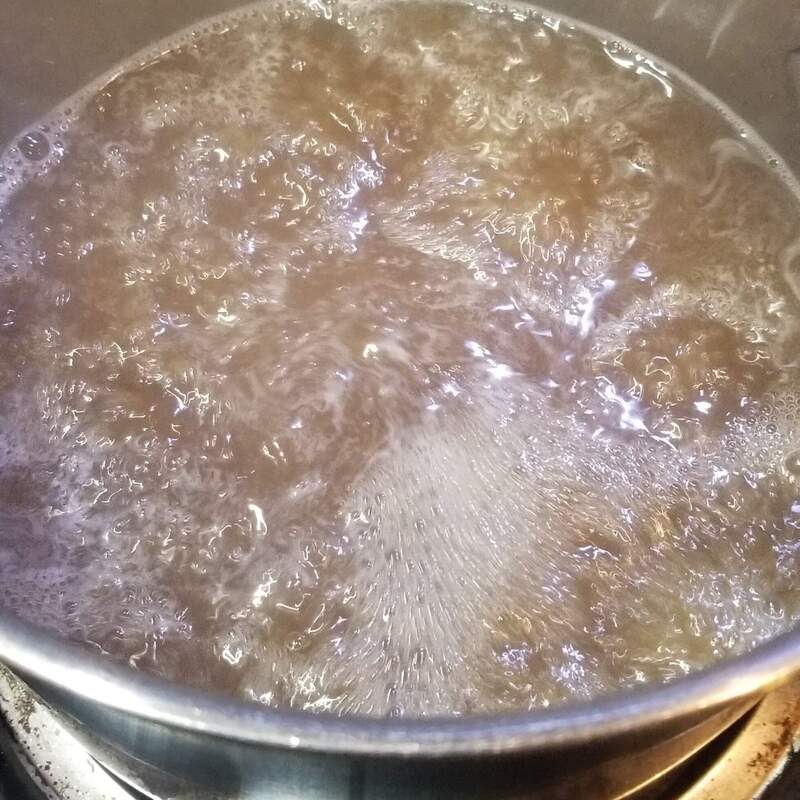
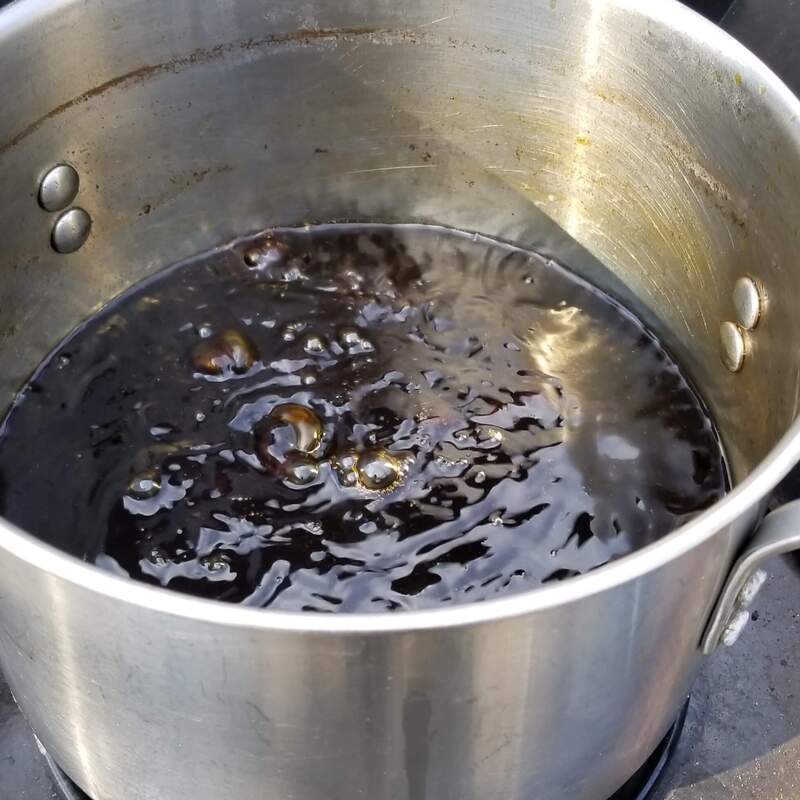
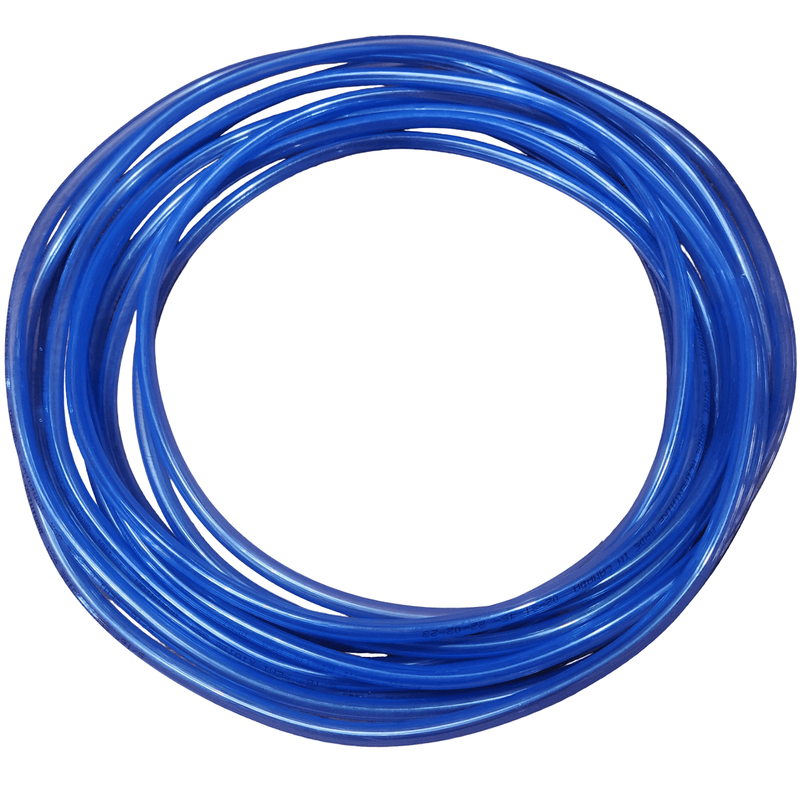
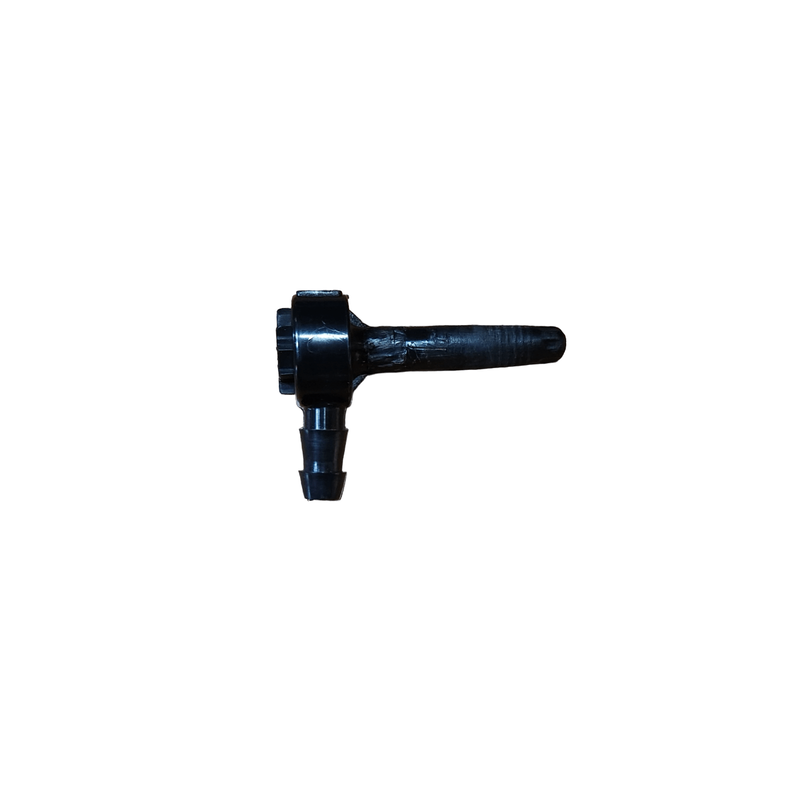
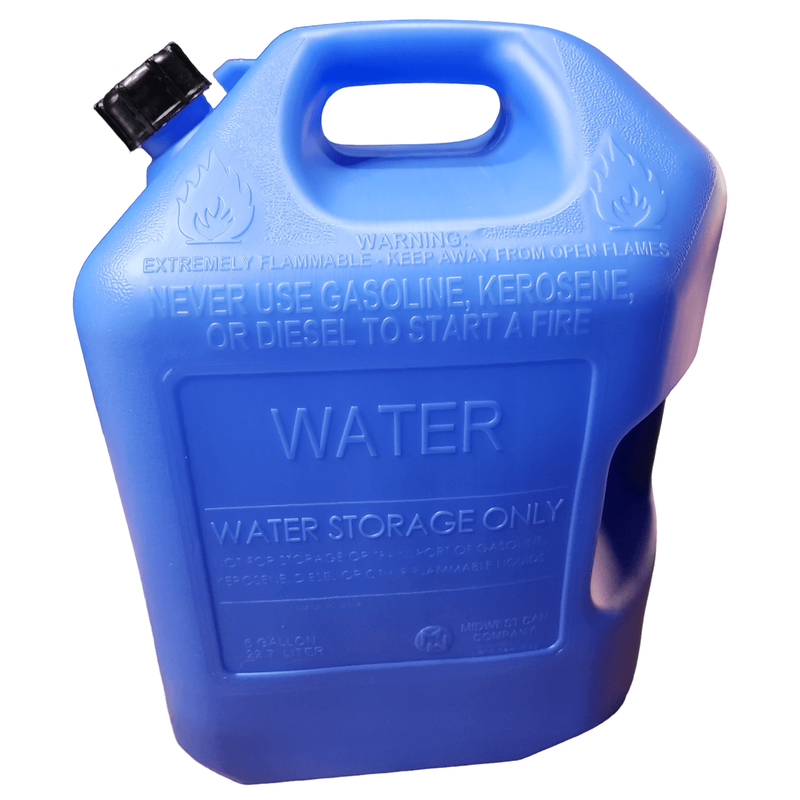
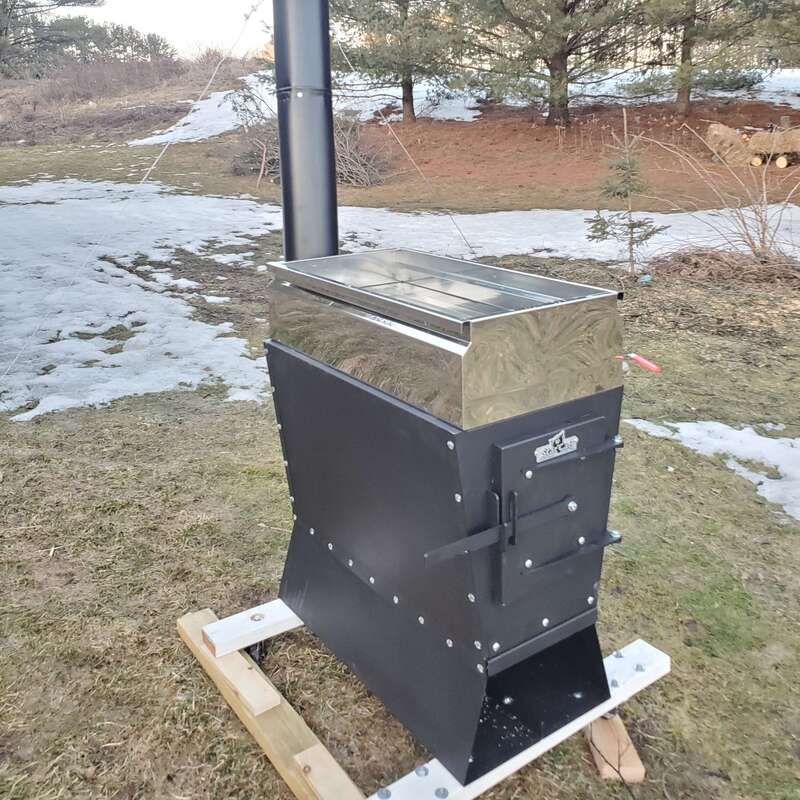
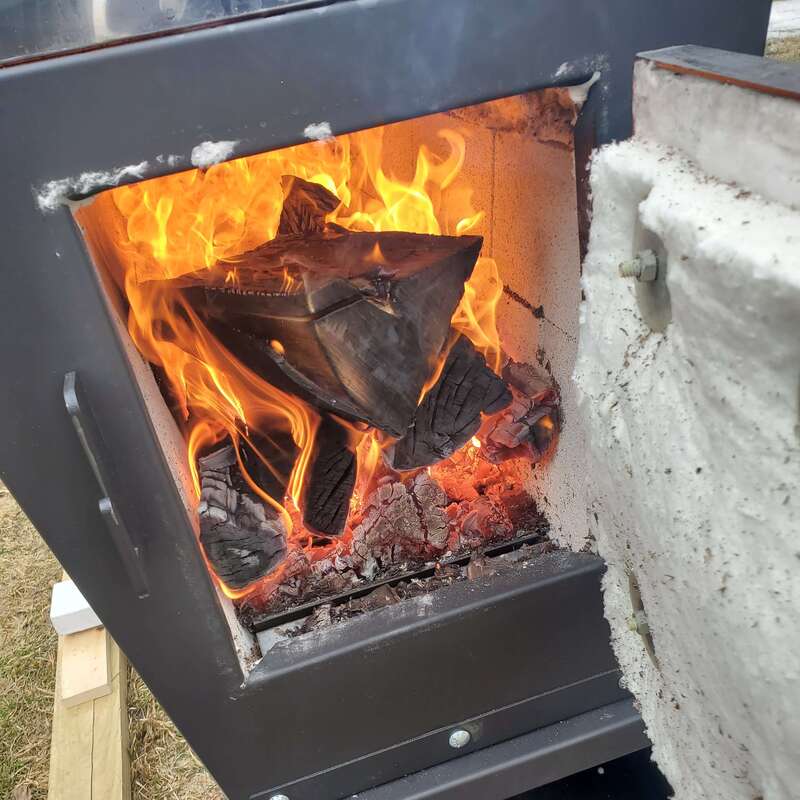
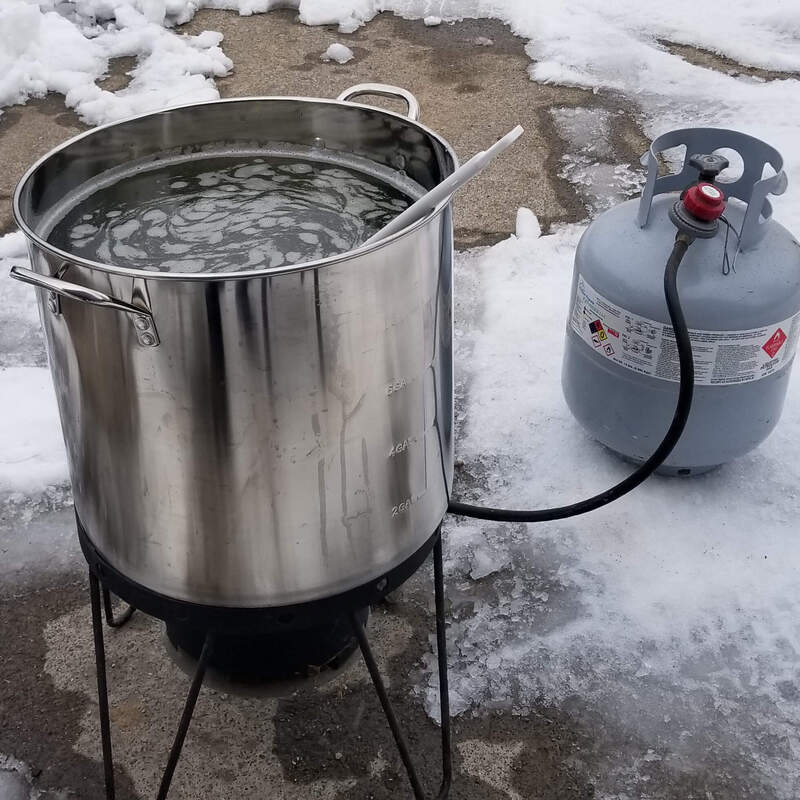
Maple SyrupingWe have been collecting maple (and occasionally birch) sap for about five years and boiling it to make syrup. This article is targeted to small, backyard syrup producers, collecting from ~2-12 taps. However, I will also discuss different methods to collect sap and make maple syrup if you wish to increase production. Why Make Maple Syrup?The truth is I do not eat maple syrup except for a taste once a year when we make it (I have difficulty regulating blood sugar). So why do I love to make syrup, even when I cannot enjoy the final product? The simple truth is that it is a fun, unique experience that occurs at a time of year when not too much else is going on. Maple syrup production occurs in early spring, and this is a time on our property when we have fewer tasks to do compared to late spring through fall. Collecting sap and boiling it down while you relax outside by a fire is a unique, almost magical experience that I highly recommend to anyone who has the chance. It is easy to buy real maple syrup, especially where I live because so many people make their own and sell extra. But real maple syrup is expensive and for good reasons. It is a time-consuming process to collect and boil down the sap, which generally has a 2-3% sugar content, into syrup which is 66-68% sugar. So, making maple syrup yourself may save money (if you do not count your time) depending on your setup and how you boil it down. If you have access to wood on your property you can boil it down for free (again, not counting your labor) but otherwise expect to pay for wood or propane to use as fuel. You can also make an evaporator relatively cheaply, if you are handy, or buy a large pot or flat evaporator pan to use over a wood or propane fire, to minimize expenses. However, unless you invest in a reverse osmosis system (more on that later) the one thing you cannot minimize is time. How Much Sap Do You Need?The general rule of thumb is that a 40:1 ratio of sap to syrup is needed if collected from sugar maples (other maples are closer to 50:1 and other trees can be tapped like birch and walnut but have even higher ratios). This means if you want to make a gallon of syrup each year you need to collect at least 40 gallons of sap. Larger producers now mostly use reverse osmosis systems first to eliminate as much water as possible and therefore increase sugar content before boiling the remaining sap with an evaporator to the final required sugar concentration for syrup. You can also collect sap from other trees to make syrup, including birch trees but the ratio is approximately 110:1, so you need over 100 gallons of birch sap to make a gallon of birch syrup. The syrup is also darker and more savory tasting than maple syrup, even with similar ending sugar content, and is often used as a glaze to cook salmon or pork. One advantage of birch trees though is that the sap tends to run after maple so by the time you are done collecting maple sap you can remove your taps and re-use them on any appropriately sized birch trees you may have. Walnut trees (Juglans), including black walnut, butternut, English walnut, and others can also be used. We have made birch syrup for a couple of years but prefer maple. We also have some black walnut trees on our property but have not tapped them as they are still too small. The color of almost done maple syrup (left) is much lighter than birch syrup (right). Timing MattersMaple syrup is always made in spring because that is when the sap starts running in trees. During the summer, trees conduct photosynthesis in their leaves. Photosynthesis is the process whereby trees and other plants take light energy and convert it to sugar. They use the energy from the sun plus carbon dioxide from the atmosphere and convert the carbon dioxide to organic sugars. In the process, they also release oxygen, which is very lucky for us! The tree uses the sugar to grow but extra sugar is pumped down from the leaves into the roots for storage over winter. The following spring when the days warm up, the sap starts running. The roots take up water from the ground and move it up the tree, taking all that stored sugar with it. Sugar is the energy source that the trees use to bud out and grow leaves that spring. Once temperatures start warming up to ~40°F during the day but still dipping below freezing at night, the sap will start running. In central Wisconsin, this is usually March into early April. This year (2024), however, we had a huge warm-up in the first couple weeks of February and again later in February, and many people decided to tap early (this is the earliest we have ever collected sap and made syrup). The season can be as short as a couple of weeks or as long as a month or more, but when the days and nights start getting too warm, the sap can go bad in the heat, and it also gets bitter. Usually, when the maple tree buds start swelling, this is a sign you should pull your taps. 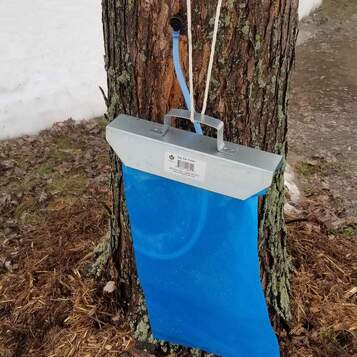 A typical tubing and bag setup for sap collection. We have since swichted to longer tubing with 5-gallon food-grade buckets for collection, which are reusable long-term. Supplies and EquipmentTrees – If you want to make maple syrup you need maple trees. Any larger maple tree works but sugar maples have the highest starting concentration of sugar in their sap. We have mostly red maples and silver maples on our property and measurements with a refractometer show a concentration of about 2% sugar in the sap. This can vary from tree to tree, even within the same species, and the beginning versus the end of the sap season. Generally, you want your trees to be at least 10 inches in diameter at 4-5 feet above the ground. You can put in 2 taps if your tree is over 20 inches in diameter. (1) I see many people putting in multiple taps in trees that probably should not have more than one, I prefer to put the health of the tree first. There are other trees that you can tap for syrup, but maple, birch, and walnut species appear to be the top three most tapped trees. Drill – You will need a drill, preferably battery-powered unless you are only tapping trees close to an electrical source. Some people even use hand drills, but I would not recommend this unless you are only tapping a few trees or have younger people to help drill. We use a 5/16th drill bit because our spiles are 5/16th in size. They also come in 7/16th and 3/16th inch sizes. Spiles/Spouts/Taps, Tubing, and Bags/Buckets – You will need tubing that fits your spile size. This year we switched from collecting sap in bags to using longer tubing into 5-gallon buckets. We have yet to tap more than a dozen trees so we can easily collect our sap by hand but if we ever expand, we will try using gravity flow to funnel the sap from multiple trees into one or more larger collection vessels. Most of our land is flat so this is probably only an option for a small section of our woods behind our house which only has about 8 tappable trees. Many commercial operations use a vacuum system to collect more sap and it does not require gravity to keep the sap flowing into a large collection bucket. If you are collecting sap in the bags or buckets that hang on the tree you only need a short, 1–2-foot, piece of tubing for each tap, or if you can hang your bag/bucket on the spile you do not need tubing at all. This year we started collecting sap in food-grade five-gallon buckets with a lid that we drilled a hole into to insert the tubing. Because we place the buckets on the ground, and you usually drill tap holes a few feet up this method requires longer-length tubing, but it is easier to collect and keeps more debris out of the sap. Although more expensive, the buckets also reduce plastic waste because they are more reusable than plastic bags and easier to clean out between collections. We use plastic spiles, but you can also find more durable metal ones. We now buy tubing in bulk from a local maple syrup supply company (The Maple Dude) and have found that the tubing comes in rigid or semi-rigid types. We much prefer the semi-rigid as it is easier to get over the end of the spiles. Tubing (5/16") can be bought in bulk (left), spiles, also known as spouts and taps (center) come in plastic (pictured) or metal, and water storage jugs (right) are a great way to store smaller amounts (6 gallons) of sap. Rubber Mallet – We use a rubber mallet to pound the spiles into the trees after drilling. 70% Isopropyl Alcohol – We use 70% isopropanol to sterilize the drill bit before drilling and the spiles before inserting them into the tree. Thermos of Hot Water – A thermos of hot water is helpful to warm up the end of the tubing before you place it over the spile. This is especially useful if you have rigid tubing! Even with the hot water we sometimes have difficulty fitting the rigid tubing over the spile. Rope and Bungee Cords – These can be helpful if you are using the collection bags, we have had the wind pull the bags far enough away that the tubing falls out. We usually tie the bags to a tree branch if possible, instead of hanging it off the spile for more security and then wrapping a bungee around the top of the bag and the tree to help hold it in place. Filters – You will likely want at least 2 different kinds of filters. A sap filter is used after collecting the sap to remove any sticks, insects, or bark debris from the sap. A finishing filter (often with a pre-filter inserted) is used for a final filter of the syrup at the end of the boil. 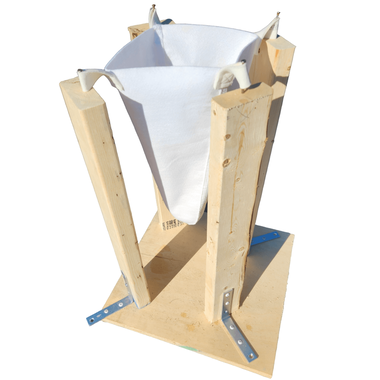 A finishing filter in a homemade filter stand. The stand is large enough to fit a 6-8 quart pot underneath. Evaporator/Pan or Large Pot - Last year we invested in a StarCat wood-fired evaporator (the smallest one they make) from Smoky Lake Maple Products that has saved us lots of time! Before the StarCat we used a 10-gallon brewing pot on a propane burner which worked well but took 12-14 hours to boil down a 10-gallon batch plus the added expense of buying propane. Fuel – We used propane for several years but as prices and our sap collection volume increased, we decided to invest in a wood-fired evaporator since we have lots of hardwood available on our property. We now use wood to boil the sap until the volume gets too low for the evaporator. We then transfer the sap to a pot over the propane burner until it is just about done, then finish boiling it on the stove in our house. Reverse Osmosis System – Another improvement to increase efficiency is to invest in a reverse osmosis system to save time boiling the sap. Small backyard syrup producers can buy reverse osmosis systems that can concentrate sap from about 2% sugar to 4%. This might not seem like a huge difference, but it doubles the sugar concentration which should decrease the boiling time by half. If you have 100 gallons of 2% sugar the RO system can get it down to 50 gallons of 4% sugar. So instead of a 24-hour boil (or more), you might be able to get it done in a more reasonable 12-hour day. The wood-fired StarCat Evaporator (left and center) is much more efficient than our old method of using a 10-gallon brew pot on a propane burner (right). How to Tap Trees and Make Maple Syrup
ConclusionIf you get the chance to collect sap and make syrup or even help with someone else’s collection and boil, I highly recommend it. If you have any questions, please feel free to contact me. References
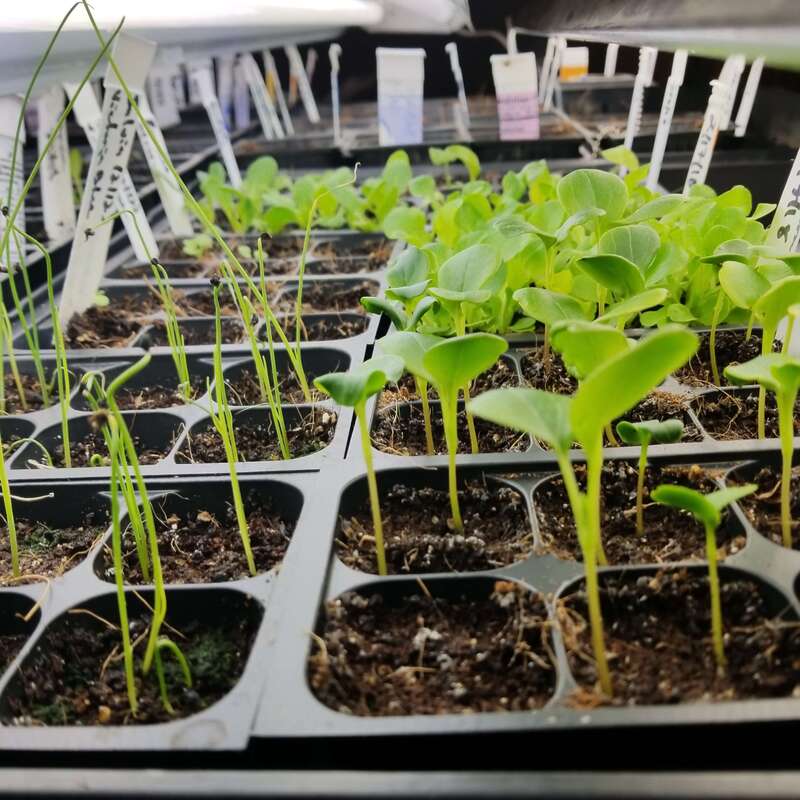
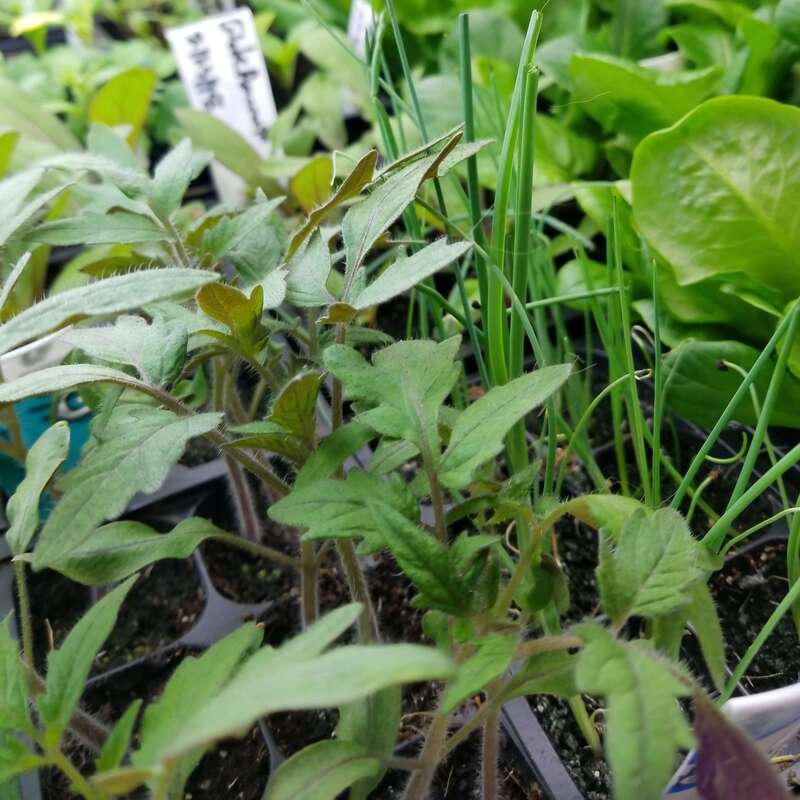
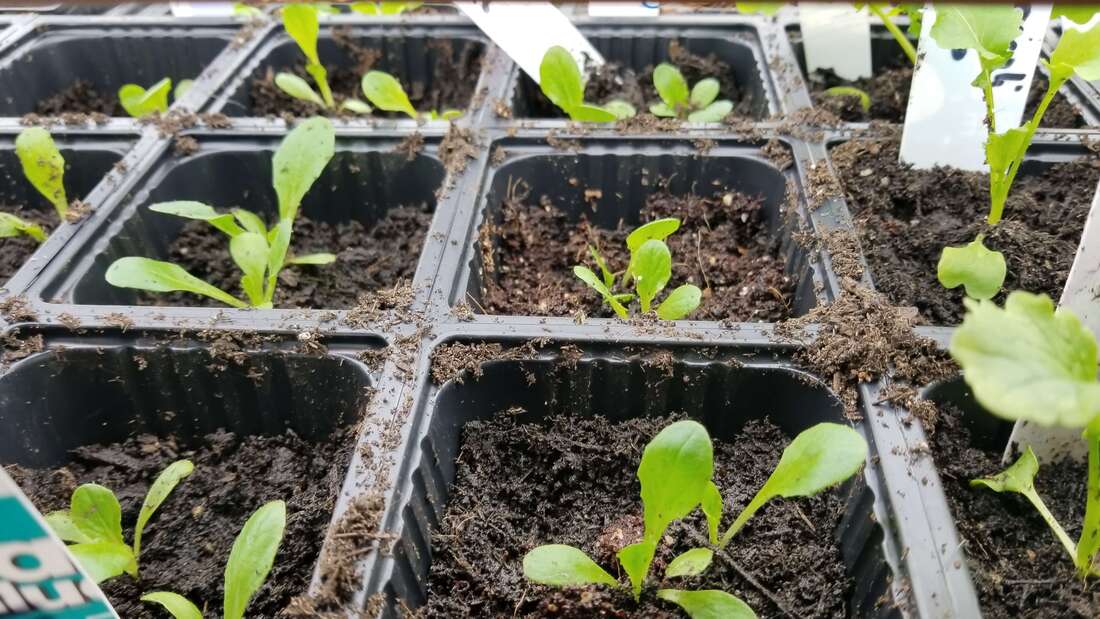
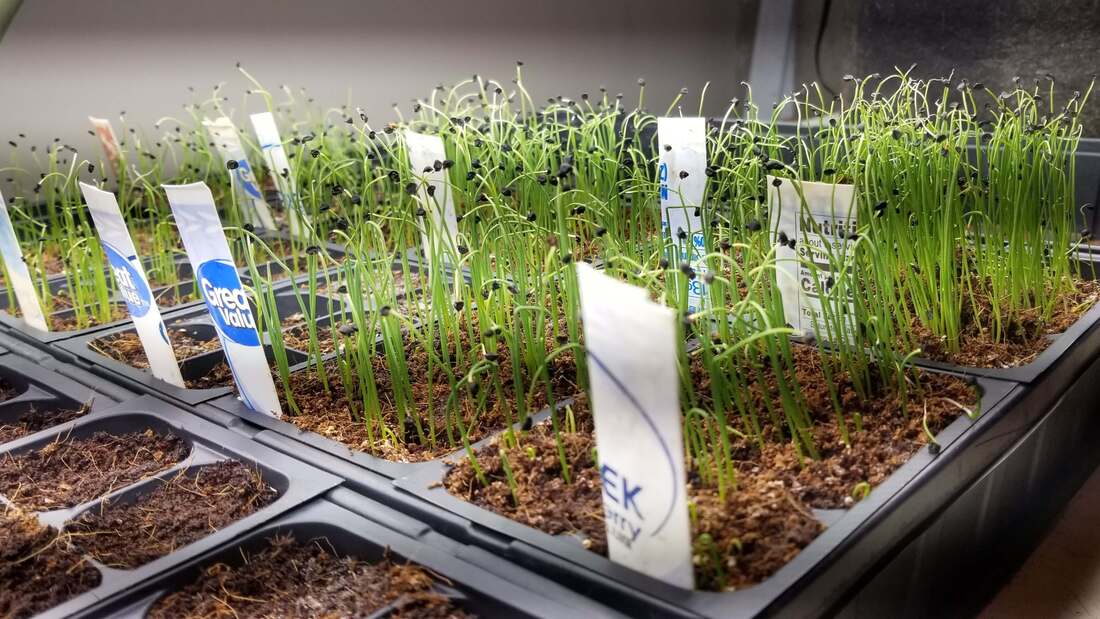 The Basics of Seed StartingI started growing my vegetable plants from seed rather than buying seedlings from big box stores or local greenhouses for several reasons. First, I love working with soil and plants so by starting seeds I get to start gardening (albeit indoors) earlier than I would if I bought seedlings. Second, I have a very large garden, so I save money by buying seeds and starting them rather than buying plants. Lastly, one of my favorite parts of having a garden is to try many different varieties of vegetables, especially tomatoes and peppers. If I buy my seedlings from big box stores or even independent greenhouses my selection is much more limited than if I buy seeds and start my own. Before I get into the supplies you will need to start seeds let's discuss timing. I see this question asked all the time in my online gardening groups and there is not a simple answer. The easiest way to get a rough idea of when to start your seeds is to first figure out your average last frost date in spring. There are lots of different websites and I would recommend checking several, but this one has worked well for me and gives dates close to many other sites. Once you enter your zip code, look for the 50% chance of last frost at 32°F, which for me is mid-May. Remember, this is an average and in any given year the date could easily fluctuate by a week or two. Realistically, I generally do not get my warm season crops, both directly sowed seeds and transplants, planted until the soil warms up more which is usually the first week of June for me. Once you know your average last frost date count back, however many weeks is recommended (check your seed packet or do an online search), to figure out when you need to start seeds. For slow-growing and slow-germinating seeds like onions, celery, artichokes, and some herbs like parsley I start seeds 8-10 weeks before my last average frost date. For many cold crops like cabbage, kale, broccoli, and cauliflower I plant 7-8 weeks ahead. For peppers which can take weeks to germinate (especially the super hots), even with a heat mat, I start about 7-8 weeks before my average frost date, but I generally plant them out 2 weeks after my last frost date since peppers do not like the cold. Lastly, for tomatoes, which germinate and grow more quickly than peppers I start later, about 4 weeks before my last frost date. Again, I usually wait a week or 2 after my last frost date to transplant to make sure the air temperature and soil temperature are warm enough. The reason seed starting dates is not an exact science is because even knowing your average last frost date you may live in an area with a microclimate that is either warmer or cooler than average. You can start tracking your temperatures where you live, but that would take years to get good data or learn to enjoy a little trial and error. As mentioned above the actual last frost date can vary because it is based on an average. Also, the temperature in which you are growing makes a difference. I found that when I started putting my seedlings into a greenhouse for a couple of weeks before I planted them, they grew much faster than when I had them growing in my cooler basement. So, I had to adjust my dates and start my seeds later to account for faster growth. The best resources I have found to help you calculate dates are from Johnny’s Selected Seeds which has SO MANY freely available calculators and tools, some of which are downloadable. My favorite tools are their seed-starting date calculator for seedlings and their fall-harvest planting calculator. They also have a succession-planting calculator which I have never used it as I do not have much time to replant most seeds due to my short growing season. Once you have your seeds organized and dates figured out it is time to get all the supplies you need. Some of these supplies are optional so buy what you can depending on your budget. I also recommend starting just a few different types of seeds in your first year and if it goes well increase the number you grow in the years after if you want. You do not want to end up overwhelmed or with a bunch of leggy, or even worse dead seedlings because things went wrong (trust me I’ve been there). Seedlings in 6-cell pots with a fan blowing (middle) to strengthen them and help avoid damping-off. SuppliesBefore you start seeds, you need to stock up on a few supplies.
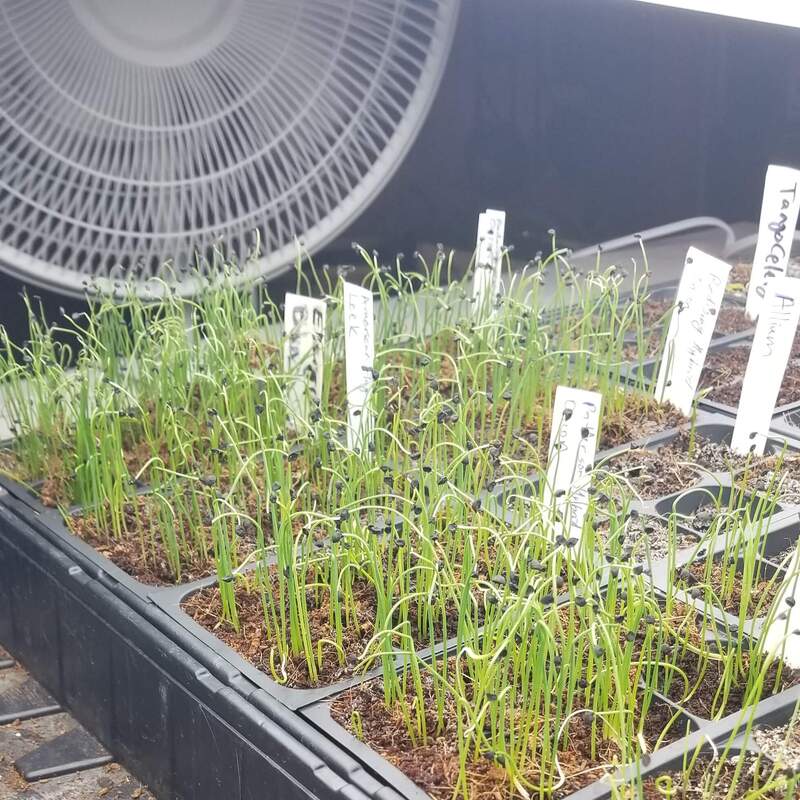
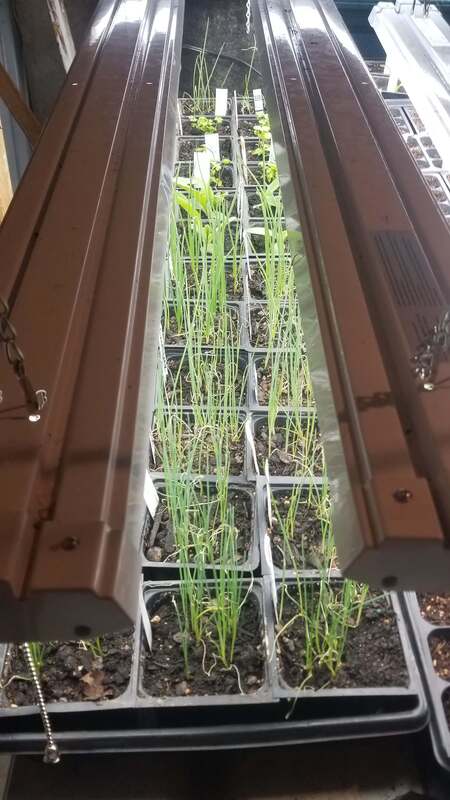
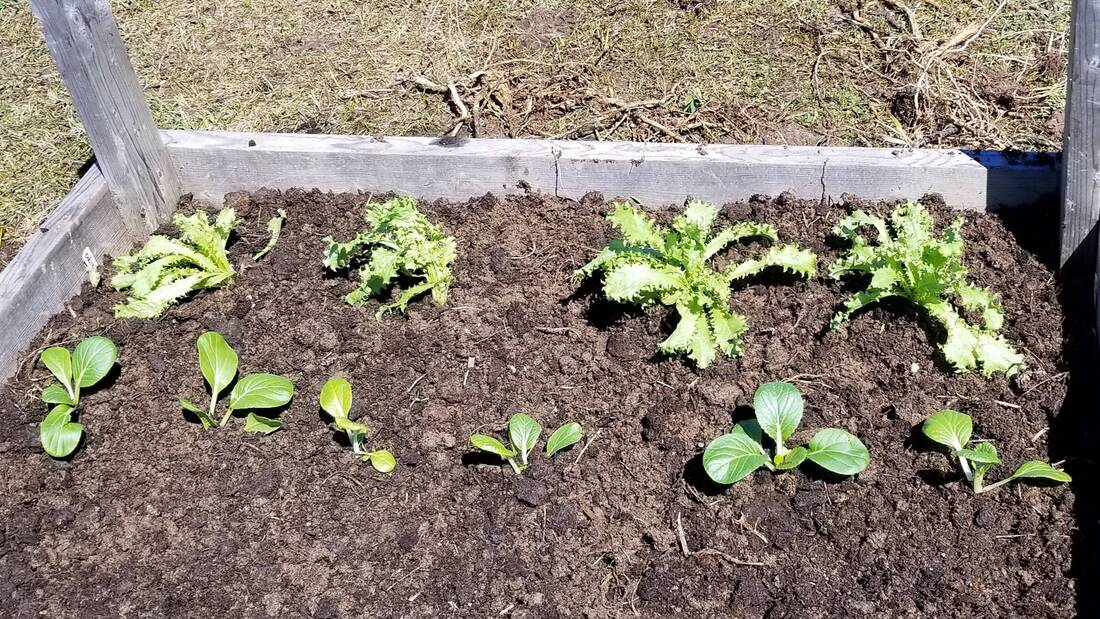
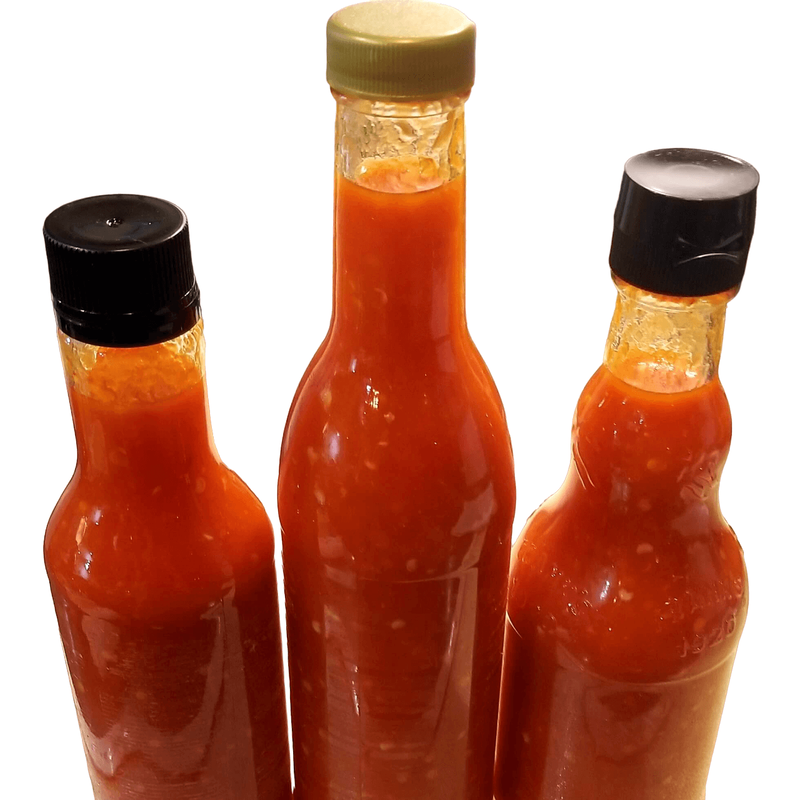
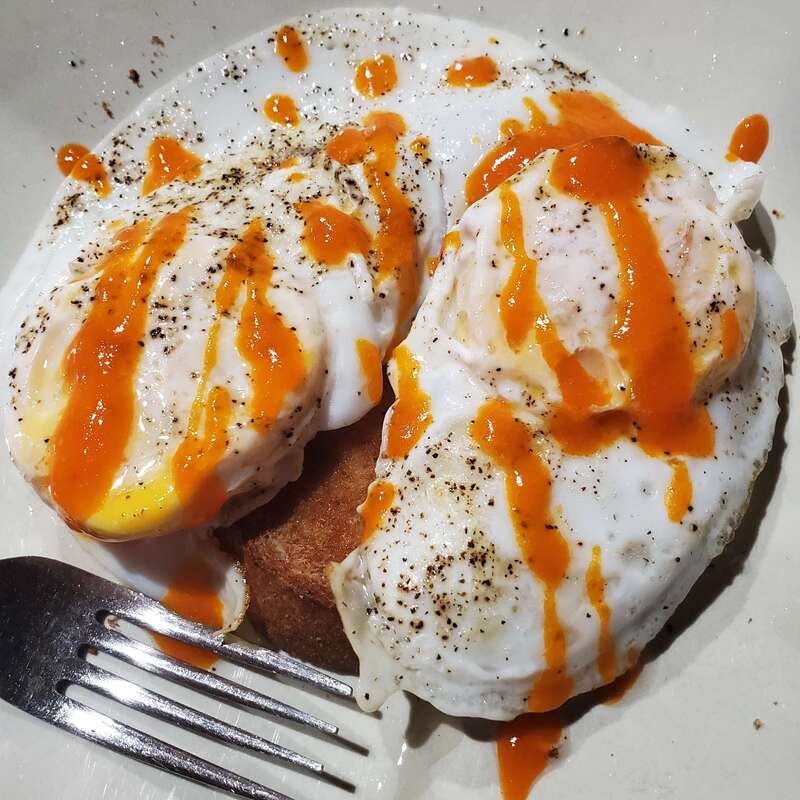
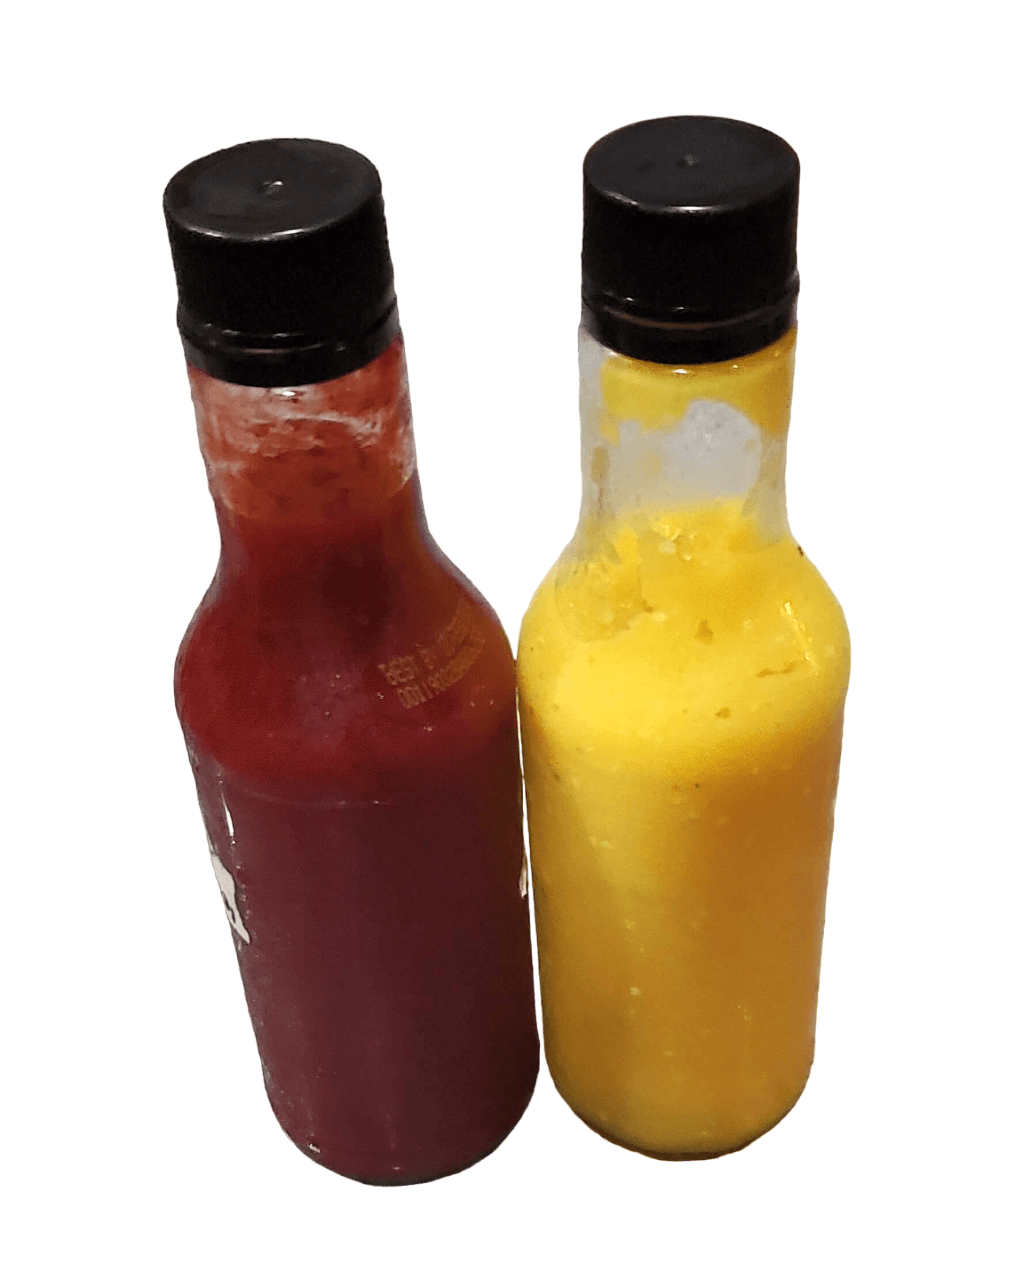
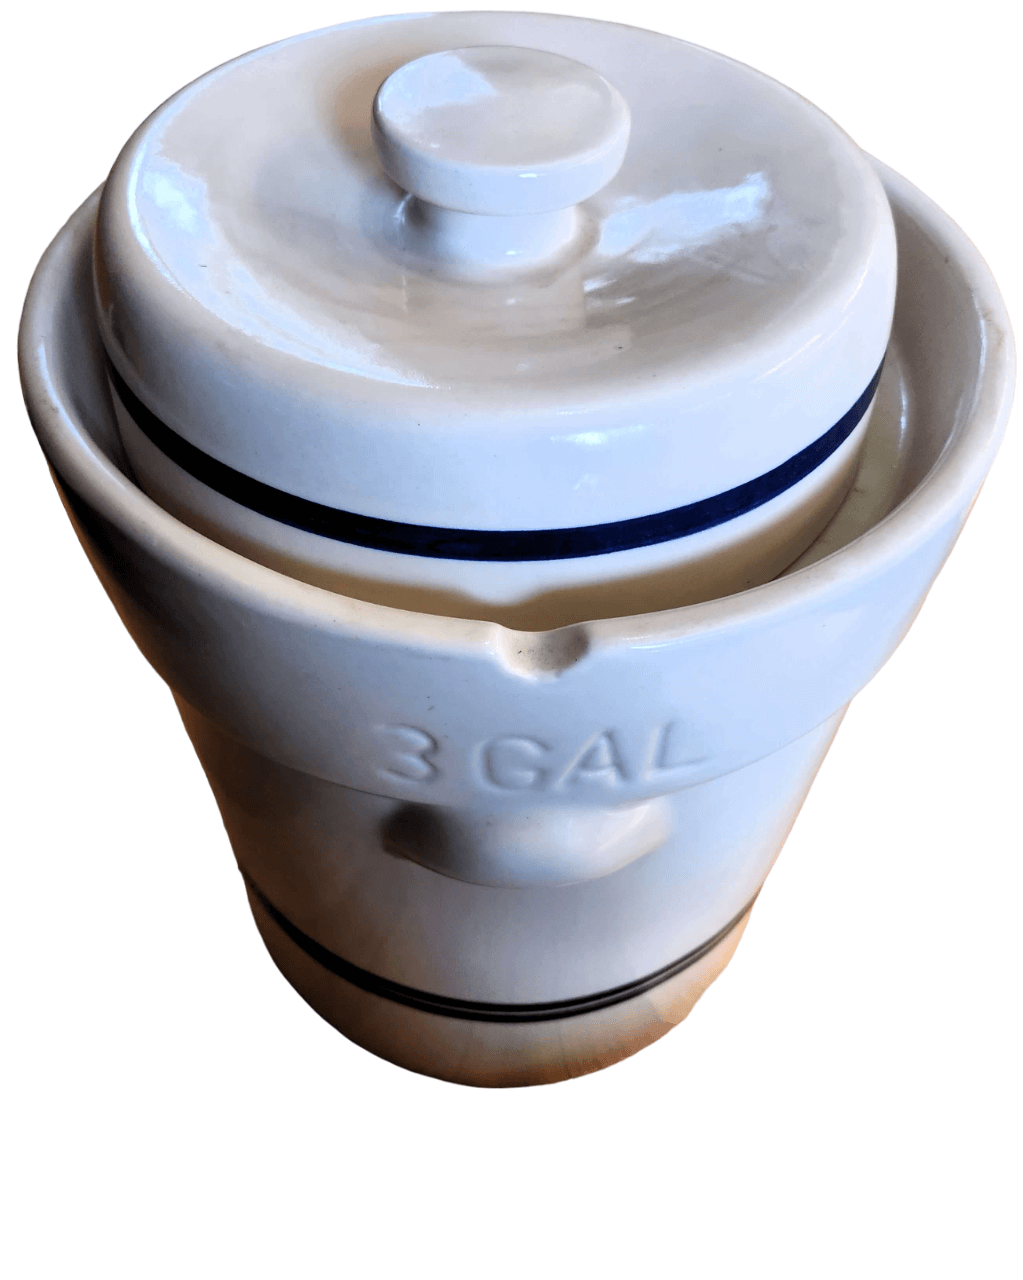
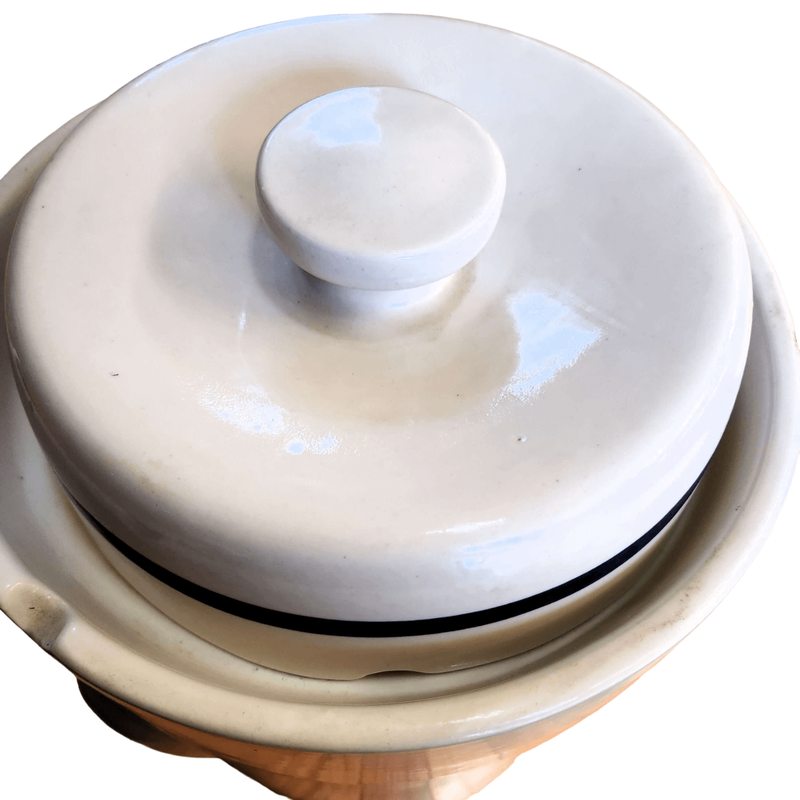
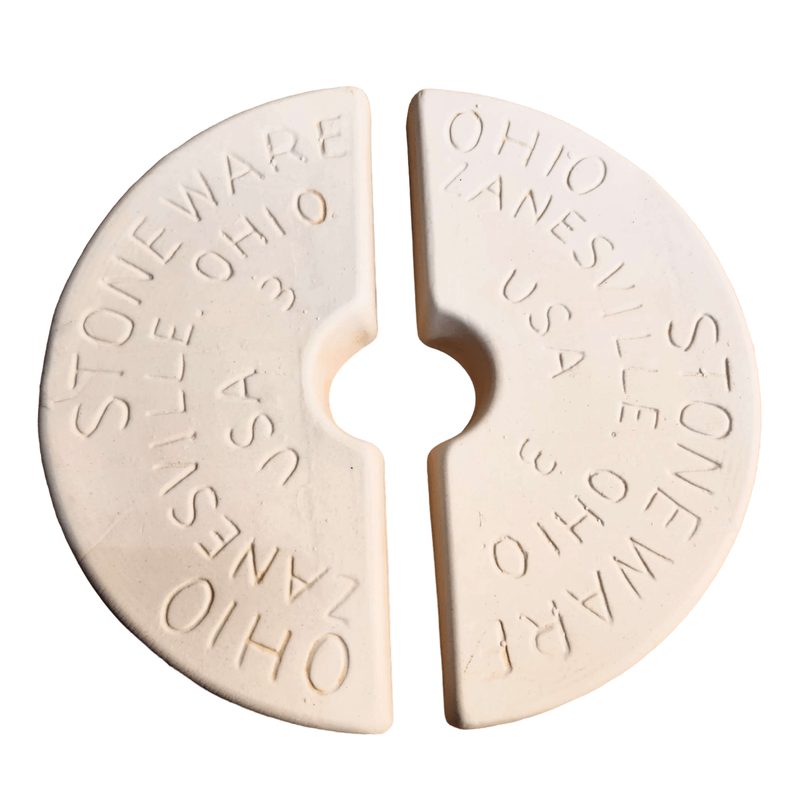
From left to right, onion seedlings under 4 foot LED 5000K lights, lettuce seedlings potted up into 3.5 inch square pots, and endive and pac choi recently transplanted into a raised bed. ConclusionI love starting my own seeds and hopefully you will too. Just remember if it does not work out great your first time, try again! My first time I started seeds I went on vacation and the person who was checking in on my seedlings overwatered them because she thought they were dying. It turns out they were dying because I had problems with damping-off (this was not her fault, some had started dying before I even left for vacataion). Unfortunately, watering even more makes damping-off worse so I lost about half or more of my seedlings that year. I have since learned that less water is usually better and I also try to time my vacations until after the majority of my plants are in the ground! Good luck and feel free to contact me with any questions! 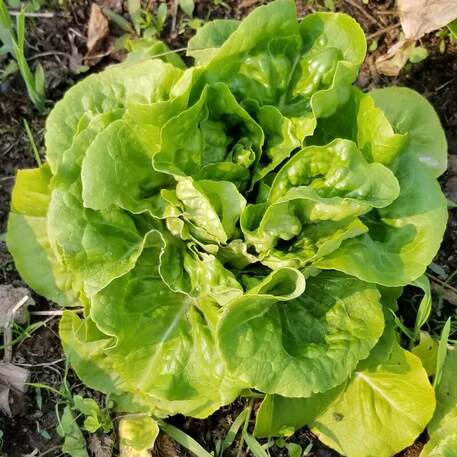 Fully grown lettuce that I started from seed in my basement and transplanted outdoors in my raised beds. Open-Pollinated, Heirloom, Hybrid, and GMO Seeds I see a lot of confusion online about the different types of seeds that are available for purchase. Here I will attempt to clarify the differences between them, allowing you to make the best-informed decision about what types of seeds are best for your garden. Open-Pollinated vs Heirloom SeedsOpen-pollinated and heirloom seeds are similar in that both types of seeds can be saved year after year as long as they are grown distanced from different varieties of the same species to prevent cross-pollination (1). These seeds are genetically stable and manifest similar phenotypes (physical characteristics) when grown (1). Open-pollinated seeds arise from cross-pollination of separate plants of the same species AND variety or self-pollination from the same flower or separate flowers on the same plant (1). Self-pollinating varieties can generally be grown closer together with less risk of cross-pollination but unless you isolate the flower and hand-pollinate there is always the risk that the wind or an insect cross-pollinated for you if another variety of the same species is growing nearby (1). Tomatoes and peppers are probably the most saved seed by home gardeners, and I found that peppers are more likely to cross than tomatoes. I do not attempt to isolate my plants because I am only saving seeds for my use, and I do not mind the uncertainty of growing a possible hybrid the following year. Heirloom seeds are an older variety of open-pollinated seeds (1). Generally, any seed older than 50 years is considered an heirloom but that is not universally agreed upon (2). Heirloom seeds must be open-pollinated but open-pollinated seeds are not necessarily heirlooms. If you are interested in saving seeds and want to make sure the seeds you collect will grow to be the same as their parents, then you must use open-pollinated or heirloom seeds. New varieties of open-pollinated plants can be made using labor-intensive traditional plant breeding methods that involve crossing 2 varieties, collecting the seeds from plants manifesting the characteristics you are looking for, growing new plants from those seeds, and repeating for many years until you have a stable seed that produces the same type of plant year after year. Although new open-pollinated plants can take years to develop, once you have stable seeds, they can be propagated easily via saving seeds (assuming no other varieties were nearby to cross-pollinate). Hybrid or F1 SeedsHybrid seeds (also known as F1, or first generation after the cross seeds) are from cross-pollination of two genetically different varieties of the same species of parent plants (1). The usual way to create these can take years and lots of testing to determine that the phenotypes you want (characteristics such as color, disease resistance, size, etc.) are present and stable in the offspring. Because of the time it takes to generate new varieties of hybrid plants and because to make seed a grower needs to perform this cross-pollination each year (1), which is labor-intensive, is why hybrid seeds cost so much more than open-pollinated or heirloom seeds. Hybrid vigor is a phenomenon that often arises when two different plants are crossed and is one of the reasons why hybrids are so popular (1). You can save seeds from hybrid plants but there is no guarantee that the plant that grows from the saved seed will be the same as the parent. I have successfully re-grown some hybrids (but not most) from seeds that looked just like the parents so if you are willing to experiment there is no reason you cannot save hybrids. If you are not interested in experimentation, simply stick to saving open-pollinated or heirloom seeds. Importantly, hybrid seeds are NOT GMO (genetically modified organism) seeds. GMO SeedsGMO seeds are developed by genetically engineering the genes from one species into another (2). This is done for a variety of reasons such as disease resistance, pesticide resistance, or increasing a desirable trait such as more nutrition. Most gardeners appear to be vehemently opposed to GMO seeds, but they may not be aware that 70% of the processed foods in the United States come from GMO ingredients (2). However, although you may be unwittingly eating GMO crops, GMO seeds are generally NOT available to the average home gardener (see update below!), they are primarily used by commercial farmers to grow corn, soybeans, canola, sugar beets, and cotton (FDA). Other non-processed foods that may be GMO in the United States include certain varieties of potatoes, apples, summer squash, papaya, and pink pineapples (FDA). Many people want to avoid every GMO crop which although extremely difficult is certainly an option. I think GMO crops and seeds need to be taken case by case. As an example, the Hawaiian papaya would likely have gone extinct due to a ringspot virus but was saved by genetically engineering a resistance gene into the plant. On the other hand, the practice of engineering pesticide-resistance genes into our commercial crops so that we can spray more herbicides on our crops without killing the crop itself is not a practice I am in favor of. UPDATE on 02/07/24: As of February 2024, the first bioengineered seeds are available to home gardeners from the Norfolk Healthy Produce company. They inserted a purple color gene from an edible snapdragon plant into a tomato genome. This makes a very purple tomato with increased anthrocyanin, an antioxidant that gives purple vegetables their color. This tomato has been vigoroursly tested and is deemed safe by both the USDA and FDA. Because these seeds are under patent the fruit, seeds, or plants cannot be sold by anyone other than the company that developed them, they are also very expensive! If you want a very purple tomato that is non-GMO Baker Creek Heirloom Seeds is trying to bring the Purple Galaxy Tomato to market. They were supposed to be available early this year but due to production issues will no longer be available to purchase (they even featured it on the cover of their 2024 seed catalog, oops!) Hopefully seeds will be available soon! In the meantime, there are lots of other heirloom and open-pollinated purple and black tomato varieties available, try them all! ConclusionI grow mostly open-pollinated and heirloom seeds (especially my tomatoes and peppers), but I will occasionally grow hybrids usually for specific reasons such as disease resistance, reduced bolting, or easier growth. I lost all my cucumber crop one year to downy mildew so ever since then I have grown at least one type of downy mildew-resistant cucumber variety along with my open-pollinated varieties. It is also possible that you can find open-pollinated disease-resistant varieties if you do not wish to grow any hybrids however in many cases disease resistance may not be as well documented, so it may take some trial and error with different varieties to find one that works. The other type of crop I generally grow from hybrid seed is broccoli and cauliflower. We tend to have large temperature fluctuations in the spring, and I grow much more consistent heads of broccoli and cauliflower with hybrid seeds than open-pollinated ones. One last note on the “organic” seed label. Organic simply means a seed was grown under organic conditions as defined by the USDA’s National Organic Program (1) This means that any fertilizer, pesticides, or any other treatment used to grow the plants must all be labeled organic, and the seeds cannot contain any genetically modified genes. There is no difference genetically between a seed of the same species and variety that was grown organically versus one that was not. You can purchase organic hybrid seeds just like you can purchase non-organic heirloom seeds. ReferencesLactic Acid Fermentation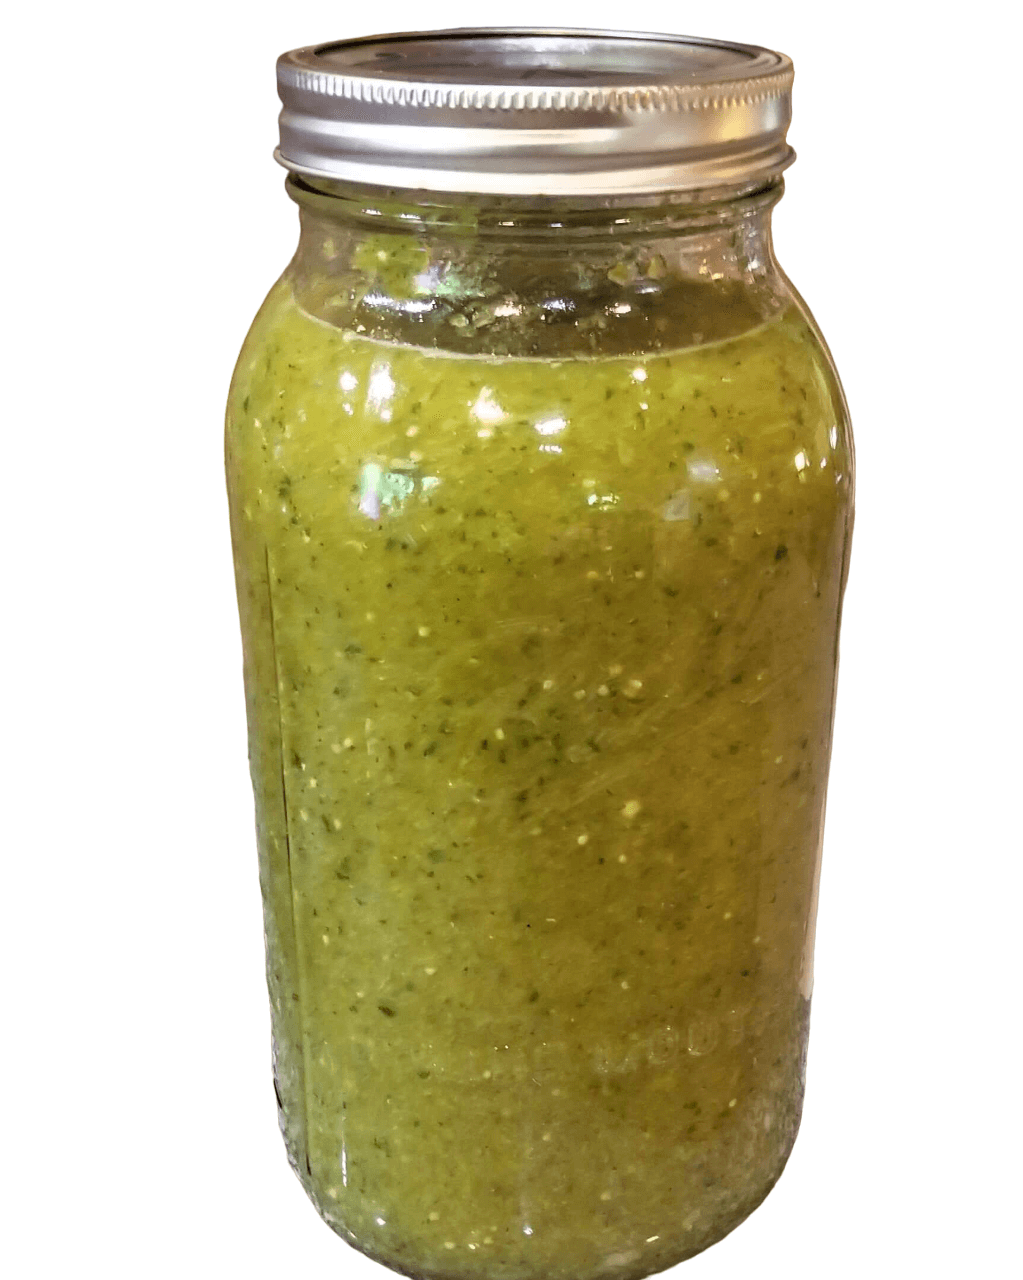 A half-gallon jar of fermented salsa verde. What is Fermentation?Fermentation is the anaerobic (without oxygen) breakdown of substances such as sugars and carbohydrates into other substances often acid or alcohol via microorganisms such as bacteria and yeast (1, 2). Microorganisms ferment to make energy, while acid, carbon dioxide, and ethanol (alcohol) are side products that we utilize (1). For food purposes, two different types of fermentation are most often used: ethanol and lactic acid fermentation (also known as lacto-fermentation). Yeast, specifically certain wine and beer strains or bread strains of Saccharomyces cerevisiae, which you can purchase, is generally used to make alcohol or bread, respectively (1). Carbon dioxide is released which is what causes bread to rise or it is off-gassed in the case of ethanol fermentation (1). In contrast, wild lactic acid bacteria, particularly certain strains of Lactobacillus, Leuconostoc, and Streptococcus, generally perform lacto-fermentation, although other bacteria may also play a role (1). Lacto-fermentation is used to make many common food products such as sauerkraut, kimchi, pickles, hot sauces, cheese, yogurt, and more (1, 2). A third type of fermentation sometimes performed at home uses acetic acid bacteria which are used to make vinegar and kombucha (2). Various fermented hot sauces and one of my favorite ways to use hot sauce, over eggs! Why Ferment?Fermentation is a form of food preservation. Before refrigeration, freezers, and safe canning equipment existed, fermentation was used to preserve the harvest and make food safer to store. Fermentation can also make food more nutritious and more digestible (2). Most cultures have food preservation techniques based on lacto-fermentation, ethanol fermentation, or both. I ferment not only to preserve the produce I grow but also because I like the taste. Fermented hot sauces and pickles taste different than a typical vinegar-based hot sauce or pickle. I am also prone to acid reflux and find that fermented foods are easier on my stomach than the typical vinegar-type pickle (although I love vinegar as well!). 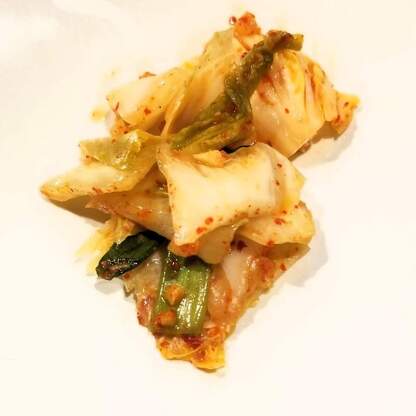 Fermented kimchi, one of my favorite ferments! How to FermentFermentation is a very safe method of food preservation assuming you start with enough salt. A good rule of thumb is to use at a minimum 2% salt, although some vegetables require more. For example, cucumbers consist of a lot of water therefore, up to 5% salt is better to prevent mold formation. For a good chart on how much salt to use and more information on how to make up the salt solution, I like this website. Because fermentation is one of the safest ways to preserve food, I am often willing to follow random internet recipes for fermentation (unlike canning where I only follow safe, tested recipes) because generally if a fermentation goes bad, you know. Just double-check how much salt to add to that vegetable for any fermentation recipe. If your fermentation turns slimy or moldy (anything fuzzy), throw it out! What is commonly called Kahm yeast (a white coating on top of the ferment that is not fuzzy) is safe to eat but can give the food an off flavor. 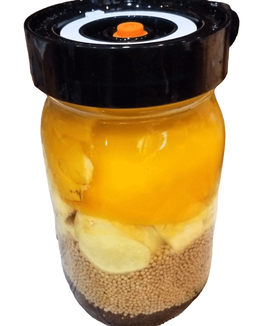 A mustard ferment with an Easy Fermenter lid. The key to successful fermentation is to keep everything below the brine and eliminate as much oxygen as possible at the top of the ferment. Anaerobic lactic acid bacteria grow without the presence of oxygen however mold contamination always occurs at the top of the ferment as it requires oxygen to grow. Once the fermentation gets started enough carbon dioxide is produced to push out excess oxygen and the risk of mold contamination is reduced. To keep oxygen from re-entering ferments I like wide-mouth mason jars (quart or half-gallon sizes are great), with glass weights to hold everything below the liquid brine and a lid to keep the air out. I often use the Easy Fermenter Lids or simple airlocks used for alcohol fermentation as they self-burp, so you do not need to keep opening the lids. If you use an actual lid you will need to release the gas produced often enough to keep the jar from exploding but you also run the risk of incorporating oxygen into the top of your ferment every time you crack the lid which can allow mold to grow. For larger ferments, you will likely want a fermentation crock. I like the water seal fermentation crocks with a lid in a moat at the top that holds water, forming an airlock. A small hole in the lid allows the gas to escape but the hole is covered by water to keep oxygen from entering the crock. A 3 gallon water sealed fermentation crock from Ohio Stoneware. The top moat is filled with water and the hole in the lid that allows gas to escape is visible in the second picture. Most fermentation crocks also come with stone weights to hold the vegetables below the brine. For a basic fermentation, you make up your salt solution (some things like sauerkraut are traditionally brined dry, meaning you add salt directly to the vegetables and the salt pulls liquid out) and pour it over your prepped vegetables. Make sure all the vegetables are covered, add your weight to keep the vegetables submerged, and attach the lid. Most ferments such as hot sauce go at least 30 days but commercially made Tabasco is generally aged 3 years, sauerkraut generally takes 6-8 weeks, and cucumbers are usually much shorter, 5-7 days although you can go longer if you want a sourer pickle. I tend to do shorter cucumber ferments to reduce the risk of mold formation and because I like crunchier pickles. In general, the longer the ferment the softer the vegetable will become. ResourcesFor sauerkraut and cucumber-fermented pickles, I follow Ball (one of the safe canning resources) recipes. Their online website only has a fermented tomato salsa recipe, but other fermentation recipes such as sauerkraut, pickles, hot sauces, and Worcestershire sauce are available in several of their books. See my Canning post for more information on the Ball books that are currently available. Pickles are more likely to mold in my experience, so I like the Ball recipe because it uses a little vinegar at the beginning of the ferment to help reduce the risk of contamination before the fermentation gets started. However, there isn’t enough vinegar added to inhibit fermentation. For fermentation resources other than Ball, I like the Insane in the Brine website, particularly for his hot sauce recipes. The author has also written a couple of books, which feature even more of his recipes than are available online. Other books I recommend include “The Noma Guide to Fermentation” by Rene Redzepi and David Zilber, “The Art of Fermentation” and “Wild Fermentation” by Sandor Ellix Katz, “Fermented Vegetables” and “Fiery Ferments” by Kirsten and Christopher Shockey, and “The Kimchi Cookbook” by Lauryn Chun. References
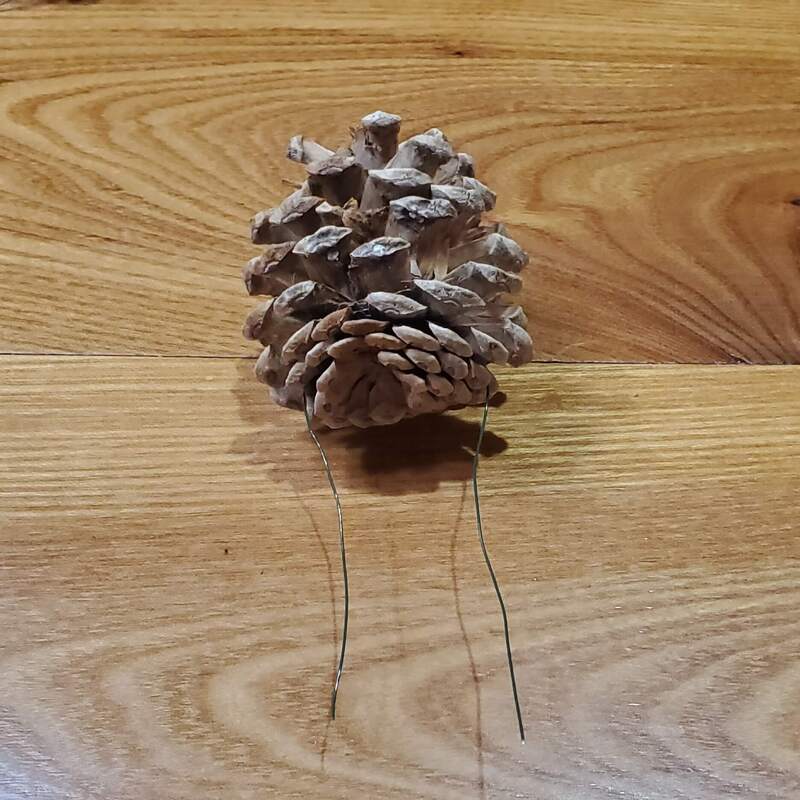
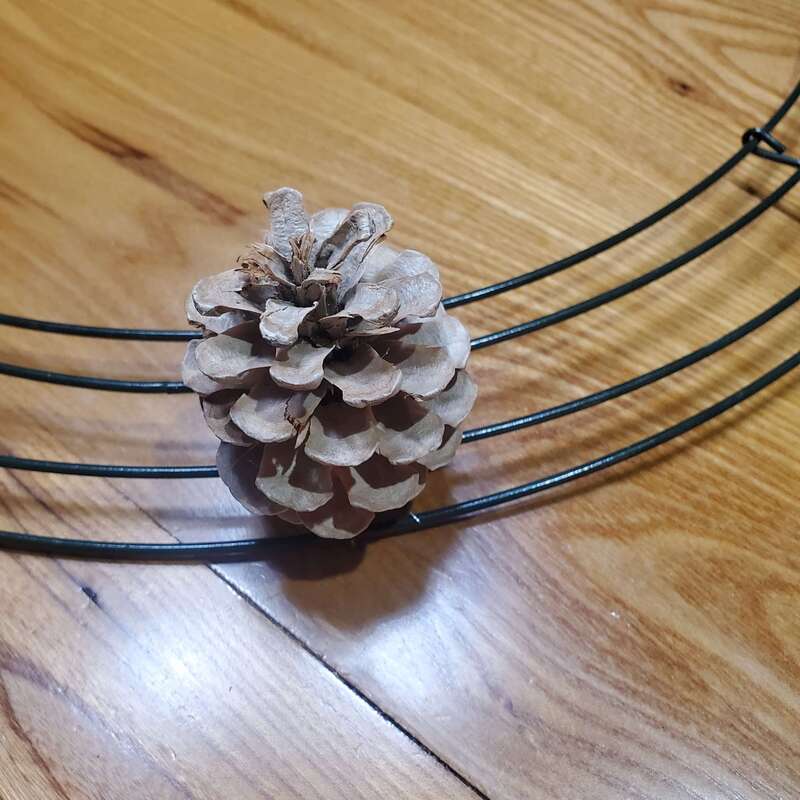
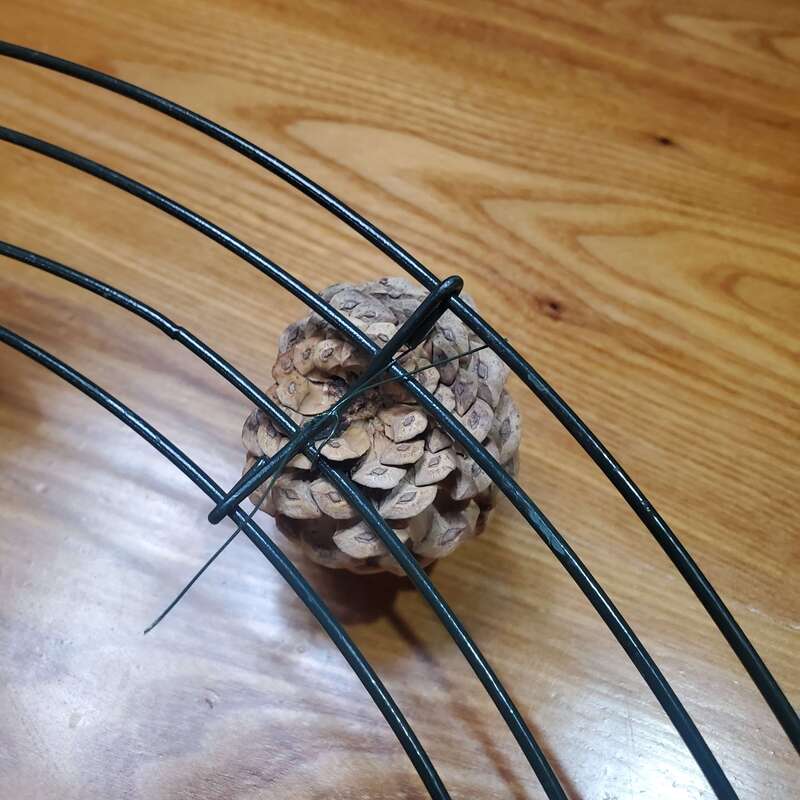
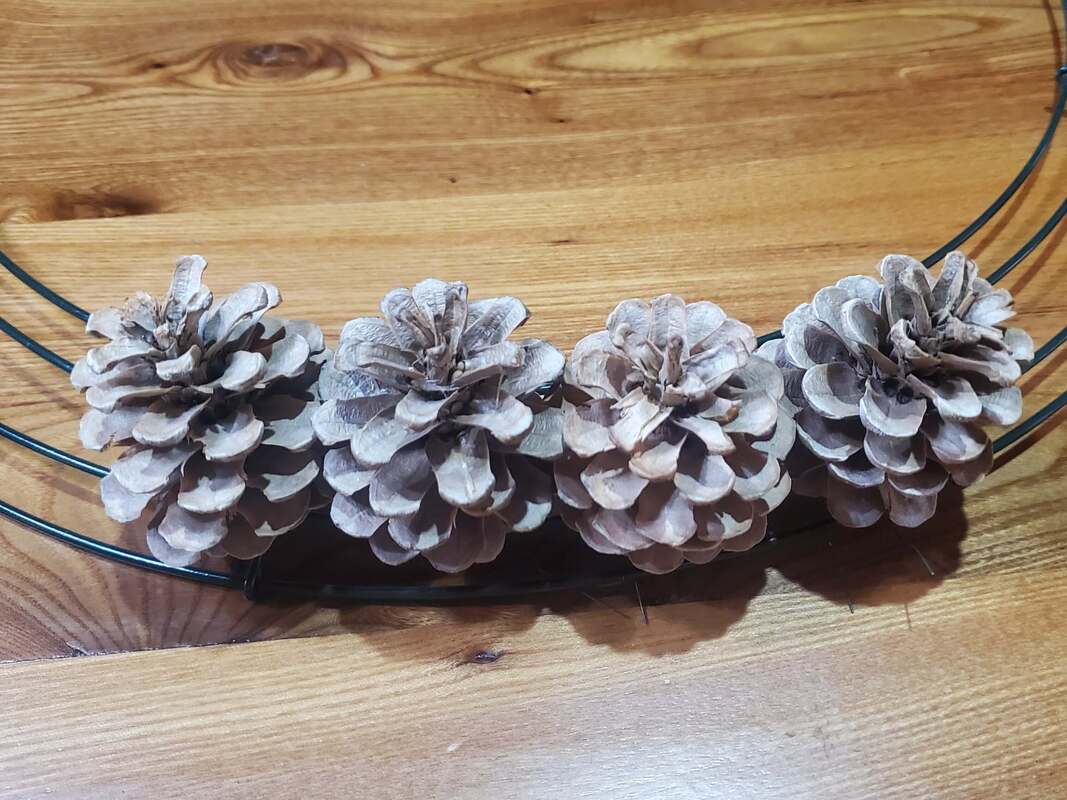
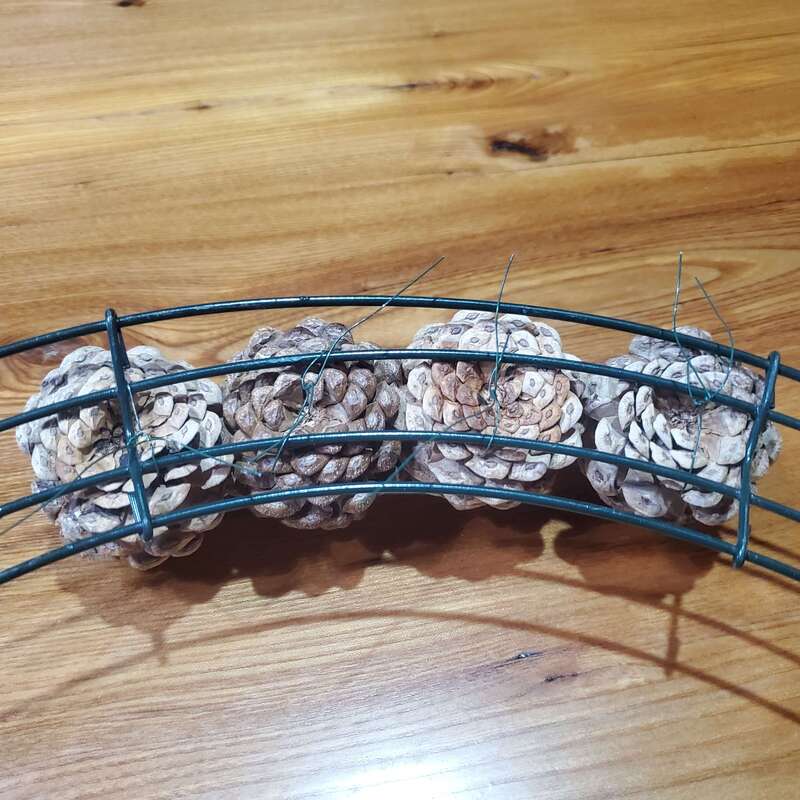
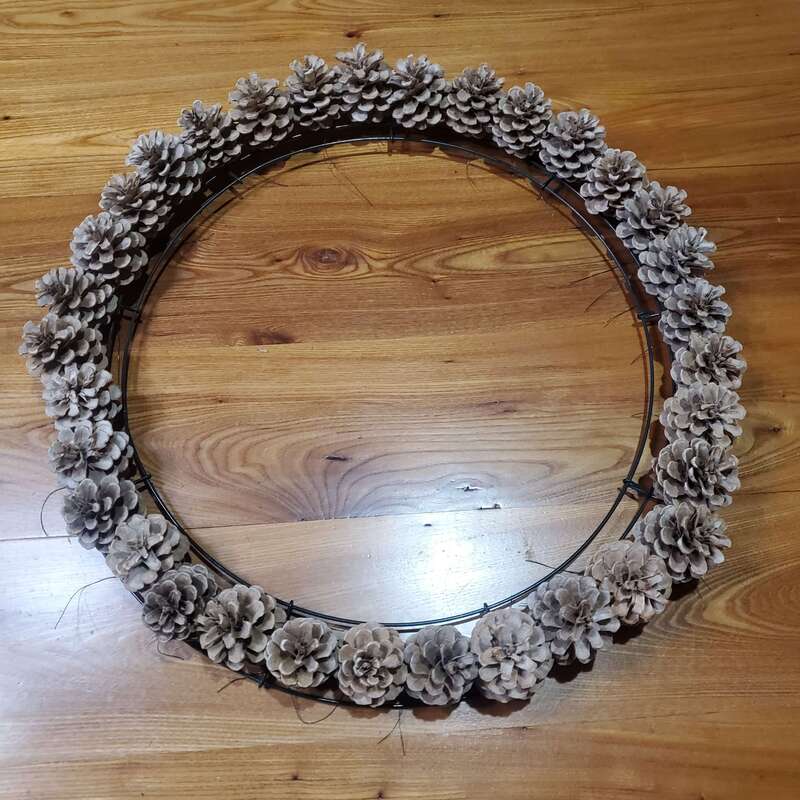
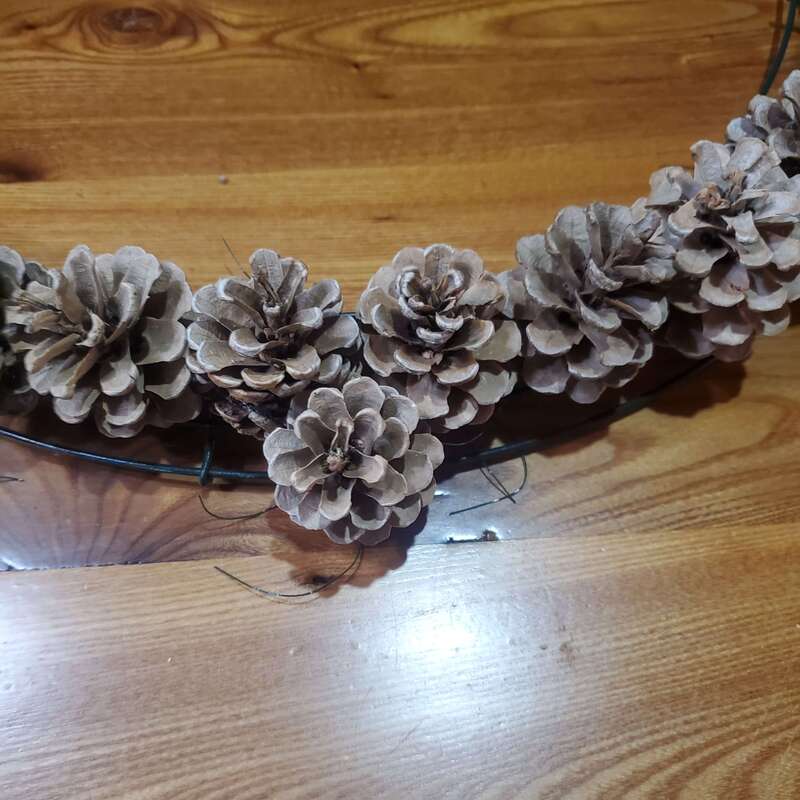
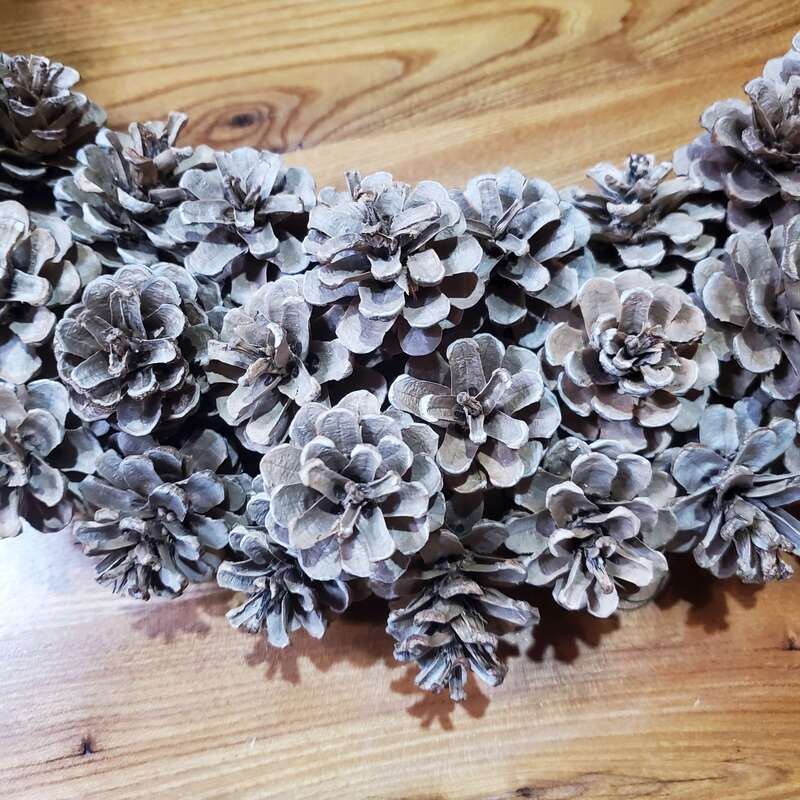
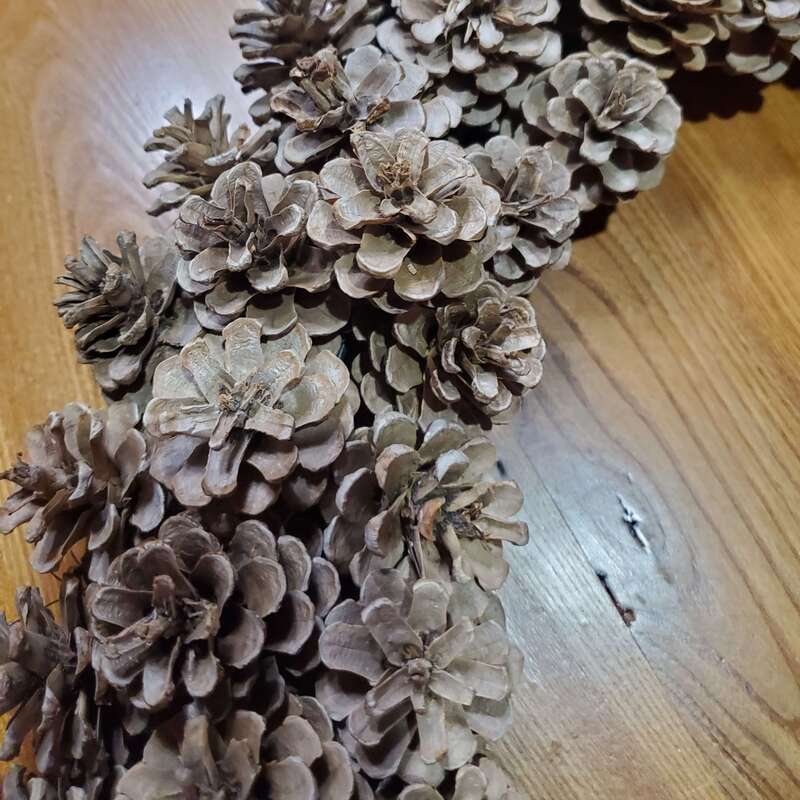
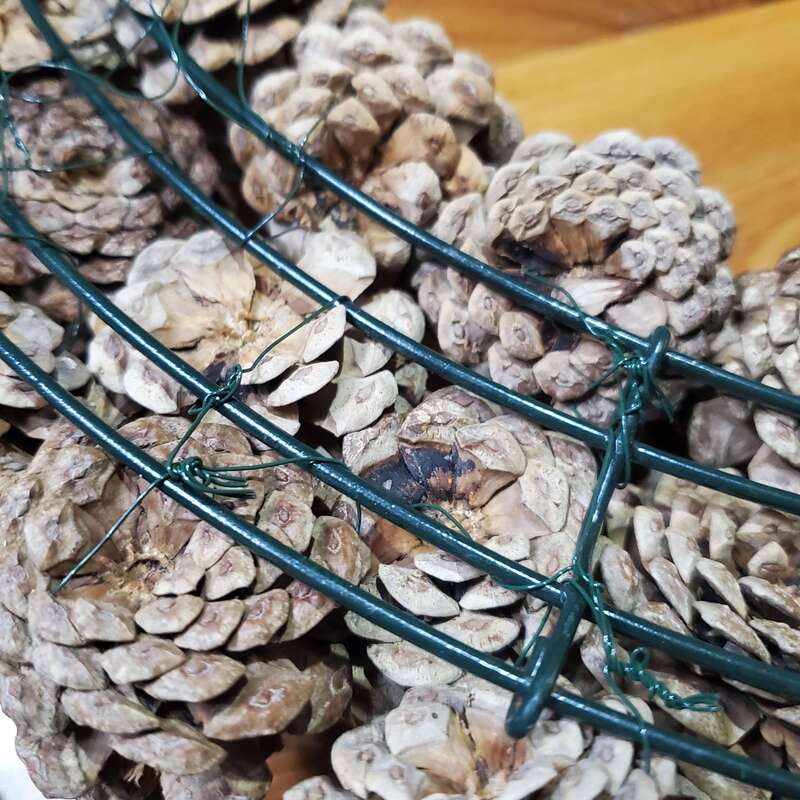
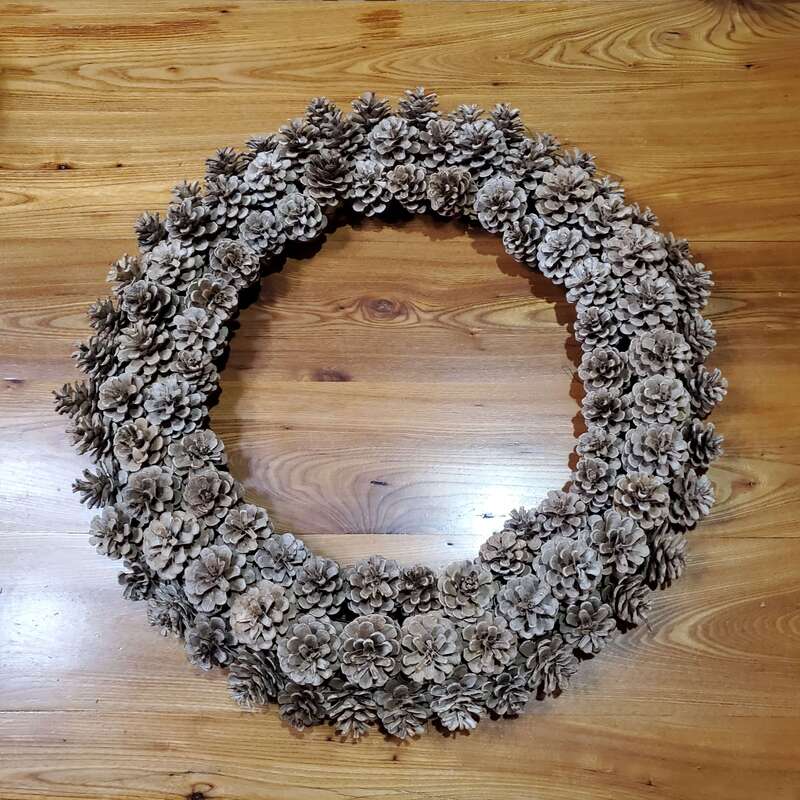
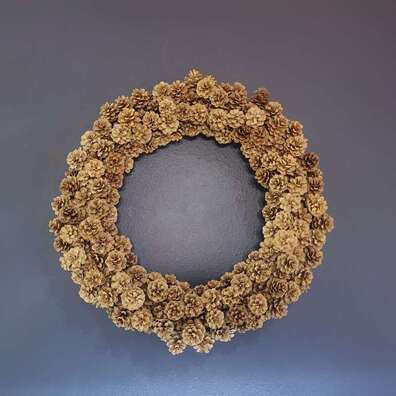 How to Make a Pinecone Wreath Using Bleached Pinecones from the Red Pine TreeOne of my early, and more popular, blog posts was on How to Make a Pinecone Wreath. Today I am going to update that post using a different type of pinecone. The first post used pinecones from white pine trees. These cones are elongated and make a very different wreath than pinecones from red pines, the focus of today's post, which are much smaller and roughly 2”x 2”. They are also more challenging to work with due to their different shape. Additionally, I use bleached pinecones so I will also discuss how to bleach pinecones. 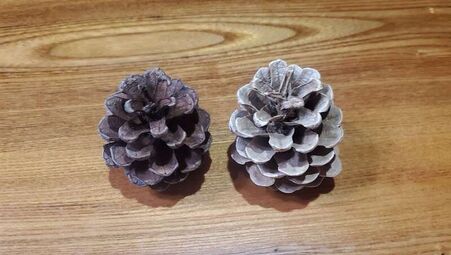 Comparison of an unbleached (left) and bleached (right) pine cone from red pine trees. Bleach the PineconesFirst, it is important to note that bleaching pinecones does not turn them white. If you want a white wreath you will have to spray paint the cones. Instead, bleaching pinecones turns them into a beautiful, driftwood-type color (see the above picture). I have found that to bleach pinecones it is preferable to use older pinecones that are not covered in sap. These types of cones bleach better as the bleach can soak into the pinecones better. Please note it is important to use protective gear when working with large amounts of bleach. Googles to protect the eyes, a respirator mask to avoid breathing fumes, and old clothes or even a rain jacket are necessary. It is also preferable to bleach the cones outside or in a well-ventilated space. I use a 10% bleach solution and bleach my cones in a 5-gallon bucket with a weight, like a heavy plate with a rock on top, to keep the cones submerged. To make a 10% solution mix 1 part bleach with 9 parts water, for example, 1 cup of bleach to 9 cups of water. I usually bleach the cones for at least 24 hours. After 24 hours most of the bleach is deactivated as once diluted it does not stay active for long. This is especially important if you have a septic tank as you do not want to kill the good bacteria in your tank by pouring lots of active bleach down the drain. After draining off the bleach water I rinse multiple times to remove any residual bleach. After rinsing I lay out the cones in a single layer on newspaper or cardboard to dry. This can take several days depending on the local humidity. If you plan on displaying your wreath outside you may want to spray the cones with a clear acrylic waterproof spray to help them last longer when exposed to the weather. I usually did this after the wreath was complete so I would not waste spray on cones that I potentially would not use. However, spraying after does not allow for as great coverage as spraying each one individually will. Regardless of whether you spray it or not, I do recommend displaying the wreath in a sheltered location if possible if you do choose to put it outside as this will expand the lifespan of the wreath. 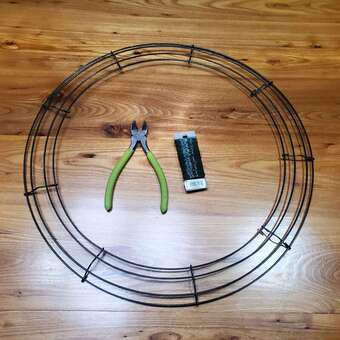 Some of the supplies necessary to make a pinecone wreath include a wire frame, wire cutters, and floral wire. I find needlnose pliers (not pictured) also helpful. How to BeginOnce the cones are completely dry it is time to start constructing the wreath. First, you will need a wire wreath frame (I have used 12” and 18” frames) and floral wire (the green wire available in most craft, big box stores, and online retailers). I like the 26 or 22-gauge wire. The 26-gauge wire is easier to work with since it is thinner, but 22-gauge can be helpful when trying to thread the wire through the wreath after the first 3 rows of cones are attached since it is stiffer and less likely to bend. Some people hot glue the cones to a foam frame but I highly recommend individually wiring the pinecones to a metal frame. These wreaths are very delicate but at least by wiring them, you do not need to worry about them falling off! You will also need wire cutters and I have found needle nose pliers come in handy when adding the last group of pinecones to grab the wires and pull them toward the back of the frame. Step 1: MaterialsYou will need a wreath frame, floral wire, wire cutters, needle nose pliers, and pinecones. For red pine pinecones, you will need a lot of cones, much more than for a white pine pinecone wreath! As an estimate, you will need about 100 cones for a 12” frame and about 200 for an 18” frame. For the wreath pictured, I used an 18” frame and used about 36 cones for each of the first 3 bottom rows which equals 108 cones for the bottom layer. I like to add in a second layer to fill in any gaps using as many pinecones as necessary until it looks “pleasing” to the eye. Step 2: WiringI cut approximately 6-8" pieces of floral wire and wrap it around the stem end of the cones (go a few scales down from the end) at least twice. Then insert the top of the cone with the floral wire outside the two wires in the center of the frame with the floral wire sticking out the back. Twist several times to attach the cone to the frame. Repeat this process for the entire middle section of the frame. I find it easier to start in the center for the red pine pinecones versus the outside for the white pine pinecones. I usually use my larger pinecones on the first layer of the wreath and save the smaller ones for the top layer and to fill any holes at the end. For the cones at the end, you may need a longer wire (8-10") to reach through the wreath with enough remaining to grip and twist to secure the pinecone. I also find that pushing the cones as close as possible while you wire them in place makes the entire wreath more secure. I try to interlock the scales of cones next to each other to make them more stable. Step 3: Trim the WiresFilling in the next ring of the wreath is much easier if you first trim off the excess floral wire. Otherwise, you often grab the wrong wires when attaching the second row of pinecones. Make sure each cone is secure and the wire is tight. I often twist the wires of 2 different cones together first to maximize the stability of the cones and wire. Then trim the excess wire, wrap the cut end around the frame, and push the cut end inward to avoid scratching yourself when handling the wreath. When the wreath is complete, I hot glue the ends of the wires for extra security and to avoid scratches on the wall. Wreath comparison with just the first three bottom rows complete (left) versus additional pinecones added on top to fill in any gaps and complete the look (right). Step 4: Complete the WreathAfter you trim the excess wires from the first row, move on to the second row, trim the wires from this row, and then wire in the third row. Each row gets subsequently harder to wire because there is less room to fit the cones and your fingers however, with a little patience you will soon have all three rows wired. Next, fill in any gaps with the smallest cones you have on hand. I have found it helpful to hang the wreath on the wall to determine where the gaps are. Sometimes taking a picture of the wreath on the wall is also helpful as it is easier to notice problems with the wreath from a picture than on the table or wall. You may also find it necessary to adjust or even remove certain cones that do not fit quite right. If a cone is sticking out too much you can often wire it to pull it closer to the remaining cones. If this does not work, simply remove it, and replace it with one that fits better. Once the wreath is complete and you are happy, finish trimming the wires and hot glue them to keep them from scratching the wall or you can back the wire frame with felt. Regardless, hang the wreath and enjoy!  Red onions I steam canned in red wine vinegar. Delicious on burgers! Recipe from the Ball Complete Book of Home Preserving. Safe Home CanningThere are many canning resources available online and in print, however, most of them are unfortunately not safe. Many people do not care about canning safely (i.e., canning rebels) and claim “their kitchen, their rules,” however, I would not want to eat their canning or even their cooking. This blog post is for those who do want to can safely and not worry about making someone sick or even killing them. If you disagree with safe canning practices, please do not comment as I will remove all unsafe canning advice, but I am happy to answer any legitimate questions. Although I have a bachelor’s degree in microbiology, I am not a food scientist, therefore, I encourage anyone learning to read over some of the safe canning resources given below. Two safe canning resources in North America that test their recipes are Ball (Bernadin in Canada) and NCHFP (National Center for Home Food Preservation, associated with the University of Georgia). Most university extension sites are also safe, but if there is a discrepancy between extension sites or even Ball, go with NCHFP to be safe. I also like a canning blog that only publishes safe recipes from Ball/Bernadin or NCHFP, called Healthy Canning. There are great articles on the Healthy Canning site that explain why certain practices or substitutions to recipes are or are not safe. Also, there is a safe canning group on Facebook, called “Canning” and one of the admins (Ann Crum) also has a YouTube channel called Ann's Mini Homestead, the only one I am aware of that promotes safe canning techniques. In general, avoid any other website, blog, Facebook page, or YouTube channel as it is likely unsafe. For printed canning resources in addition to Ball/NCHFP website recipes, there are several Ball books available (safe if from 2005 and later), and you can purchase the NCHFP book from the University of Georgia extension site but all the recipes are also available on their website and can be printed out from there. Most other books available to purchase contain at least some unsafe information. The Ball Blue Book is the basic book that most people start with and includes fermentation recipes for sauerkraut and cucumber pickles in addition to basic water bath and pressure canning recipes. The All New Ball Book includes some updated recipes, including meal-in-a-jar type ones as well as more fermentation recipes. However, that book did receive some criticism for containing a few errors (actually all of them do, most of which have been fixed with subsequent printings) so I looked up the errors on the Healthy Canning website and made the changes directly in the books. The last Ball book is the Ball Complete Book of Home Preserving, which has the most recipes of all the Ball books and is a good addition to your canning library. 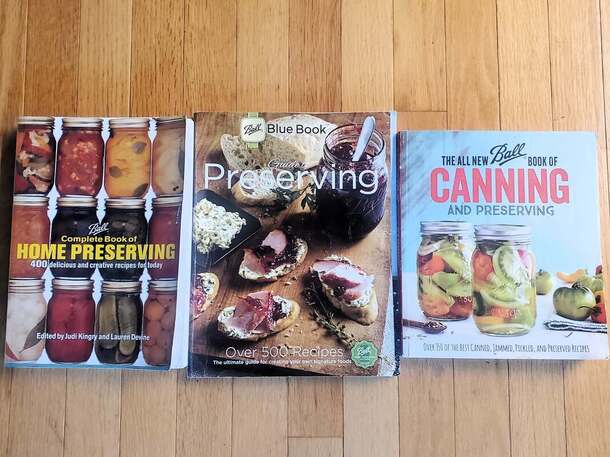 Some of the safe canning books from Ball. Water Bath or Steam CanningFor pickling you have two choices, either canning to preserve it long-term or fridge pickles, which generally last 3-6 months. I follow a Ball or NCHFP recipe if I am planning on canning it to make sure I include the correct amount of acid. If I just want to make a small amount of fridge pickles, usually cucumbers or hot peppers, I will follow either Ball/NCHFP or any recipe I like since it will be stored in the fridge and the total acidity is not as important. For water bath canning I MUCH prefer a steam canner over the traditional water bath where the water needs to be an inch or two over the top of the jar as it is much faster since you only need to boil 3 quarts of water instead of a whole pot. The only downside is that it is only recommended for recipes that have 45 minutes or less processing time. This generally isn't a problem for those living under 1000 feet but can come into play if you live at a higher elevation. Two key things with water bath/steam canning are that you need to increase processing times for increasing elevation (see chart) and you need to properly acidify your product if it is not naturally acidic enough to keep the botulism-causing bacteria from growing. Most fruits are acidic enough (exceptions are white peaches, mulberries, and elderberries so these either cannot be canned or are canned with very specific recipes) but tomatoes always need extra acid added to each jar. All tomato varieties are borderline acidic, heirlooms are not more acidic than current varieties, and "low acid" tomatoes have similar levels of acid as any other tomato, they just have more sugar which masks the acidic taste (1).  Pressure CanningFor pressure canning, there are two common stove-top canners (use a canner, not a cooker!): Presto and All-American. If you have a glass top stove check with the manufacturer or manual to make sure it can support the weight of a full canner. To be safe a pressure canner needs to be at least 16-quart capacity (15.5 for the smallest All-American), which is the volume of the pot, not the jars, and you need a minimum of 2-quart jars per canner load (or the equivalent, so 4 pints, 8 half pints, etc., and you can add a quart jar of water for small loads, to take up space). There is currently no electric pressure canner that is considered safe (not even the Instant Pots which have a canning function). Presto has recently released a new electric canner, but it has yet to be tested by an independent source (Oregon State Extension is currently working on testing it) so the best practice is to wait until testing is complete before using them. Additionally, electronic devices can go bad, and it is uncertain if you will be able to have them tested like you can with a dial gauge to make sure they are calibrated properly. Additionally, a stove-top pressure canner with a weight will never give the wrong pressure, so using the weight instead of a gauge is my preferred method. Many people love All-American canners because they are super solid and do not use gaskets, but they are extremely heavy and very expensive. I love my Prestos, I have both sizes and they are much easier to lift, the smaller one heats up and cools down faster, and for the large one, you can double stack pint jars. All-American makes smaller ones but they also make one you can double stack quarts, but it is usually too tall to fit on most stoves if you have a microwave above your stove. The key to pressure canning is you need the correct pressure for your elevation. I use the 15-pound weight because I am over 1000 feet so 10 pounds is not enough. You can go by the gauge (for me it is 11 pounds) but then you need it tested yearly to be sure it is still accurate, so it is just easier to use the weight since it is never wrong. If you live under 1000 feet you can use a 10-pound weight, but you need to buy it separately for Presto since they come standard with a 15 lb. Also, if a recipe has both water bath and pressure canning instructions generally the pressure canning instructions just mimic water bath conditions (they do not come up to high enough pressure/temperature to kill botulism spores) so acidification is still necessary. One additional point is that recipes need to be followed exactly, you cannot simply pressure can anything you want to make it safe. Density, pressure, and total canning time (including the vent time and cool-down time) are also important. 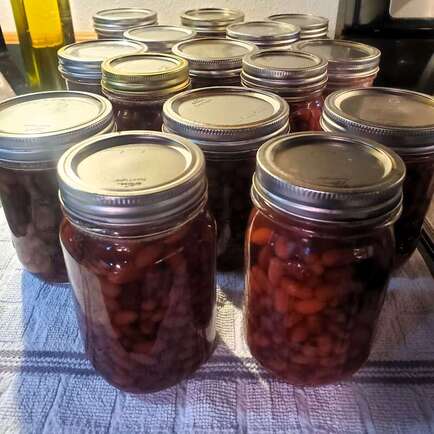 A batch of dry beans I pressure canned. Recipe from NCHFP. References
Organic Pest Control: BtBt is Bacillus thuringiensis, a bacterium naturally found in the soil used to control pests, is the most widely used biopesticide worldwide (1). A biopesticide is a pesticide derived from a biologically occurring, natural source, such as from an animal, plant, bacteria, or mineral. Although the use of Bt can be traced back to the early 1900s the first commercial use was in France in 1938 (1, 2) and was first registered for use in the United States by the Environmental Protection Agency in 1961 (3). B. thuringiensis is a rod-shaped bacterium that switches between normal vegetative growth and a sporulation state in which round spores are formed (4). When spores are formed, the bacterium also produces crystalline proteins (Cry family of proteins) which are toxic to certain insects (5). When the insect ingests the Bt, for example, while eating a leaf sprayed with the Bt-containing pesticide, the crystalline proteins bind to specific receptors on the epithelial (skin) cells of the insect’s gut, the cry proteins then form a pore in the cell, causing them to lyse (rupture) due to osmotic shock (6). Other organisms, such as humans, other mammals, birds, earthworms, and most other insects do not have the receptor necessary for binding and are therefore not harmed (2, 3). Different subspecies of Bt are specific for different types of insects. For example, Bt kurstaki (Btk), the most common and easiest to find Bt, is used to control Lepidoptera (butterfly and moth) larvae such as cabbage worms, cabbage loopers, gypsy moth, tobacco hornworm, and more (2). It has no effect on beneficial insects like honeybees or ladybugs (3) but should only be applied to plants that butterflies, such as monarchs, are unlikely to visit, for example, brassicas. Bt israelensis (Bti) is used to control mosquitos and fungus gnats (Dipterans or flies) by targeting the larvae of those insects (2) and is commercially available as Mosquito Bits or Mosquito Dunks. Mosquito Bits are in pellet form and can be sprinkled in standing water to kill mosquito larvae. I have also mixed the pellets into my plant water when I have a fungus gnat outbreak in the soil of my house plants. Simply watering your plants soaks the soil with the Bti allowing the pesticide to control the larval stage. Mosquito Dunks are larger and float on water and slowly release the Bt as they dissolve over time and can also be used in standing water. Bt aizawai (Bta) is used to control certain moth larvae species, especially those that eat grains (6). This formulation appears available for commercial farms but not for the average homeowner to purchase. Bt tenebrionis and Bt san diego are used to control beetles such as the Colorado potato beetle (6). This formulation also appears available for commercial farms but not for the average homeowner. AdvantagesBt is a very safe pesticide (2, 3) especially when compared to other non-organic synthetic pesticides and even some organic pesticides. Bt is also very effective against specific pests (6), but its mechanism of action does have some disadvantages (see below). Bt is also a very host-specific pesticide (2, 3, 6), particularly when used according to the label instructions, which reduces off-target effects. DisadvantagesBecause the larvae need to eat the Bt for it to be active, plants will sustain more damage until the toxin takes effect, usually within a few days. The Bt spores are also sensitive to UV light (sunlight will break them down) (7) and may wash off the leaves, particularly after a hard rain. The typical half-life of Bt on foilage in field conditions is 1-2 days (7), therefore it is recommended that plants be sprayed weekly or following a hard rain or overhead irrigation. There is also the possibility of off-target effects however, Bt is much more host-specific than many other pesticides on the market, even other biopesticides. When used carefully on specific plants off-target effects are minimized. ConclusionsOne last use for Bt has been introducing the gene into the plant itself, making a transgenic crop. This eliminates the need for spraying, instead, the plant cell itself produces the insecticidal protein. The use of Bt in transgenic crops is beyond the scope of this blog post and I will likely address the topic in the future. However, in the United States, the most common Bt crops are corn and cotton, but potato and tobacco have also been modified. To my knowledge these crops are not available to the average home gardener but only to commercial farms. References
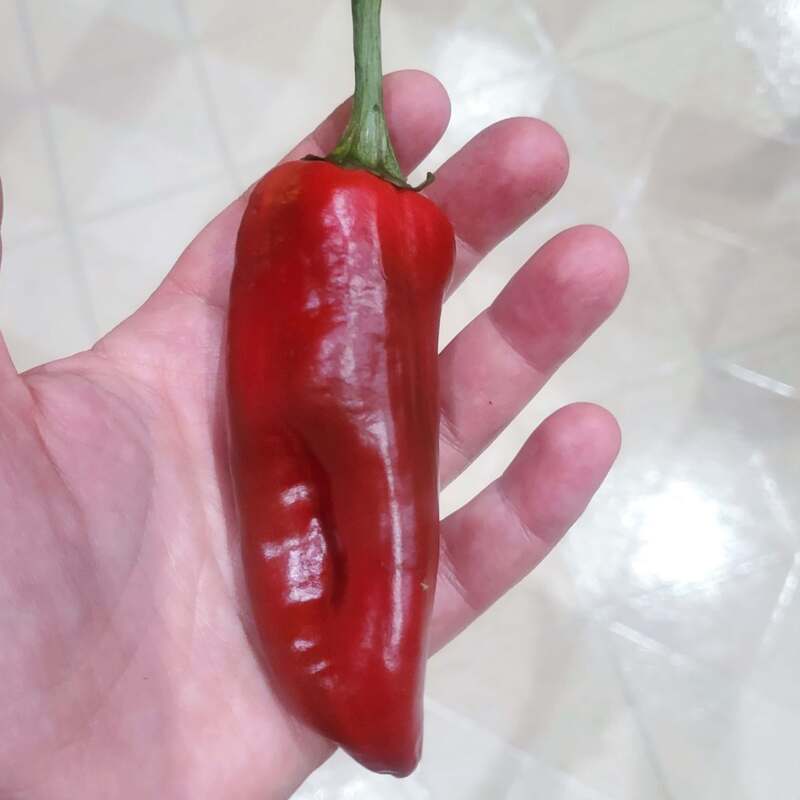
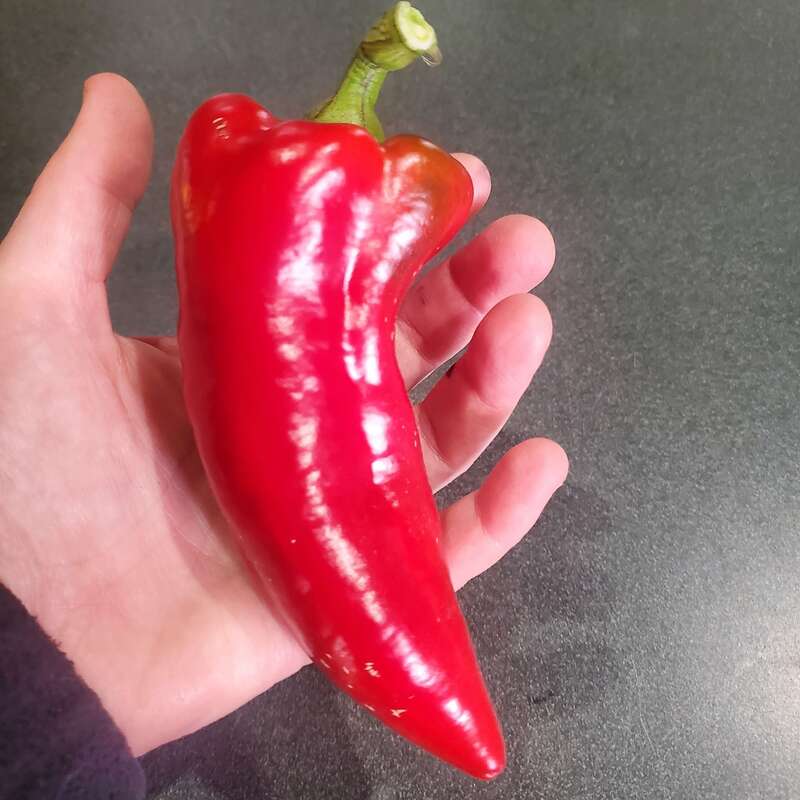
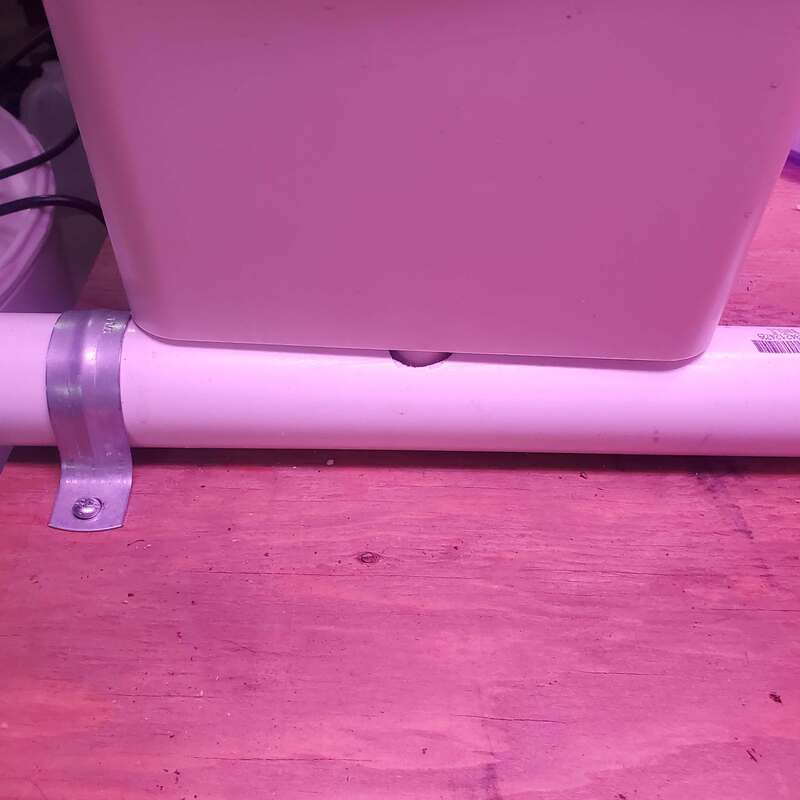
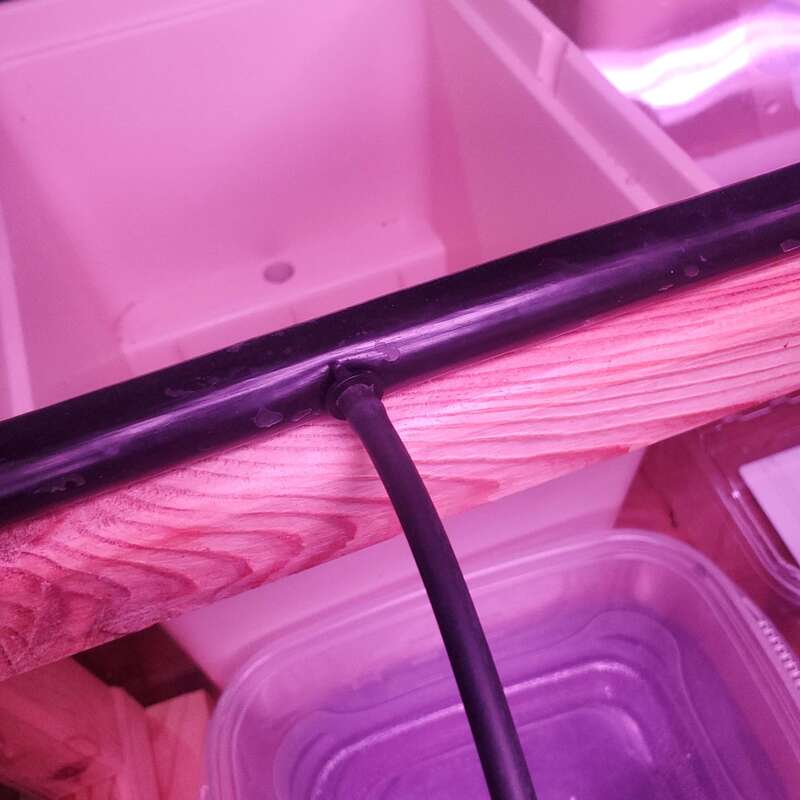
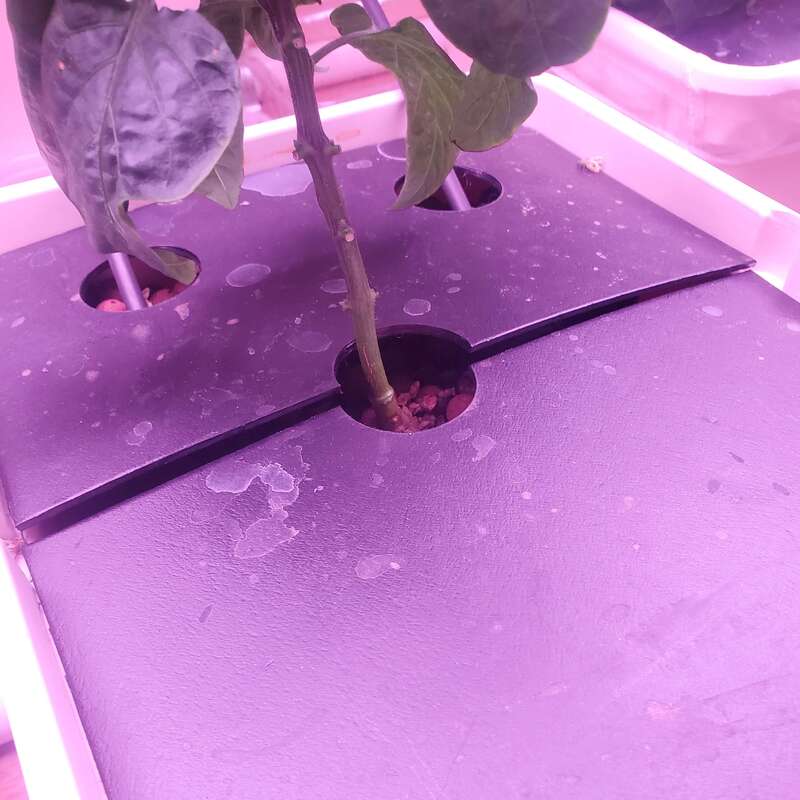
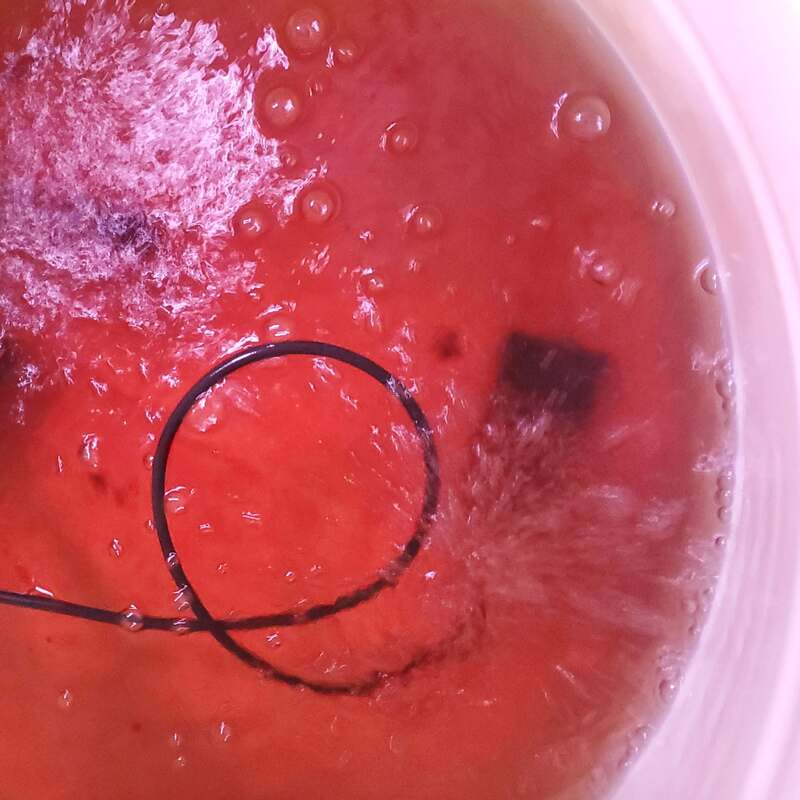
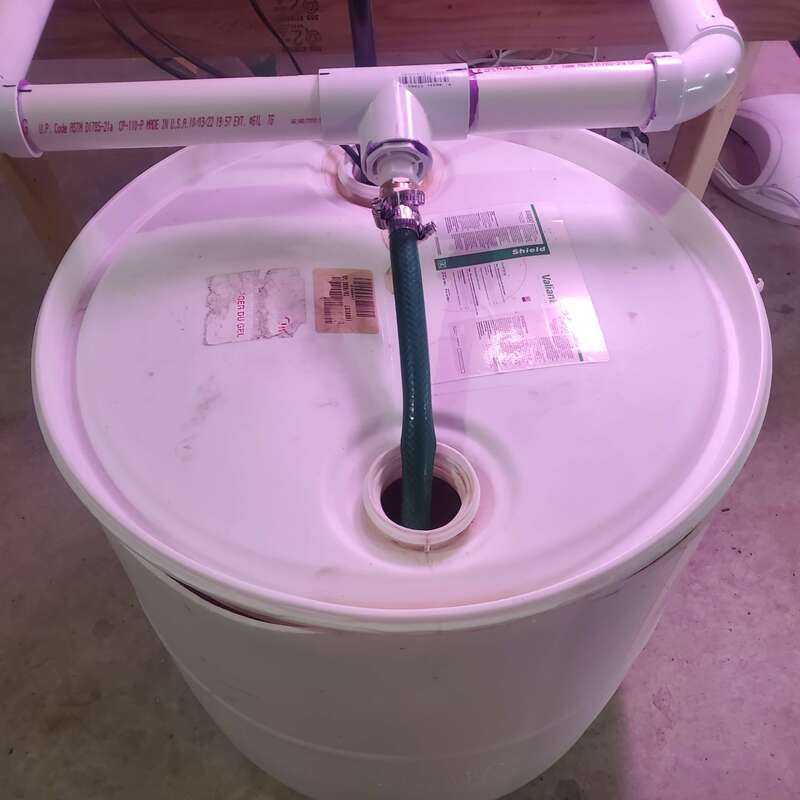
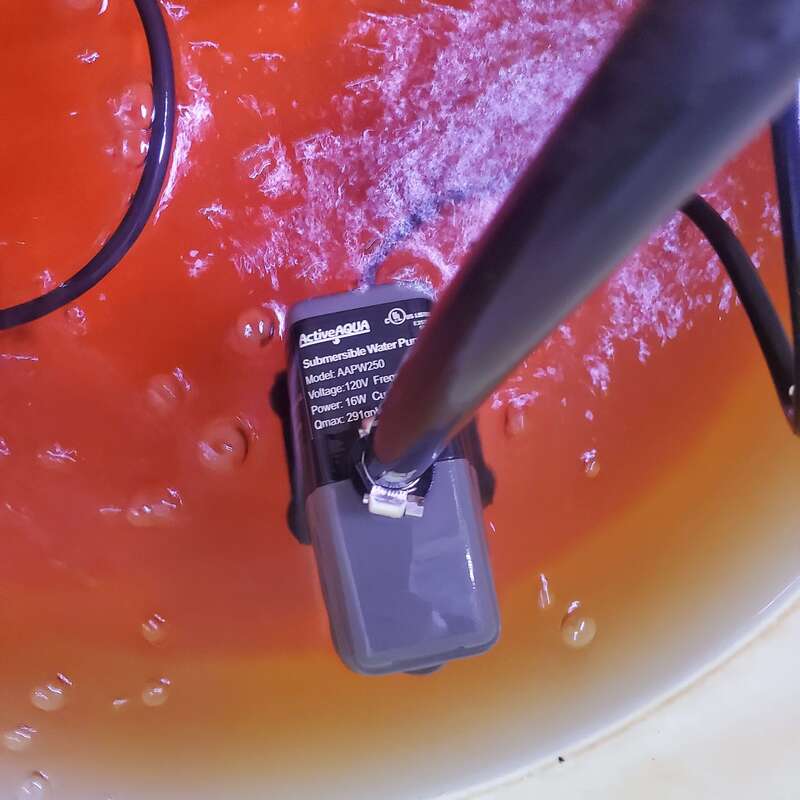
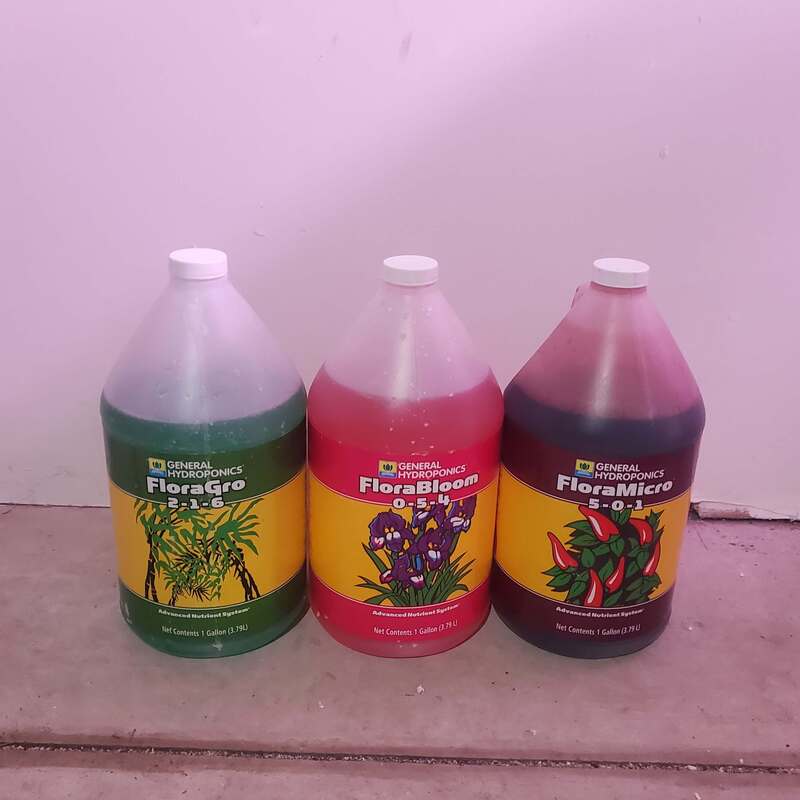
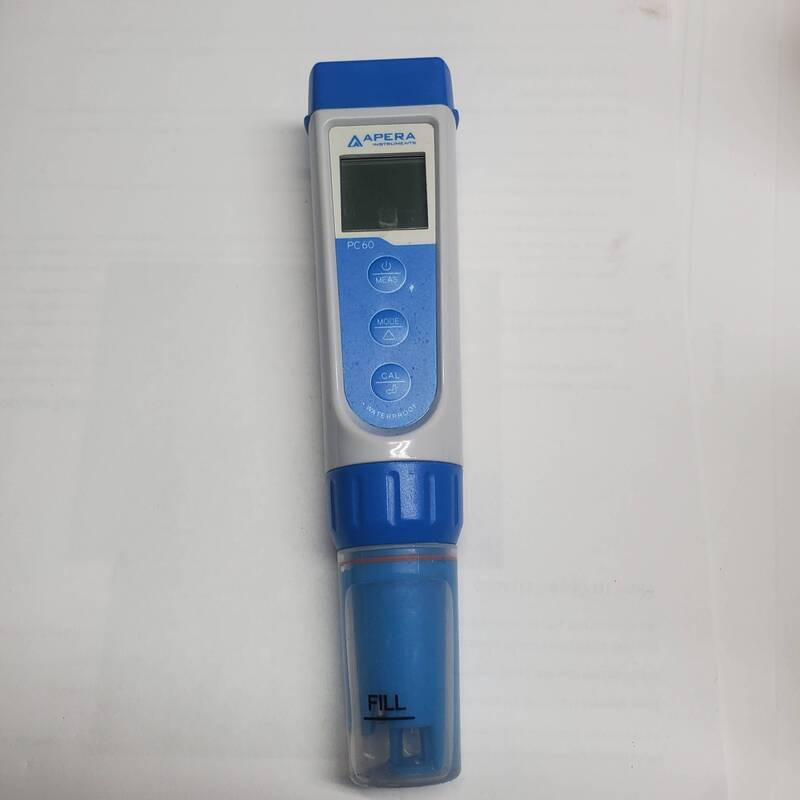
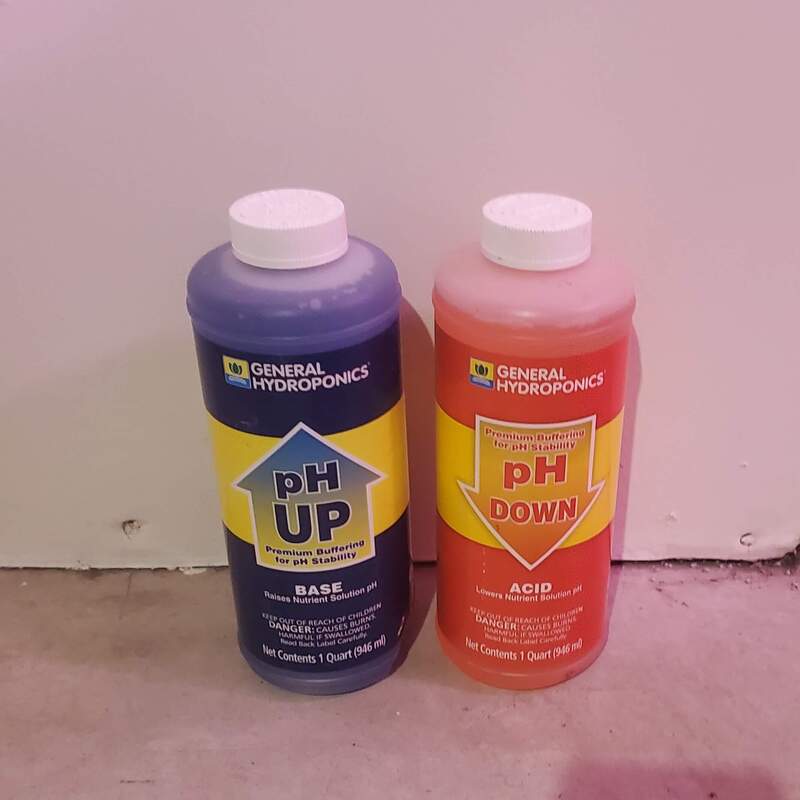
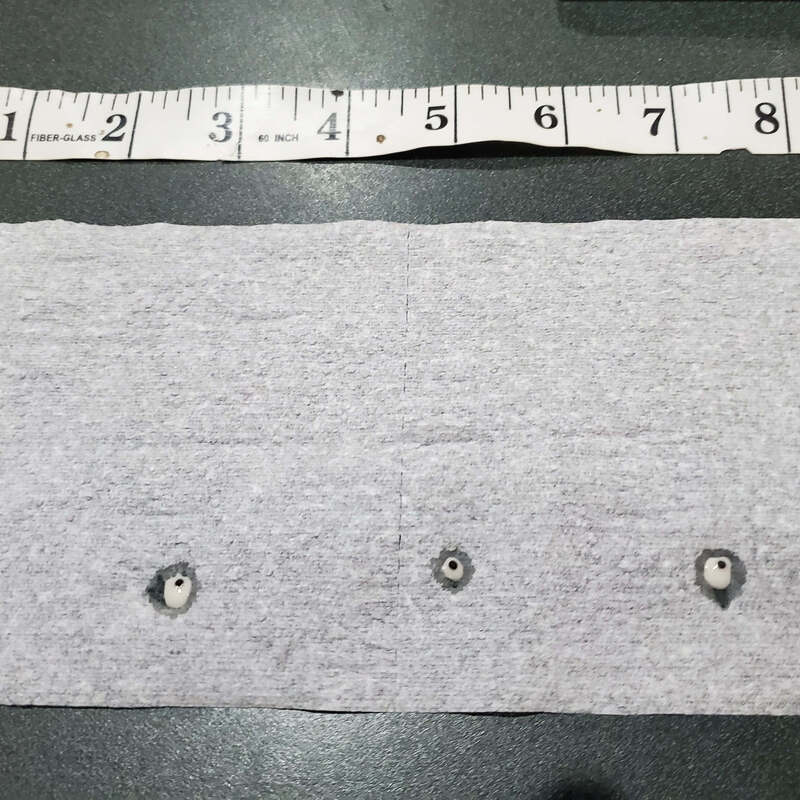
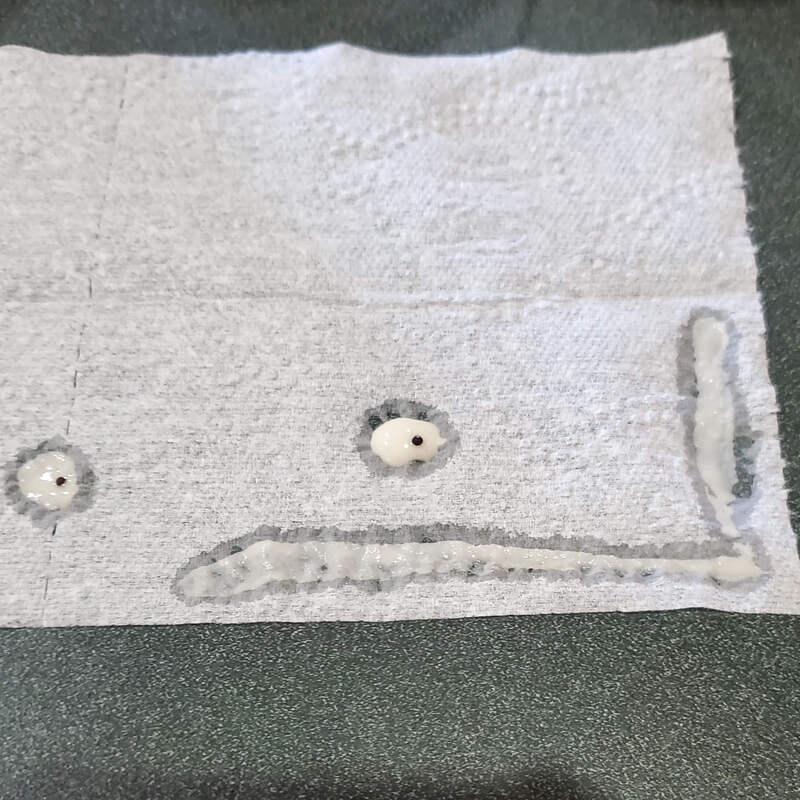
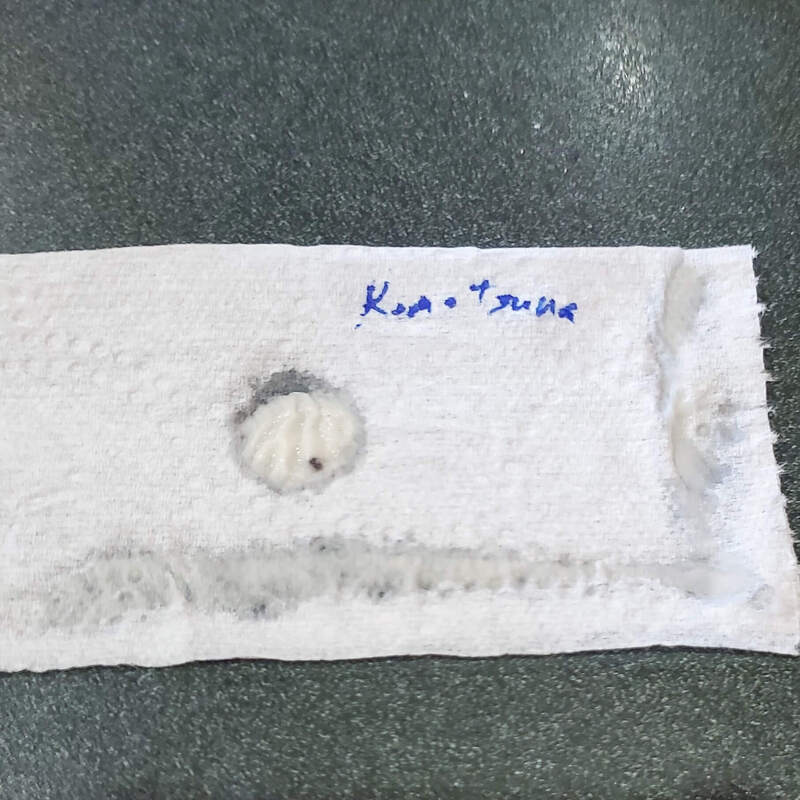
HydroponicsWhy Hydroponics?I have been interested in hydroponics since I was a child. For an elementary school science fair, I compared traditionally grown vegetables (beans and corn) to hydroponically grown ones. Although I did not win, which I am still a little sore about, I did learn the basics of hydroponics. The good news is that 30 years later there are many more options out there for hydroponic gardening. You can purchase a setup, or you can DIY one. You can use your setup indoors, in a greenhouse, or even outside. You can make up a nutrient solution from scratch or you can buy pre-made powder or concentrate and dilute it. You can use media-based hydroponics or no media at all. Or, for an extra challenge, you can venture into aeroponics or aquaponics. Although I like the idea of hydroponics, part of me feels like it is cheating without using soil. I love gardening, mostly because I can spend time outdoors and play in the dirt. Although some types of hydroponics use media, no hydroponics system uses actual soil. However, the big plus for me that outweighs all others is that hydroponics is a way to extend the season and harvest vegetables in the middle of winter. For this article, I will focus on an indoor system that uses supplemental lighting. I live in central Wisconsin in USDA agricultural zone 4b which means I can work in my garden from roughly April to November. We often still get snow in April, so it is not unusual for my cold crop seeds to get several inches or more of snow on them (they still sprout just fine though). We can also have a hard frost by mid-September although most years it is in October, but it has also been as late as November. I extend the season the best I can with frost covers but unless I buy a heated greenhouse there is not enough heat in a Wisconsin winter, or even enough light in a day to grow crops. Most plants do not grow much when days get shorter than 10 hours of light. When daylight falls below 10 hours per day, this is called the Persephone period, named after the Greek goddess of the harvest. For my area, that means that without supplemental light I cannot grow anything outdoors from November 5th to February 4th. You can however overwinter cold-hardy crops like spinach, kale, parsnips, and carrots. These crops will survive, but not actually grow until the daylight hours get longer, and the temperatures are above freezing again in the spring. 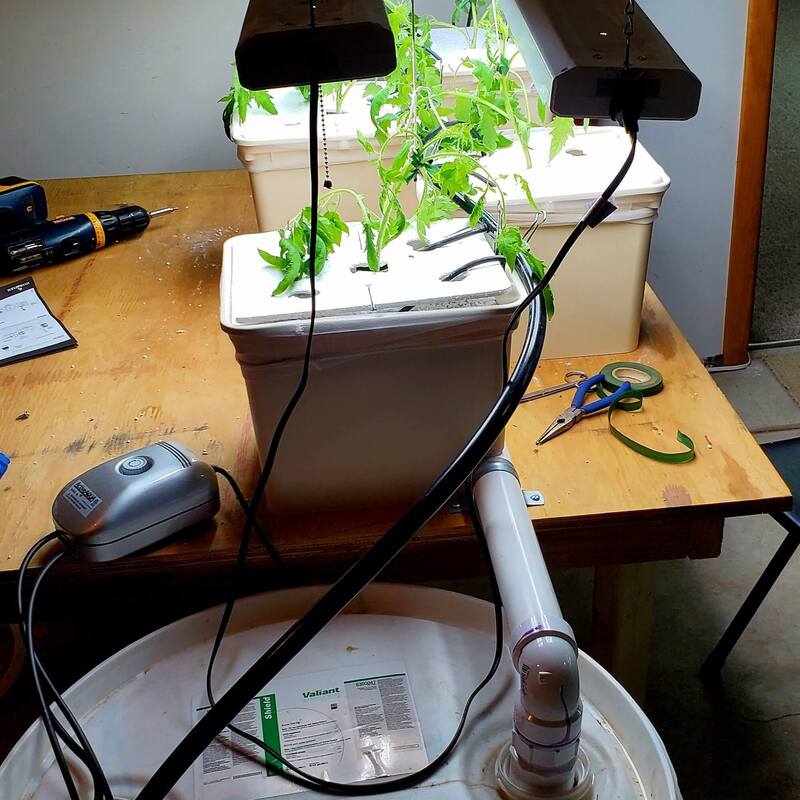 Dutch bucket hydroponic system with air pump connected to air stones in the reservoir, a submersible pump to pump nutrient solution to the buckets, and a PVC drain pump that drains back in the reservoir to be reused. What Type of Hydroponic System?Lately, Aerogarden and similar systems have become very popular. They are also very expensive. I did finally break down and buy a small Aerogarden on sale last year and I must admit it is great for crops like salad greens and herbs. I first tried tennis ball lettuce using one of the grow-your-own kits and it grew fantastically. You do not get much product, however, but it was enough for a couple of small salads or lettuce for sandwiches over the course of several weeks. However, what I am most interested in growing during a Wisconsin winter are tomatoes and peppers. I am obsessed with growing tomatoes and peppers because I love to try all the different varieties, and there are thousands of them out there. You can also easily save your own seed which means you do not need to keep buying fresh seed every few years. I discovered, however, that to grow larger crops with a purchased system is at least $800 or more. So, I decided (with the help of my husband) to build my own hydroponic system that can accommodate larger, flowering crops. Please note there are many, many different types of DIY hydroponic systems, I am only going to cover one as it is the only type I have experience with thus far. After extensive research, I realized the hydroponic system that is used most often for larger flowering crops is the Bato bucket or Dutch bucket system. Bato buckets are a type of ebb and flow (or flood and drain) system of hydroponics. These are not the easiest hydroponic systems to set up, but they are also not so complex that a reasonably handy person with a few common tools cannot do it either. There are two steps to the ebb and flow system, the flooding step where the nutrient solution floods over the roots, and then the drain step where the nutrient solution flows back to a reservoir. You can keep the Bato buckets (pots) separate or link them up in sequence to an irrigation system with a pump and drainage tube which allows them all to be fertilized at the same time and then have the nutrient solution drain back into a reservoir to be re-used during the next flood cycle. Another huge advantage to this system is that you can use timers to have not only the lights turn on and off but also turn on the pump which irrigates your buckets, without any labor on your part, once the system is set up. I have my system set to pump nutrient solution just three times per day (8 am, 2 pm, and 8 pm) for 30 minutes each. Because this type of system does not have nutrient solution flowing over your plant roots all the time, you need to use some type of media that holds moisture so the roots do not dry out in between irrigation times. The most common types of media used in hydroponics are perlite and expanded clay pebbles also known as LECA (light expanded clay aggregate, one common brand name is Hydroton). I have tried both and thus far prefer the expanded clay pebbles, but both have worked well for me. Perlite is made of volcanic rock and is cheaper than clay, but it can only be used 1-2 times before fresh is needed. I plan to add my used perlite to my raised beds outside to increase drainage, so I will not need to throw it out after it is used. Perlite is good because it is lightweight and retains water well, but I found it difficult to clean to reuse it. Additionally, because the pieces are small you need to use a mesh strainer bag in your buckets to keep the perlite from washing into the drainage system and clogging your pump. I used paint strainer bags, but I am uncertain if the plastic used in them is food-safe (if anyone knows send me a message!). Therefore, my preference is to use the expanded clay pebbles. Because the clay pebbles are bigger and will not clog the drainage system there is no need for the paint strainer bags, and in my opinion, less plastic is always good. Both the clay pebbles and perlite are dusty so be sure to wear a mask when using them until the substrate is wetted thoroughly. The clay pebbles are especially dusty so they need to be rinsed extensively before use. Two disadvantages of the clay pebbles are that they are heavier and do not hold water as well as the perlite. They seem to hold sufficient water for my plants to be fine overnight when I do not run the irrigation system, however, in the event of a power outage I think I would have to manually water the clay pebble pots more frequently than the perlite to keep them moist. Before I bought all my supplies and started setting up my system I watched some YouTube videos, one of the most helpful was “How to Build a Bato Bucket System” by ZipGrow. Their system was designed for 8 buckets, but I started with only 4 to make sure it worked before I invested more money into a larger system. I did make a table big enough to expand to 8 if I wanted to and I have since expanded my system. I also looked at some commercial systems that are available to purchase to see what supplies they came with to figure out what size water and air pumps, tubing, air stones, etc. I should purchase. Setting Up Your Hydroponic SystemI ended up setting up my Bato bucket system very similarly to the YouTube video but instead of one long system, made it to fit on a 4x4 foot table instead of a long 2x10 foot table. I also used drip stakes, instead of drip emitters because I like to push the stakes into the media to help hold them in place. For a Bato bucket system, you will need a nutrient reservoir unless you wish to manually water and drain the nutrient solution yourself. You can purchase reservoirs that are made specifically for hydroponics, but they are very expensive, which is why we cut a 55-gallon drum in half to use as our reservoir. Whatever you choose, make sure it is made of food-grade plastic and is opaque, or paint the outside to block light. Everything in hydroponics should be opaque to limit the growth of algae. You will also need the Bato buckets with elbows for drainage. I purchased these but many people have turned 5-gallon buckets into Bato buckets. PVC pipe that is 1.5” in diameter is needed for the drainage system (you need 10 feet if you want to have 8 buckets) plus an end cap for one end and an elbow for the drainage end. We ended up needing 2 end caps and 2 elbows once we expanded our system to two four-foot-long drainage tubes instead of one long one. One-half-inch tubing is used for the irrigation lines, plus a drain/stop valve for the end of the irrigation line if you want to be able to flush it. One-quarter inch tubing is used to run drip emitter stakes from the ½” irrigation tubing to the buckets, ½” clamps are used to clamp the irrigation tubing to the submersible pump and to clamp the drain/stop valve to the other end of the irrigation tubing. You also need a submersible pump to pump the nutrient solution to the plants as well as an air pump with air stones to keep the nutrient solution aerated. You can buy air pumps, air stones, and submersible pumps that are made specifically for hydroponics, or you can use ones that are designed for aquariums and ponds (just make sure they are food-safe). Zip ties are helpful to keep the air pump in place and we also used them to hold our irrigation tubing along a wooden rail in the middle of our two PVC drainage pipes. If you do one long pipe you can use 2-inch binder clips to hold the irrigation pipe along the backs of the Bato buckets, like in the YouTube video. I did not like this method because the irrigation tubing was so stiff it pulled the Bato buckets off the PVC drainage pipe and I ended up needing to put a large rock in the bottom of each bucket to hold them in place. In addition, a low table or bench is nice, so you don’t have to bend over so much as well as sufficient electrical outlets, a fan for air circulation, and a decent grow light. I used both 4-foot fluorescent fixtures with grow bulbs as well as a newer LED fixture. The LED light which was designed for hydroponics is much more powerful than the 4-foot fluorescent grow light, so it does not need to be as close to the plants and the plants grew much better on this half of my setup. I have since purchased a second LED grow light so I can have complete coverage of my 4’x4’ table. I use a 55-gallon drum cut in half as my nutrient reservoir. These are widely available in my area for free or cheap as most dairy farms buy solutions in them. We also cut the top off to use as a lid to help keep light out and help prevent evaporation. My reservoir holds up to about 30 gallons, but I usually have only 10 gallons of nutrient solution in it. When it drops by a gallon or two, I top it off until it is time to completely replace it. A rough rule of thumb is when you’ve had to top off your nutrient solution with the same amount as your total solution (in my case 10 gallons) over a certain period, then it is time to replace the solution. For example, if it takes 3 weeks before you add back a total of 10 gallons of solution, then you should replace the nutrient solution with fresh after 3 weeks. If this happens in one week then you need to replace it sooner, and you probably need a bigger reservoir. For me, I usually replace my nutrient solution with fresh, every 2-4 weeks depending on how many plants I have hooked up to the system and what stage of growth they are in. It is also a good idea to replace your solution regularly because, in addition to the depletion of nutrients, you may also want to tweak the different types of nutrients you use depending on the stage of growth. For example, you want to use a more dilute solution targeted toward vegetative growth when you first transplant your seedlings into your buckets. But later, when they start flowering you likely want to increase the nutrients and add more phosphorus-containing solution to increase flowering. In addition to the reservoir, we also made our lids for the Bato buckets as the ones I found online were flimsy. To make lids for our buckets we bought a 24”x36” sheet of HDPE food-safe black plastic and cut out lids to fit using tin snips. We cut them in half to make them easier to place around the plant and cut out holes with our drill press and Forstner bits for the plant stem plus the tubing for the drip stakes to fit through to deliver the nutrient solution. To set up the entire system, first, you need to set up your PVC drainage tubing along your table and drill holes into the top about every 1 foot for the drainage tube from the Bato bucket to fit into. We used 1.5” pipe clamps to hold the PVC pipe in place on the table. You need to cap the PVC on one end using PVC cement and place shims to lift one end of your table slightly or cut the legs on the drainage side of your table slightly shorter, so the nutrient solution drains out, instead of being stuck inside the PVC and potentially getting stagnant. You may need to get creative to make the drainage end of the PVC drain into your reservoir depending on what you are using. Since we set up a second drainage system attached to a single reservoir, we needed the 2 PVC drainage pipes to come together to drain back into the reservoir. If you have the space, it is easier to just make 1 longer PVC drainage pipe. Next, attach your larger irrigation tubing to your submersible pump and then run the tubing along the edge of your buckets. You need to either cap the end of the tubing or attach a shut-off valve so you can flush the tubing more easily. Then drill using 1/8” drill bits into the irrigation tube, preferably off to the side, and connect a small piece of ¼” tubing with a dripper stake at one end long enough to reach the center of the Bato bucket. The dripper stakes (I get mine from Drip Depot) come with adaptors to connect the ¼ tubing to your larger irrigation tubing, however, it is not unusual for these to leak slightly so you need to make sure it drips back into your bucket (this is easy if the tubing is attached to the side of the Bato bucket with 2” binder clips), or set up a system to catch the drips and return them to your bucket or reservoir if the tubing is not close to the buckets. I am currently just using aluminum foil to catch the drips but have recently purchased a food-grade glue to hopefully stop the leaking. I found the tubing to be very stiff so connecting it to the buckets was difficult and the binder clips were not always sufficient to keep it attached, plus if the buckets were light (only contained perlite) they sometimes moved due to the force of the tubing. Therefore, we switched to running the irrigation line down the center of the table and having the more flexible ¼” tubing running to each bucket. This way we can have 2 sets of buckets (4 on each side, 8 in total) on each side of the tubing and do not need to worry about trying to bend the ½” tubing to reach each Bato bucket. Last, you need to connect one end of ¼” tubing to your air pump and the other end to your air stones. I keep my nutrient solution aerating 24/7 but the submersible pump is on a timer to only run 3x per day. Remember, if your roots are submerged in water constantly, this will likely lead to root rot as the water will prevent the roots from receiving proper oxygenation. NutrientsOne big final question is what type and how concentrated your nutrient solution should be? I have been using the three General Hydroponics nutrient solutions with their CaliMagic and Floralious added in. I have also heard great things about the Masterblend dry mix which you combine with water. The advantage of General Hydroponics is you do not need to dissolve the nutrients, so it is faster to set up. The disadvantage is that it is more expensive, and I have had mold grow in the concentrated solutions which would not be a problem with long-term storage of dry nutrients. I have since started buying smaller bottles that I can use up more quickly before they get contaminated or expire. General Hydroponics has a great chart on its website for how many milliliters of each concentrated nutrient solution to add for each stage of growth per gallon of water. It also gives the ppm/EC value you should hit if you use those concentrations. Once you mix your solution you should double-check your pH (generally you want between 5.5-6.5 for tomatoes and peppers) and EC or TDS values. EC is electrical conductivity, a measure of any dissolved salts (nutrients) that affect the conductivity of your solution. Basically, the higher the EC, the more nutrients/salts are dissolved in the solution. EC is measured in mS/cm or millisiemens per centimeter. TDS is total dissolved solids and is measured in parts per million (ppm). I have an EC meter so I start off at 0.8-1 for seedlings and go up to 1.6-2.0 for full-size plants. I keep the lights on 18 hours per day when they are still growing but drop them down to 12 hours per day once fruiting begins. As far as what type of water to use, you should ideally have your water tested by a water laboratory to determine if it is good enough to use for hydroponics. I have yet to have mine tested but since I have softened water, I switched from sodium chloride to potassium chloride as a softener which is more expensive but better for plants. If you have water that is unacceptable for hydroponics, you can consider a reverse osmosis system or use distilled water. ConclusionHopefully, this post and the pictures help explain how to set up a Dutch Bucket system. If you have any questions, feel free to comment or send me a message! Make Your Own Seed TapesI love seed tapes for lots of vegetables that are directly sown, but I particularly love them for those that have small seeds, which makes them hard to sow thinly. If I sow the seed too thick, I must then spend hours every summer thinning my plants, or I end up with skinny, stunted plants. My favorite vegetable to use seed tapes for is carrots, as I have difficulty getting these seeds thin enough when sowing. I have even tried mixing the carrot seed with sand and using a shaker to spread the seed more evenly, but I still end up with carrots too close together. The convenience and speed of planting seed tapes are also nice as you can just lay them down and top them with soil (just don’t try it on a windy day). 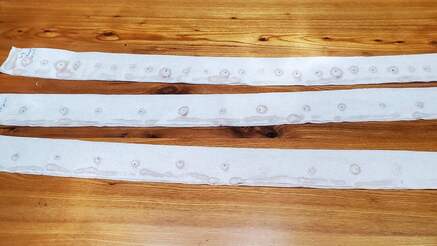 These are completed seed tapes that are laid out flat to dry. The big disadvantage to seed tapes is that they are much more expensive than just buying the seeds alone. Additionally, the varieties you can buy them in are limiting. My favorite part of gardening is trying lots of different varieties, but generally, you can only get very common varieties in tape form. Although making seed tapes is time-consuming, I find that I prefer to spend my time in the late winter making my seed tapes, when I am less busy rather than taking the time to thin plants in the summer, when I am much busier. Plus, most gardeners I know have a hard time thinning as they hate to kill any plant. 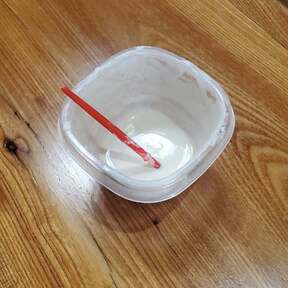 Flour-water mixture with a paintbrush that I use to make the seed tapes. I found two common methods online to DIY seed tapes. One method is to use school glue and the other is to use a flour-water mixture. I tried the flour-water mixture first and it worked so well that I have never bothered to try the glue method. You will need toilet paper (either one-ply or pull the two-ply apart so you use one sheet), toothpicks or a paintbrush, a small container to mix flour and water in until you get a runny paste, and a tape measure. The steps are simple: The flour mixture is dotted out at set intervals and a seed placed in each dot (left). The flour mixture is placed along the entire bottom/side edge of seed tape to seal (center). Seed tape is folded over to seal it and labeled with the variety (right).
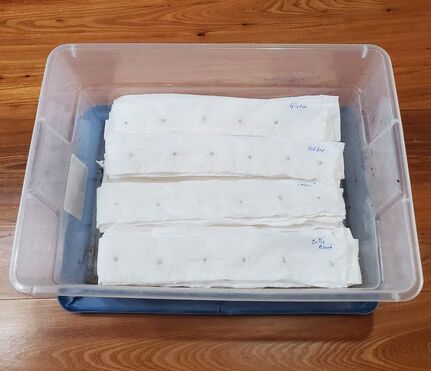 I fold up the seed tapes once they are dry and store them in a plastic tote until it is time to plant. Last, some lessons I learned using seed tapes:
|
AuthorIn 2016, my family and I moved from the New York City area to small town Wisconsin. Our move, this website and blog (and our previous Etsy store) is the result of our desire over the past several years to simplify our lives, increase our quality of life, reconnect with nature, and enjoy a more self-sufficient life. I grew up as a country kid in central Pennsylvania working on my grandfather's fruit farm and as a corn "de-tassler" at a local seed farm. My background is in biology where my love of nature originated. I am a former research scientist and professor and have now transitioned to a part-time stay-at-home mom, self-employed tutor, and small business owner. Thank you for taking the time to check out my site. Archives
May 2024
Categories
All
|


 RSS Feed